AWS Console Deployment (EC2)
Follow these easy steps to install an enforza Gateway instance in AWS using the AWS Console.
This tutorial assumes that you:
- have your VPC, subnets and route-tables in place
- want to deploy an enforza Gateway in your public subnet
- are comfortable with configuring your route-tables in order to forward traffic to the enforza gateway
- know what you are doing
Step 1: Create a New EC2 Instance
-
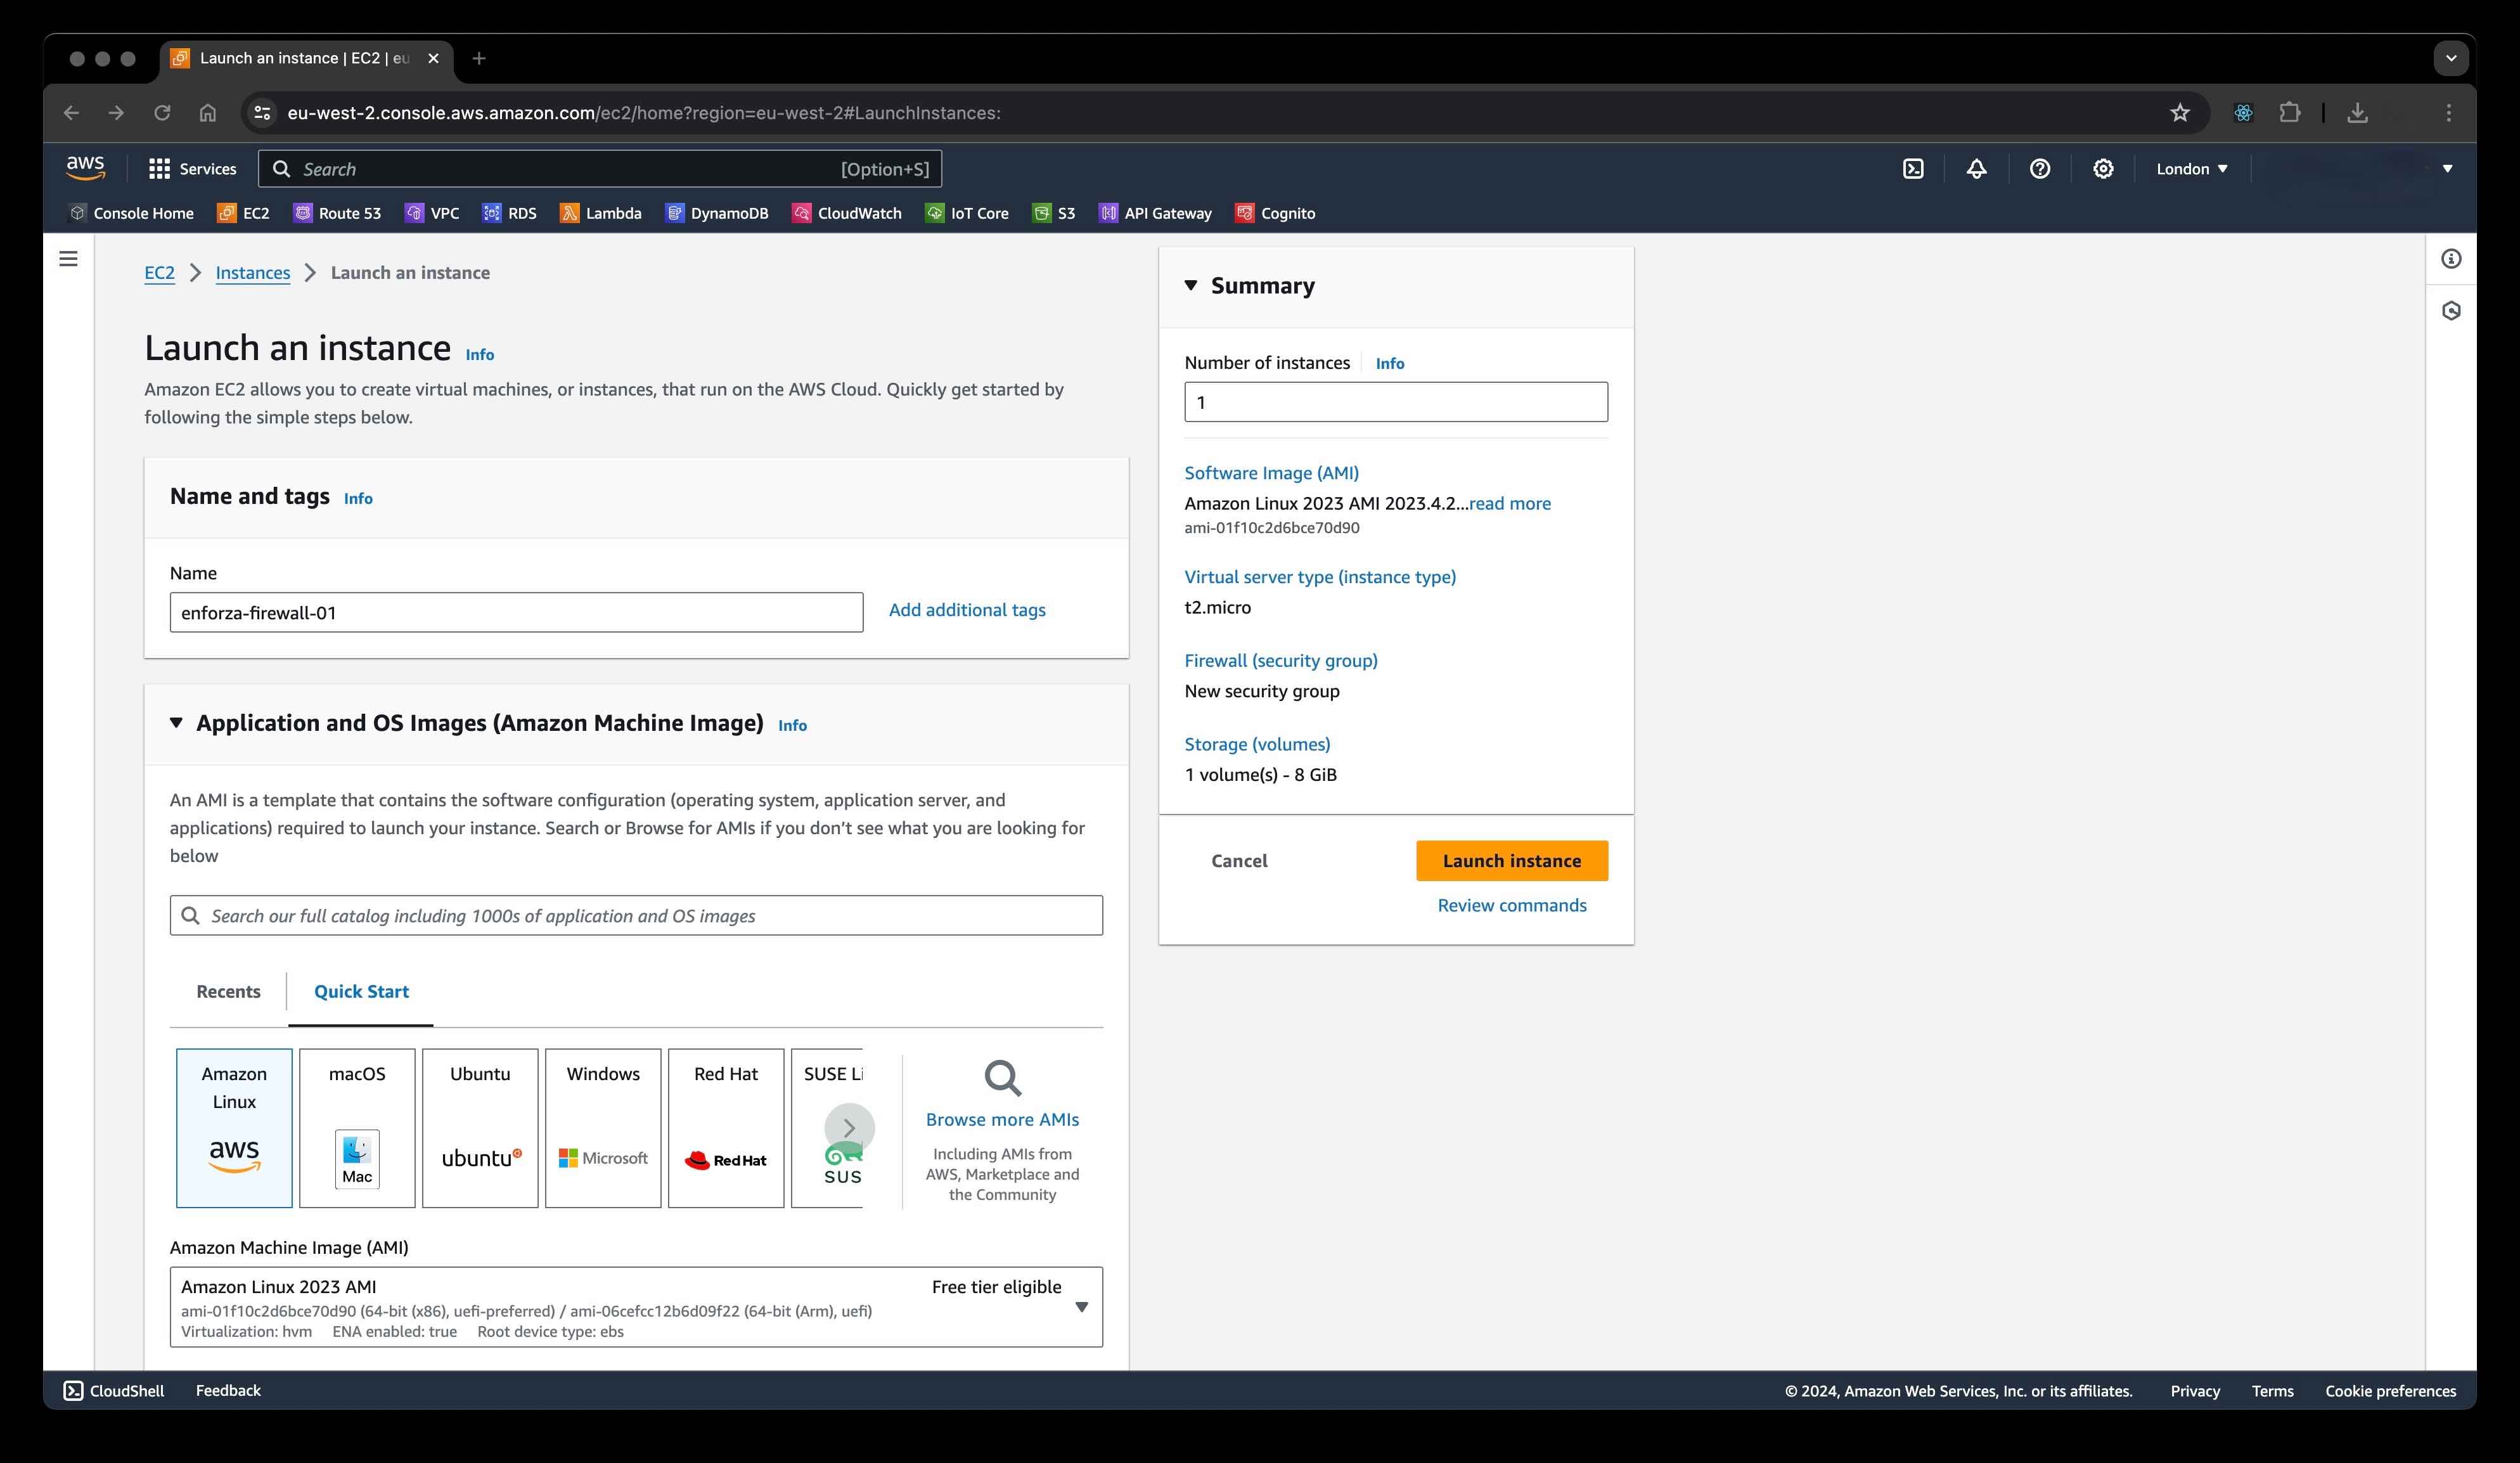
Open your AWS Console and navigate to EC2.
-
Click Launch Instance and select an Ubuntu or Debian image for your new instance.
Step 2: Add the enforza Installation Script
-
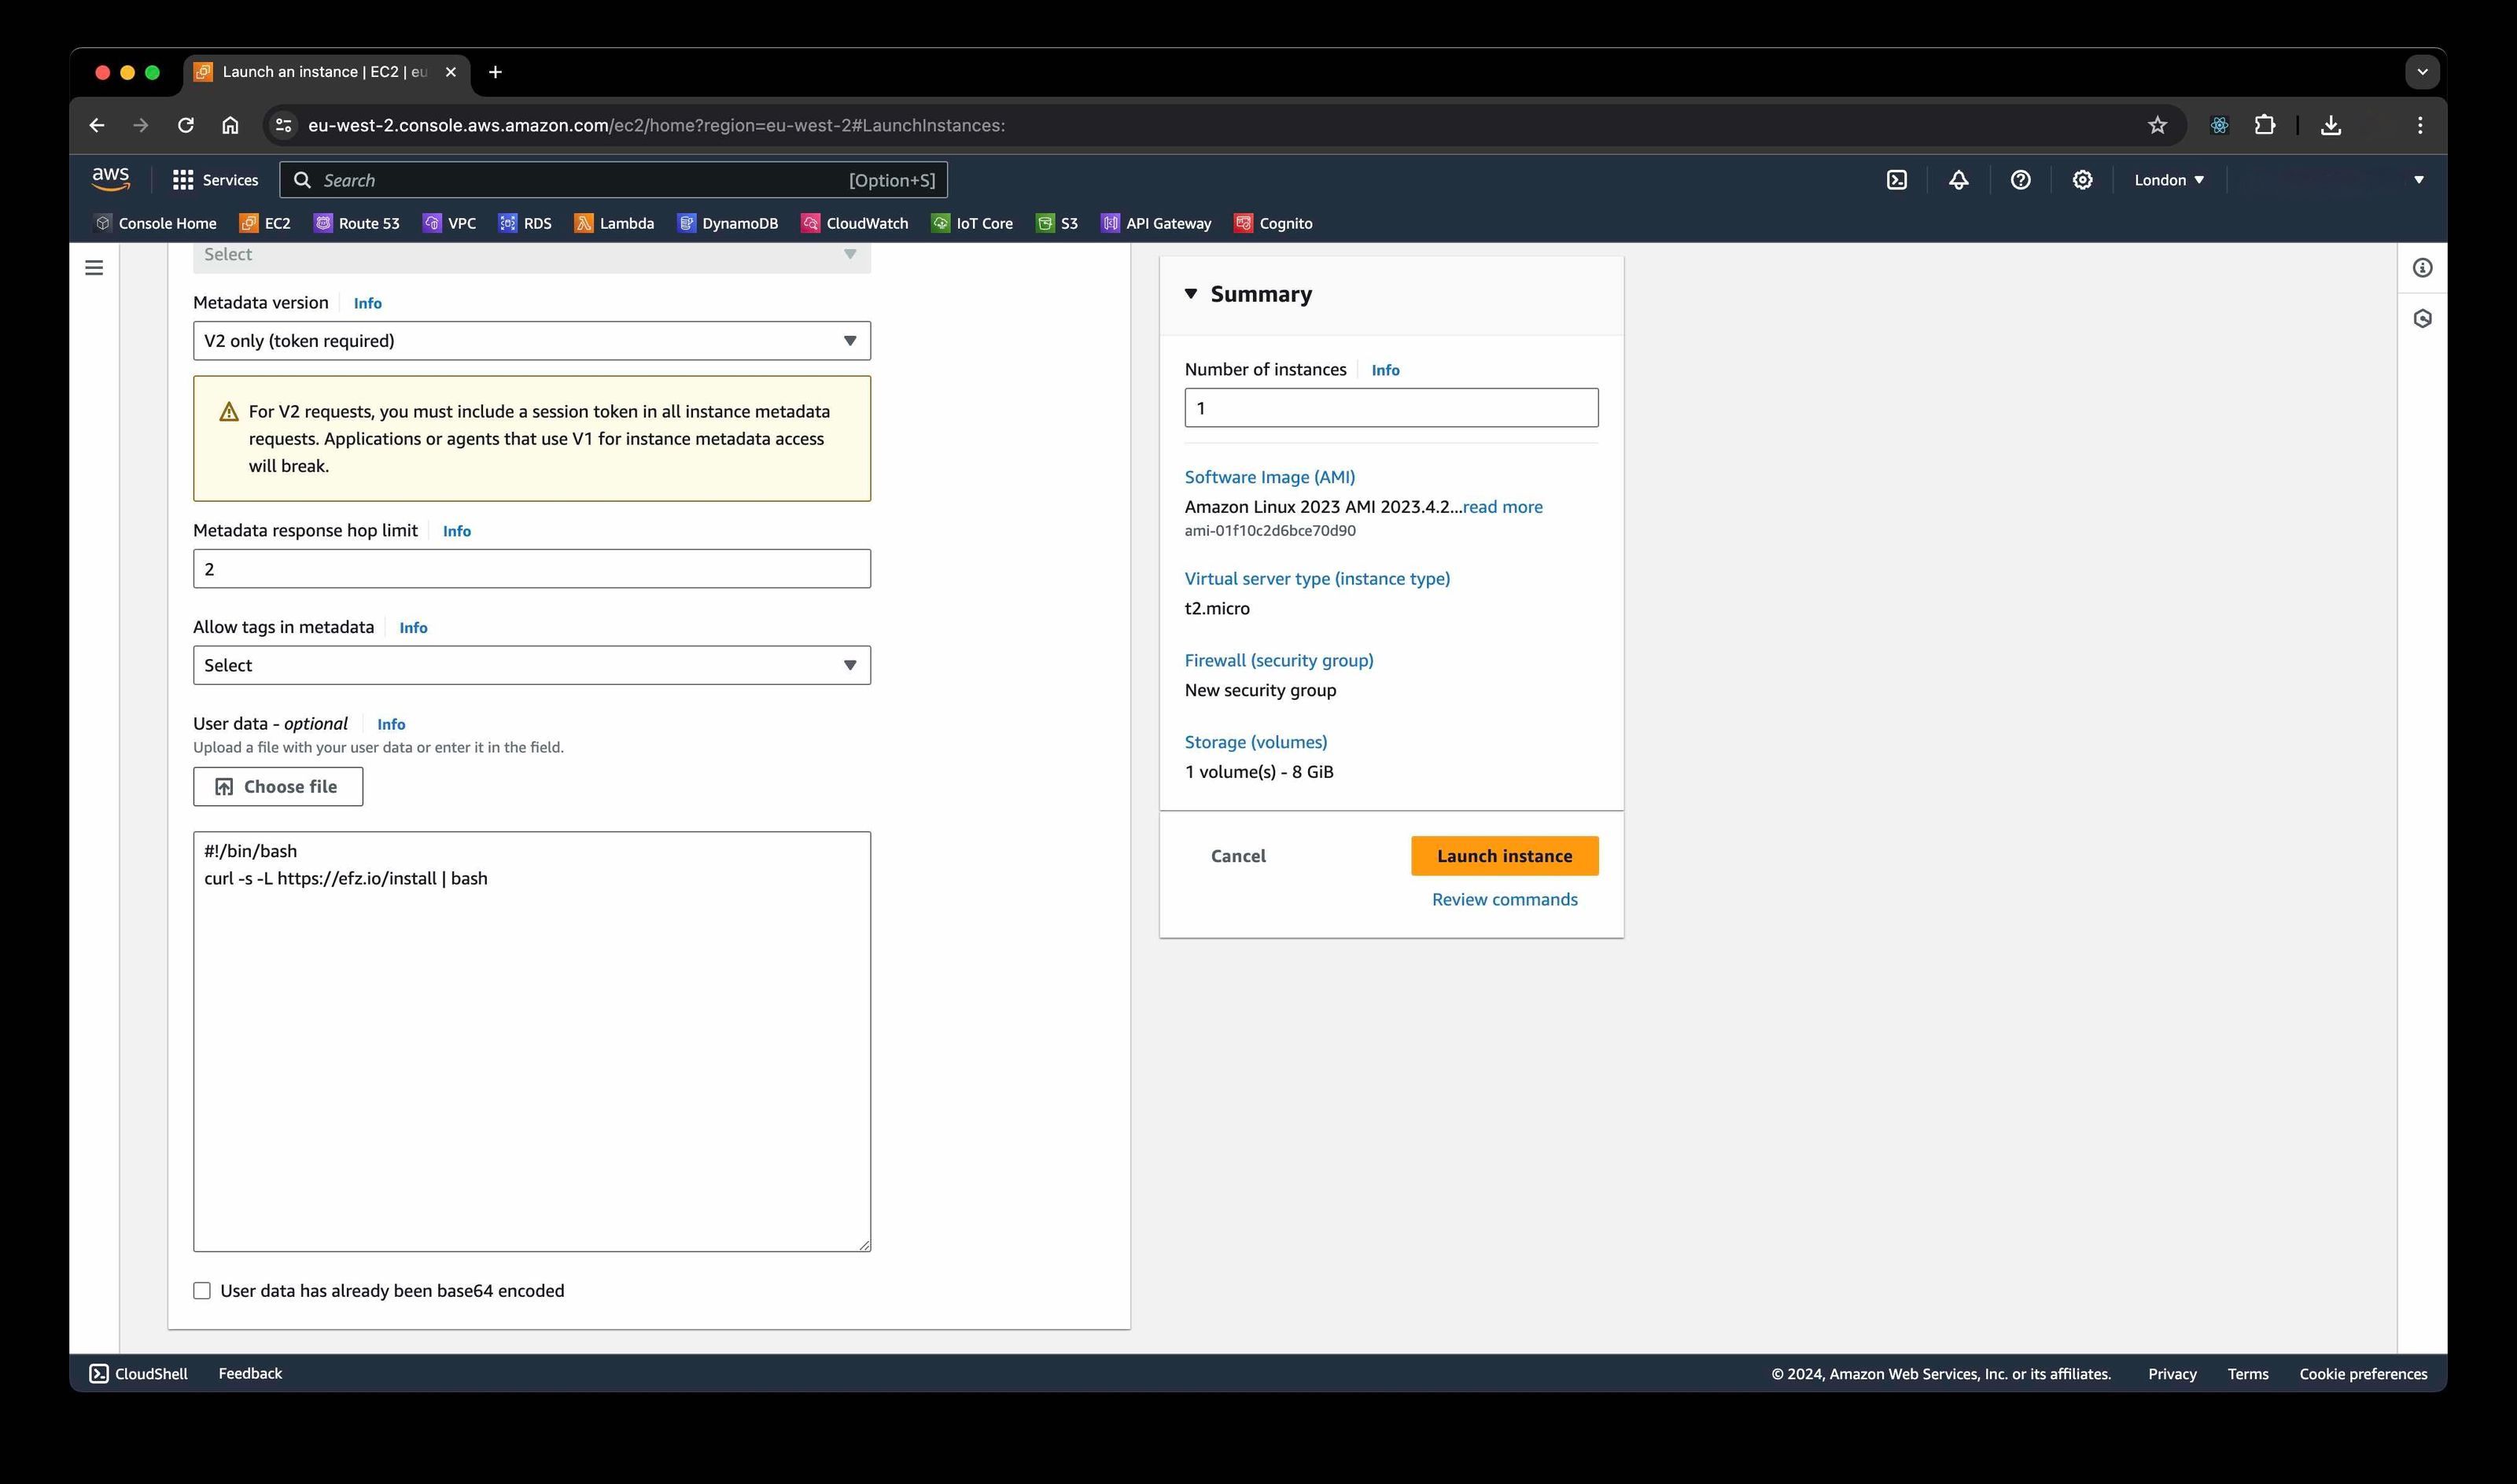
Scroll down to the User data section.
-
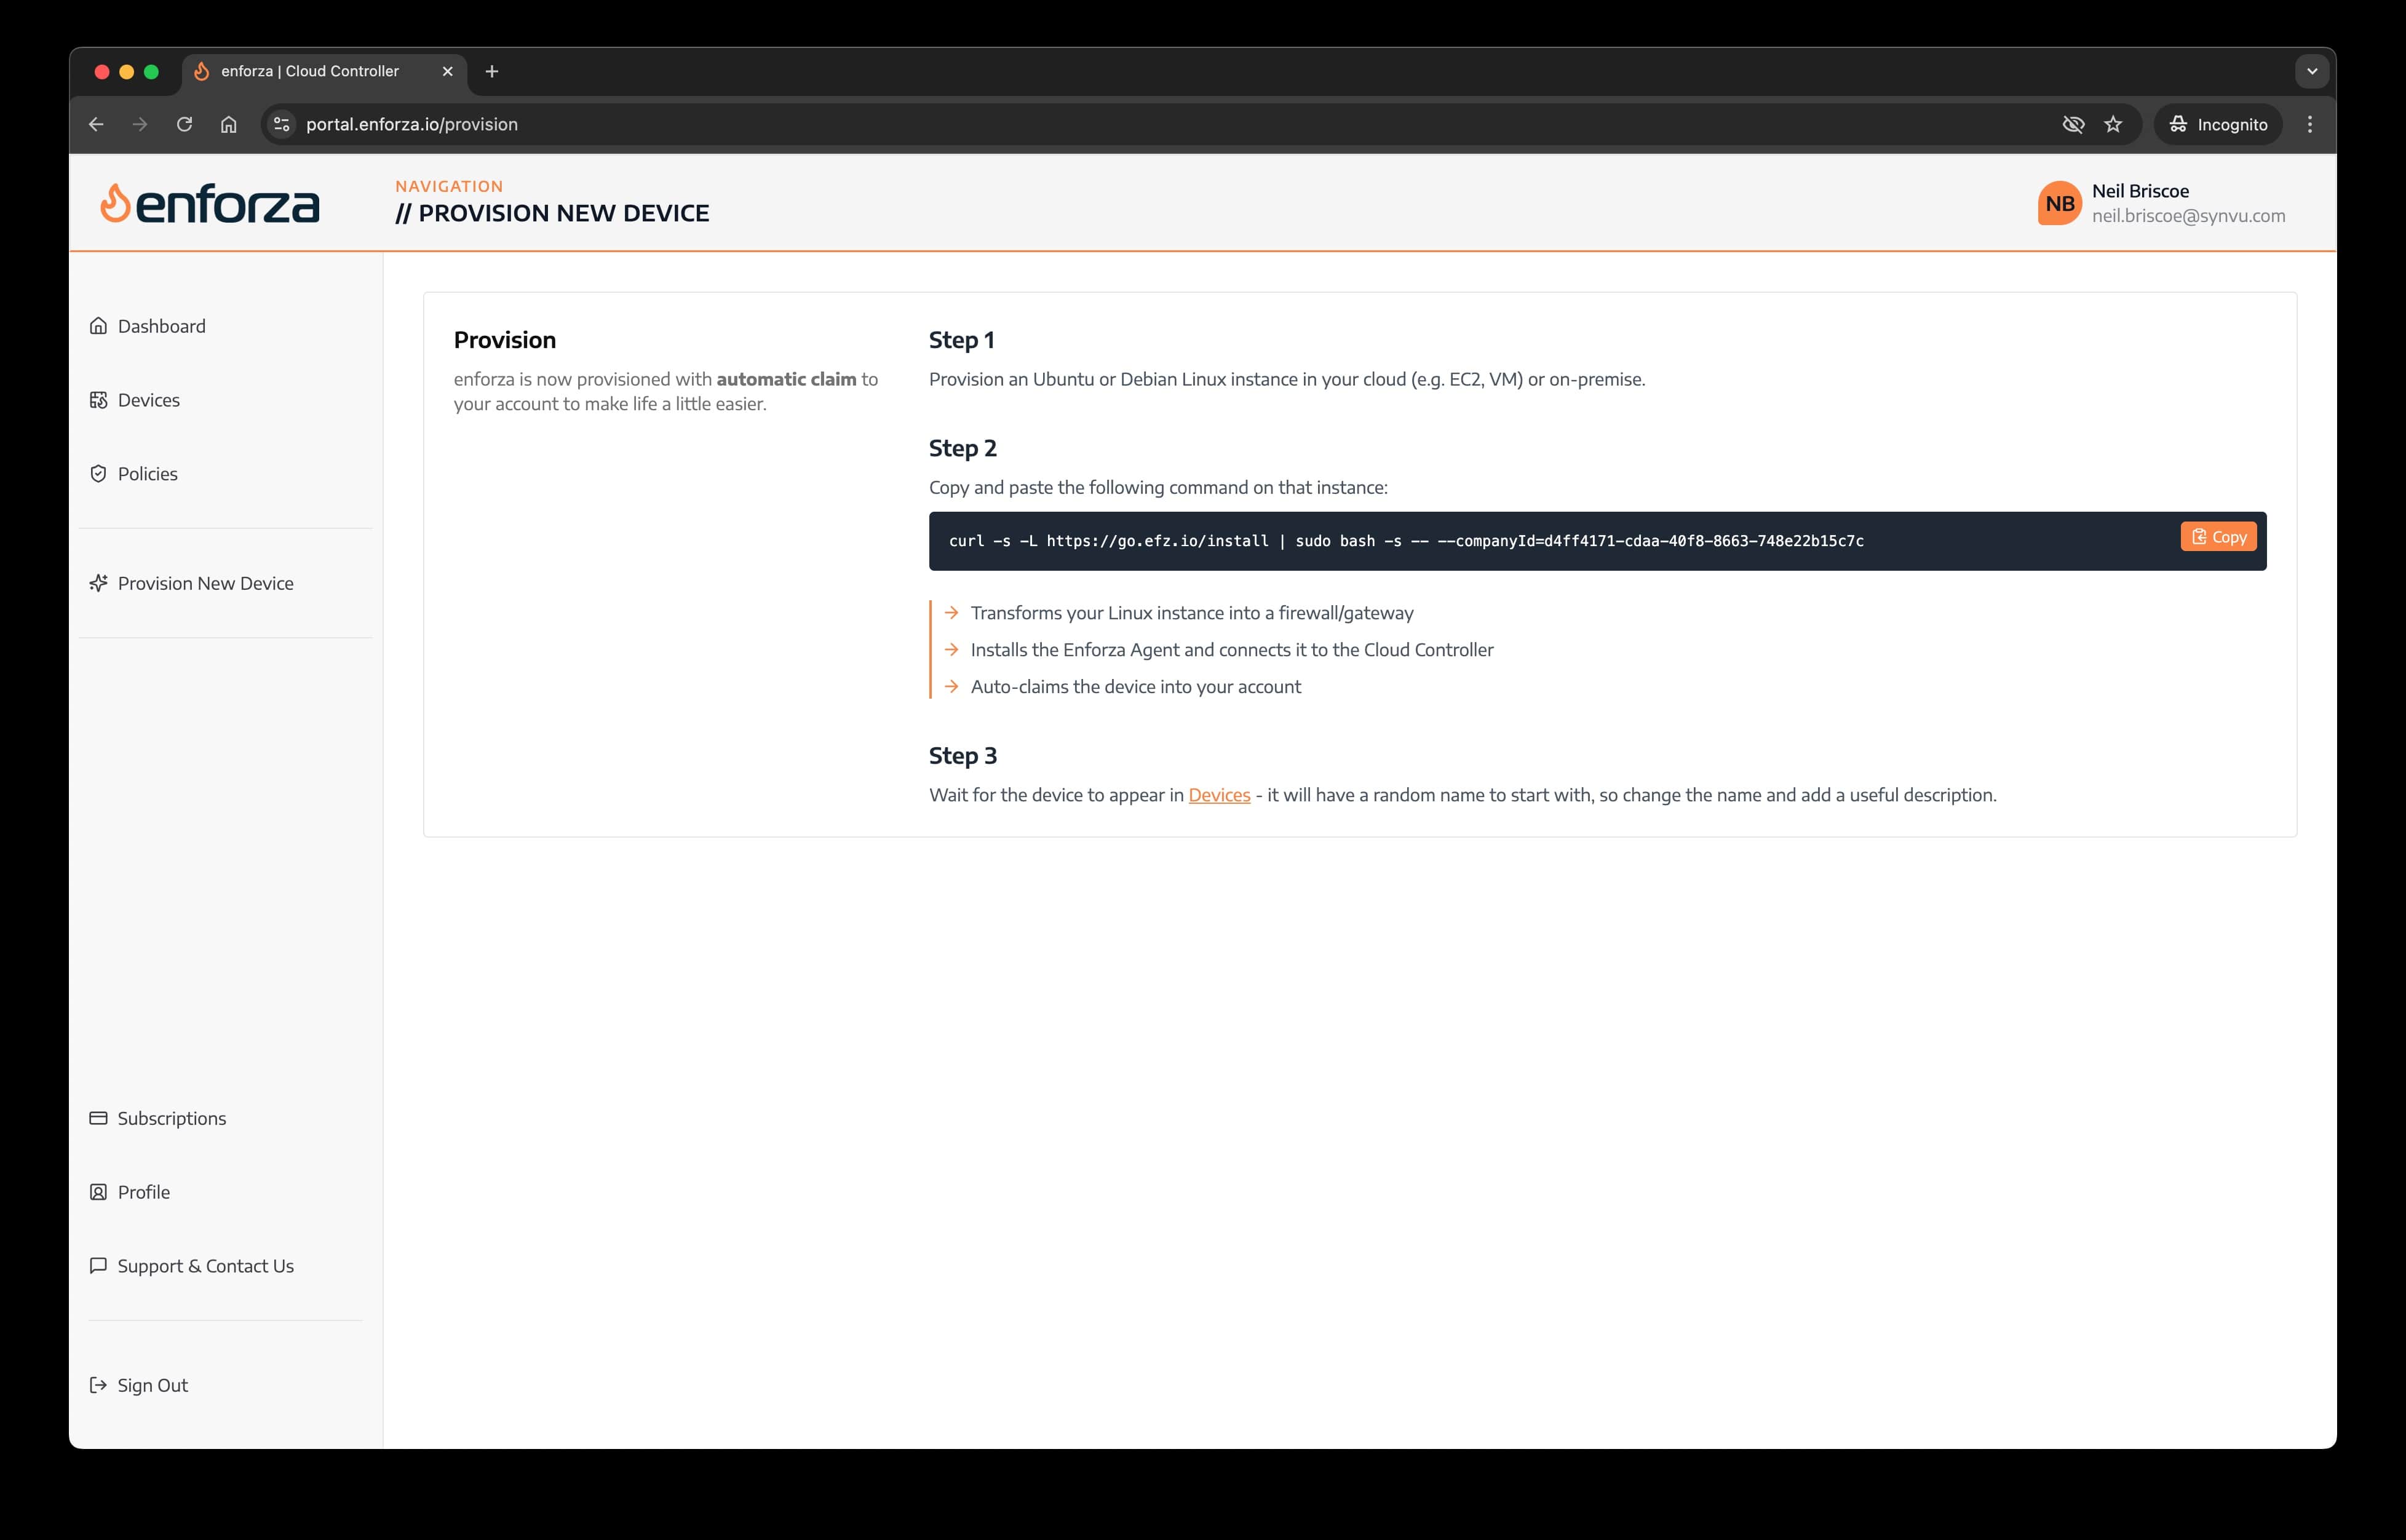
Paste the following code into the User data input box:
Refer to "Provision New Device" for your unique install command
Step 3: Set Up SSH Access (Optional)
-
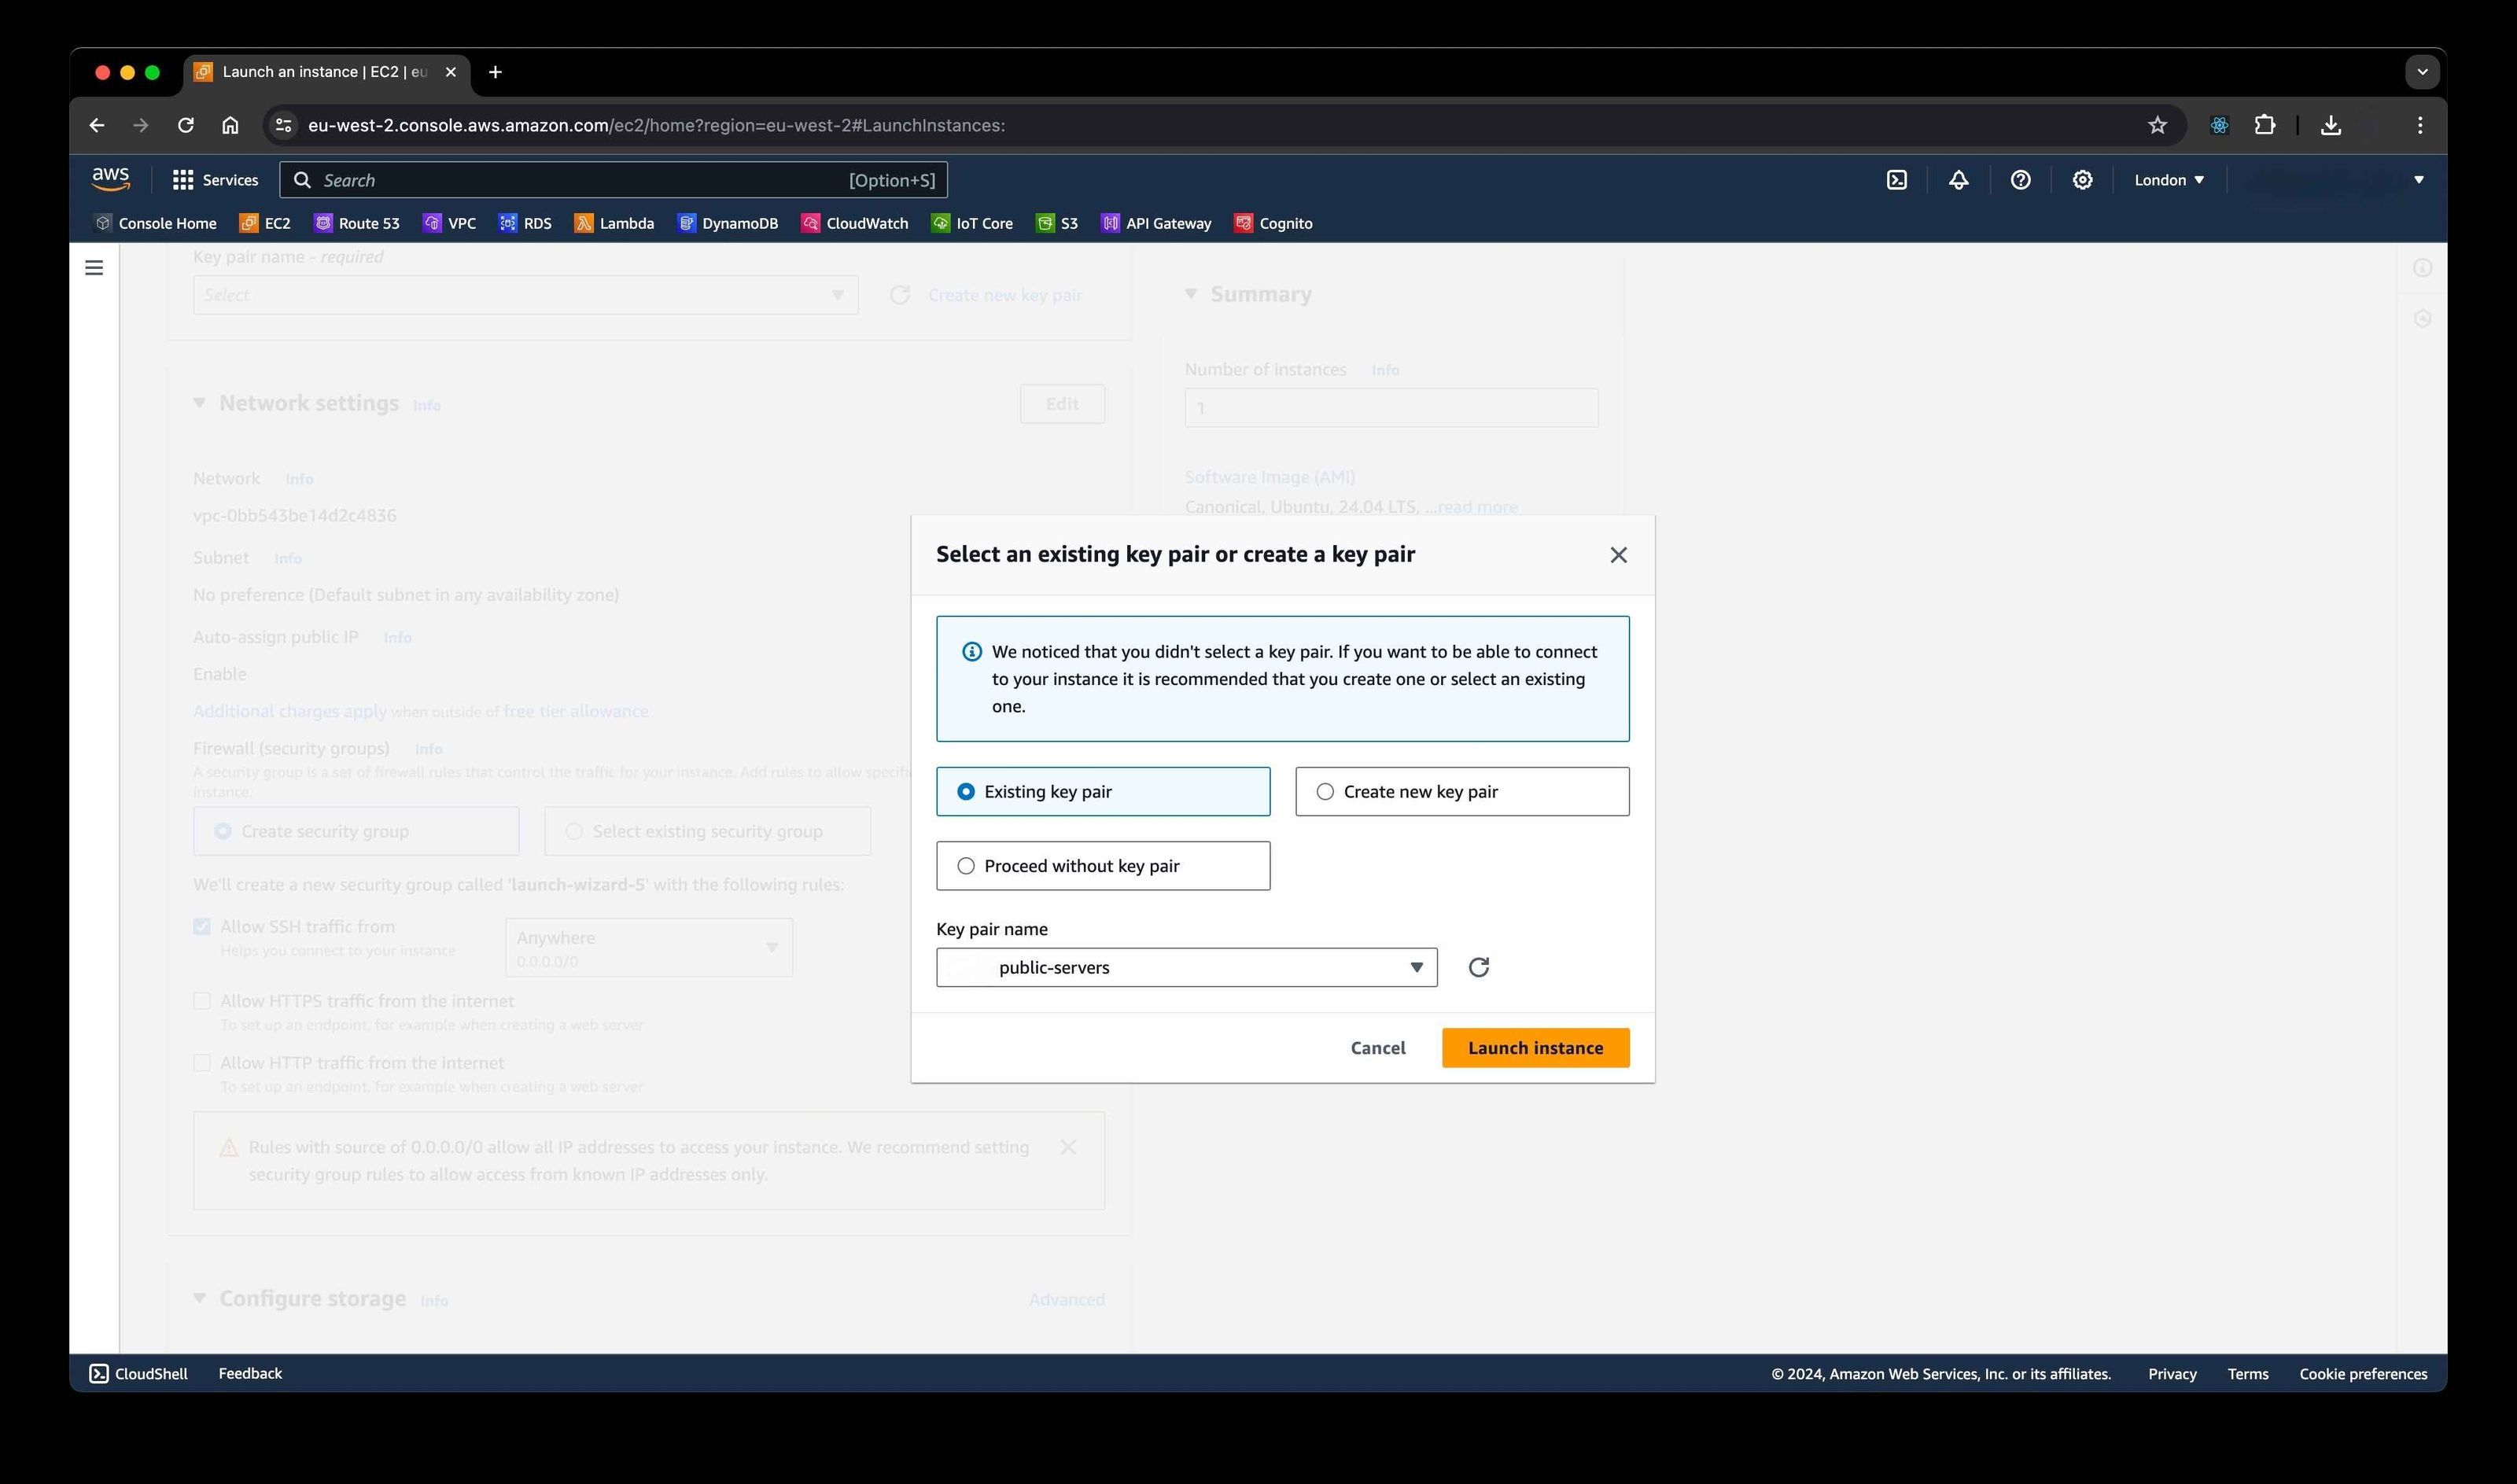
If you want to log into your server via SSH, either select an existing SSH key pair or create a new one.
-
Keep this key safe—you’ll need it for SSH access.
Step 4: Watch the Server Build
-
Once you launch the instance, AWS will start provisioning your new Linux server.
-
You can track the progress by clicking on the Instance ID (something like
i-xxxxxxx).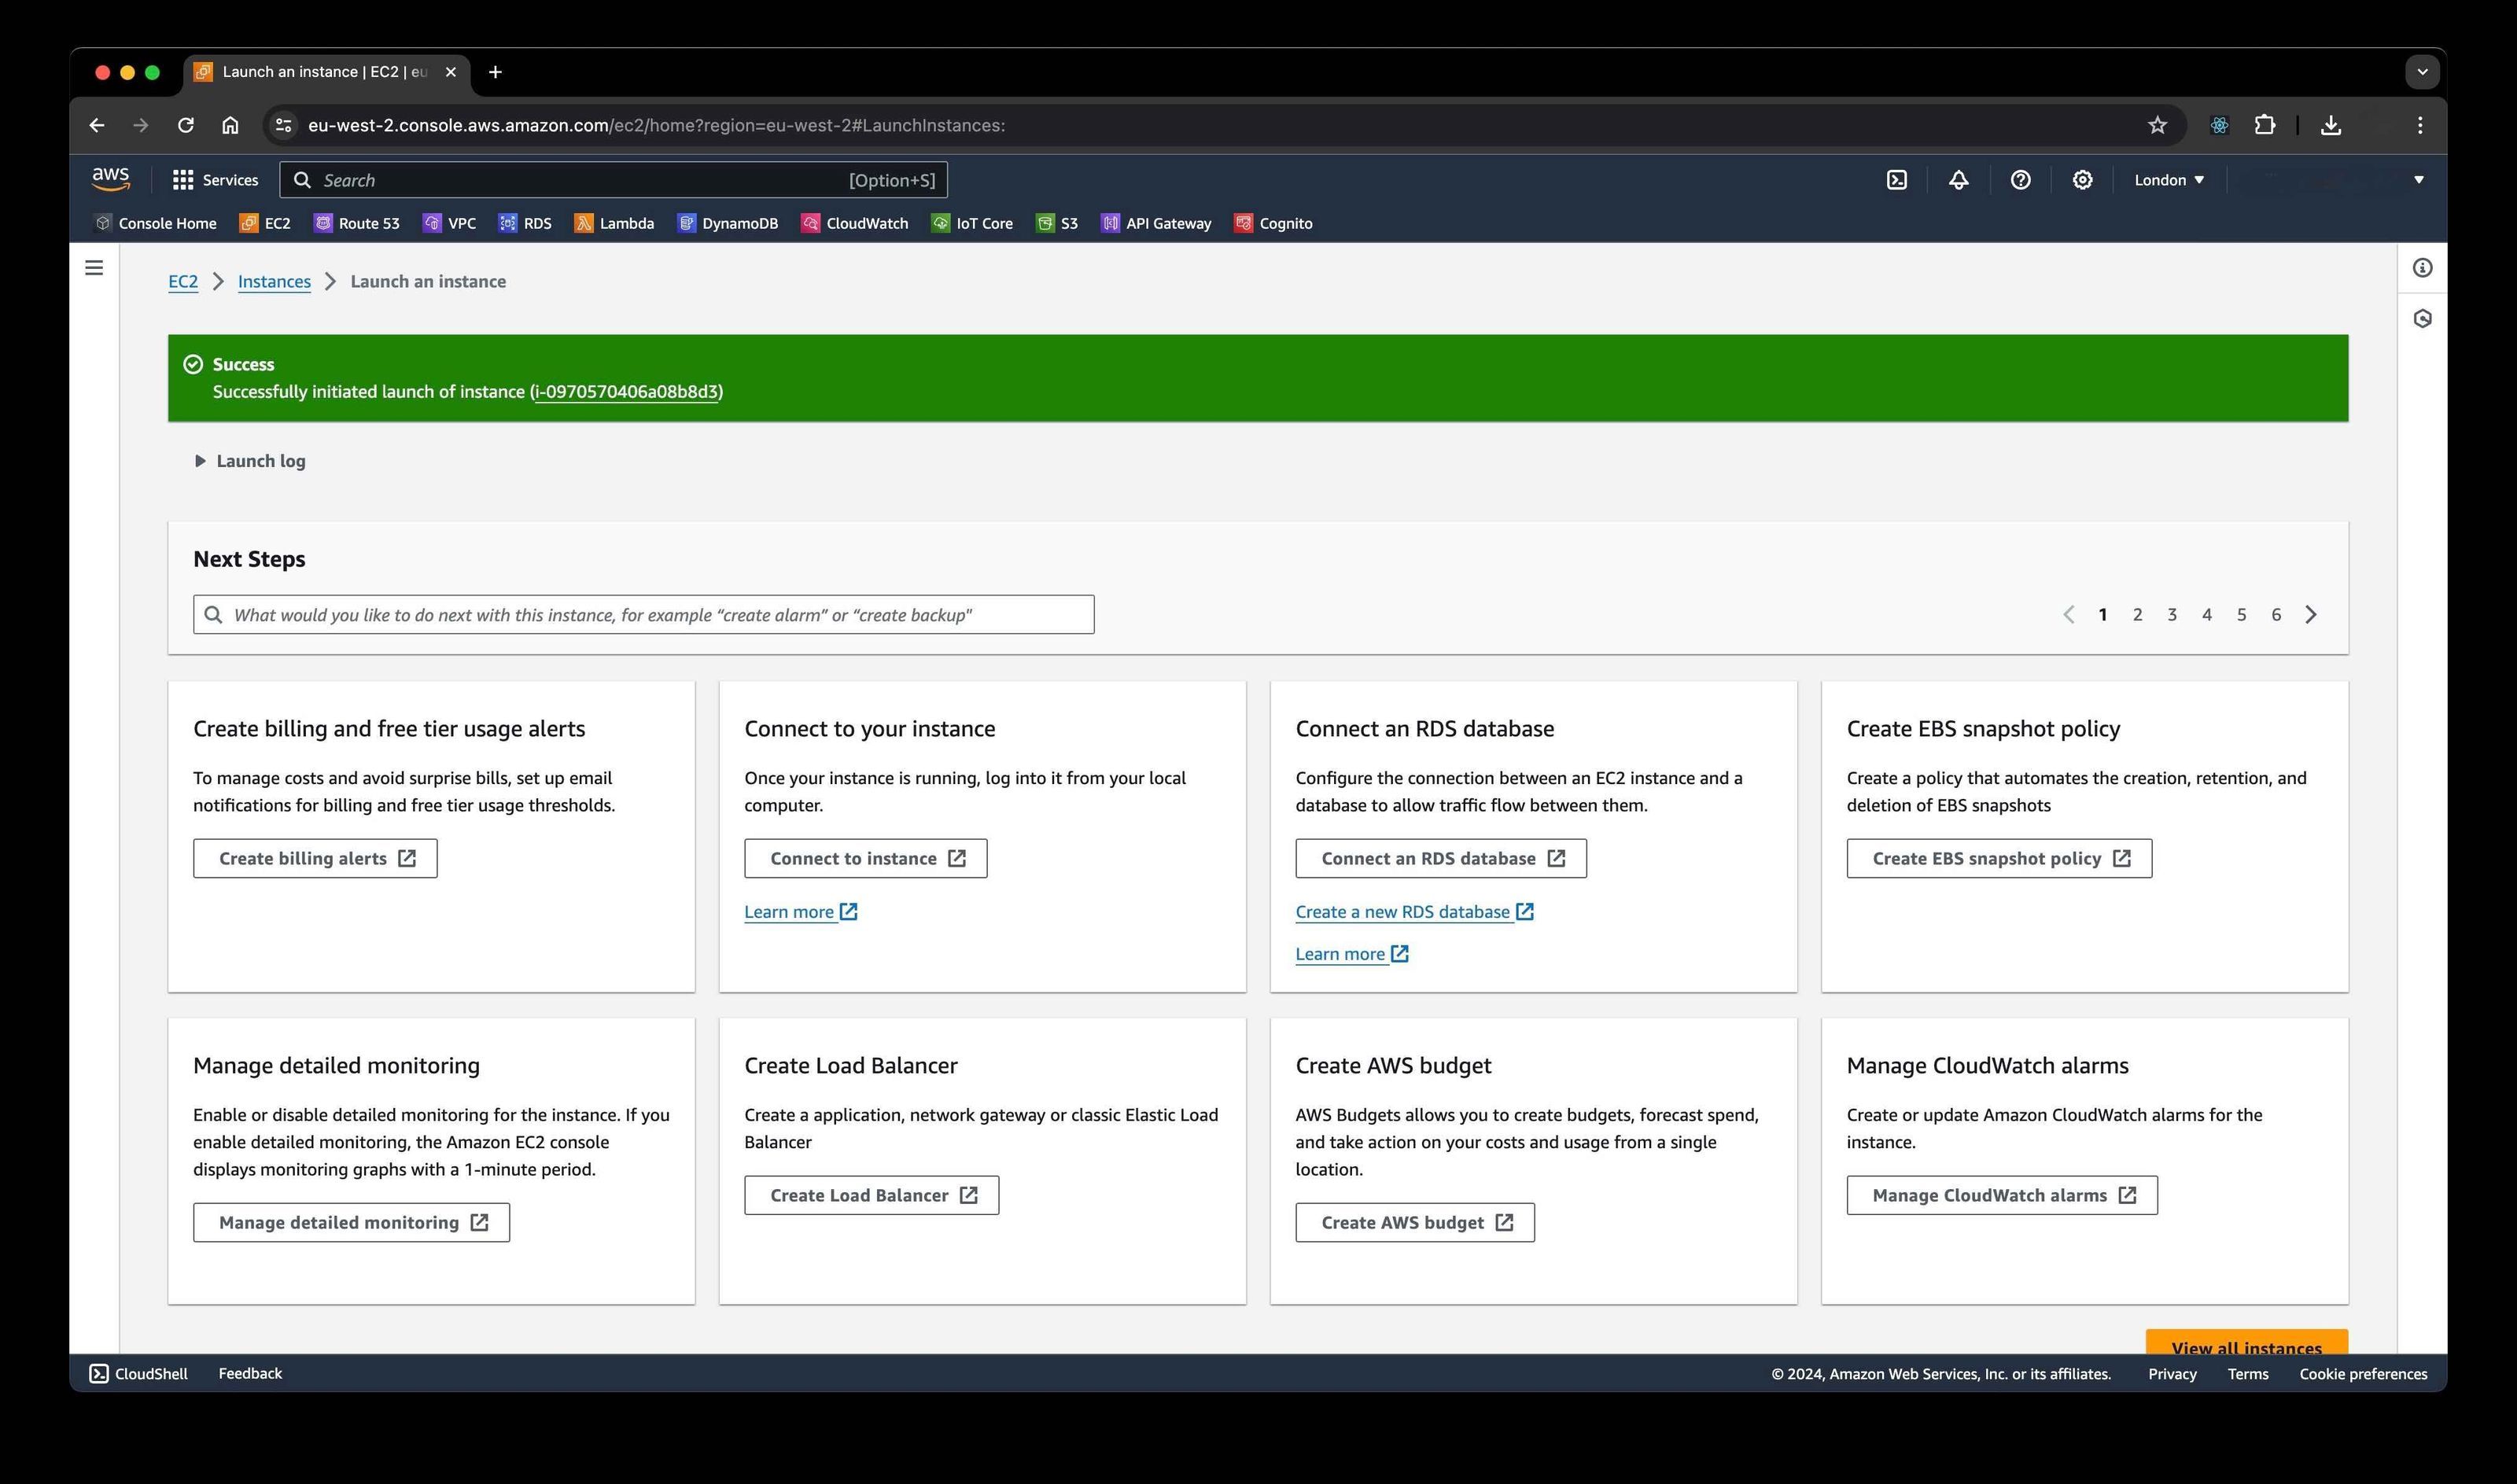
Step 5: Wait for the Server to be Ready
-
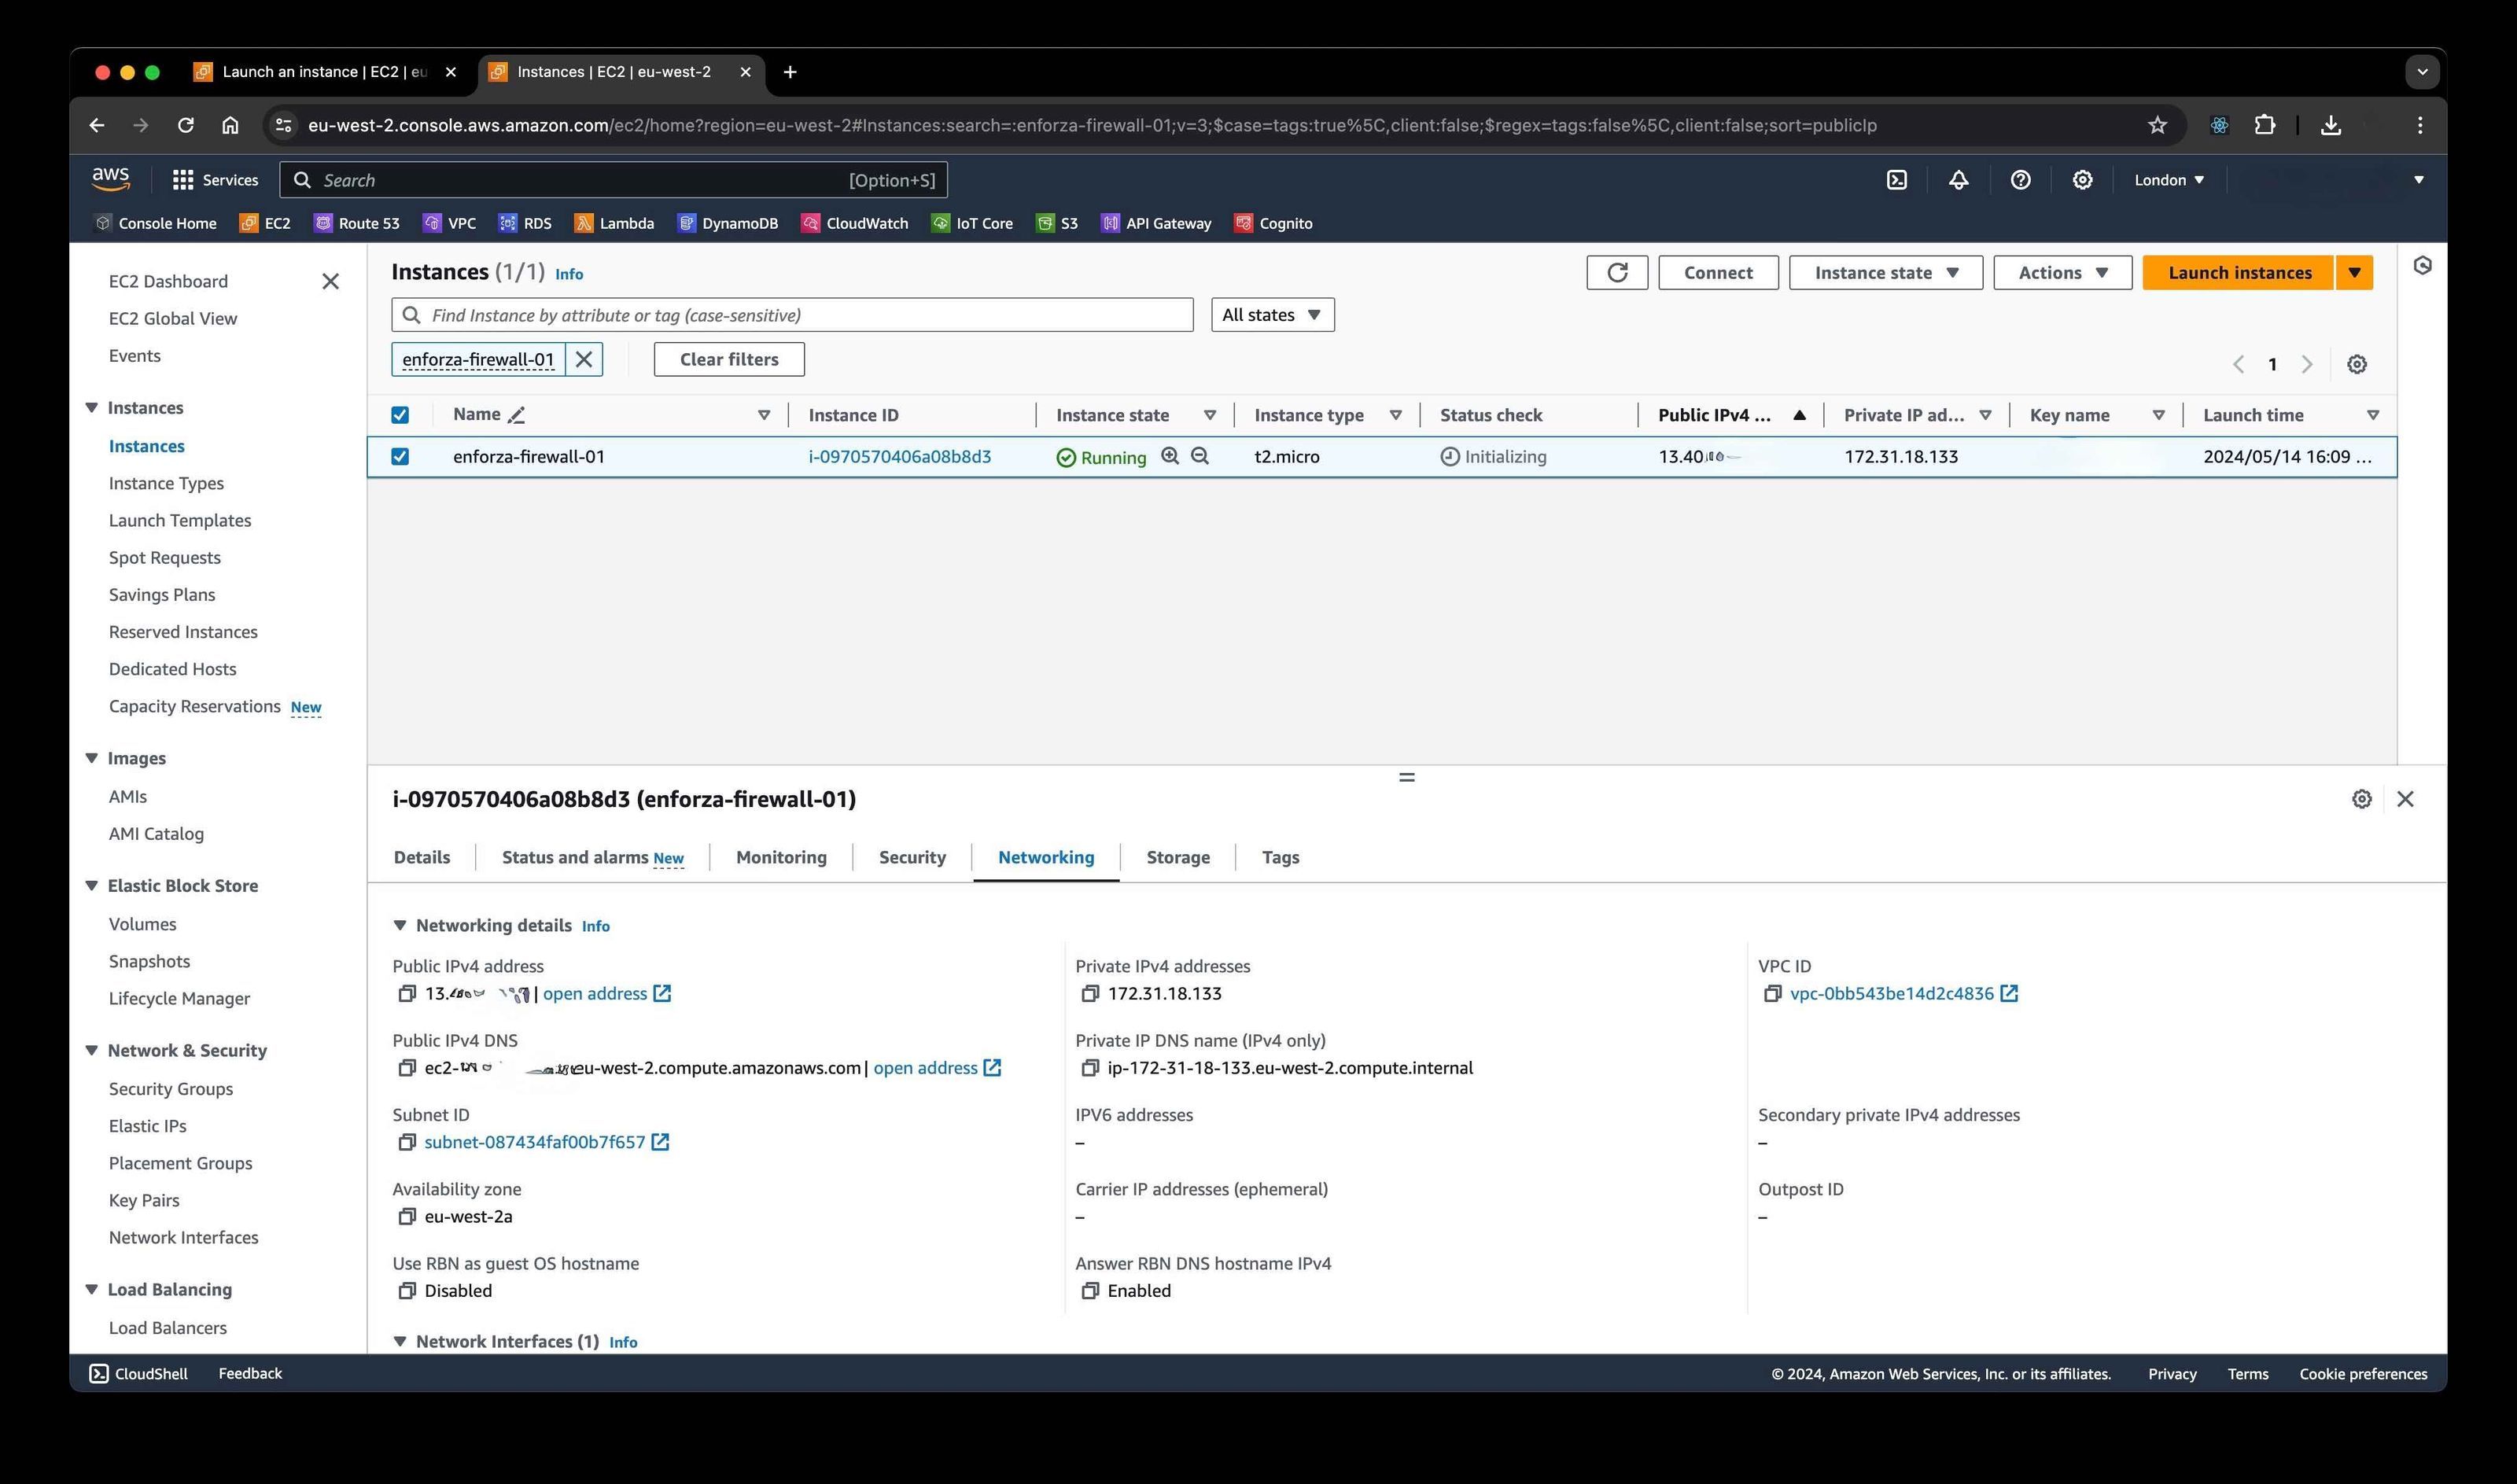
After a few minutes, the Instance State will show as running. Your Linux server is now up and running.
-
In the background, the enforza agent is being installed and automatically provisioned.
Step 6: Disable Source/Destination Check
-
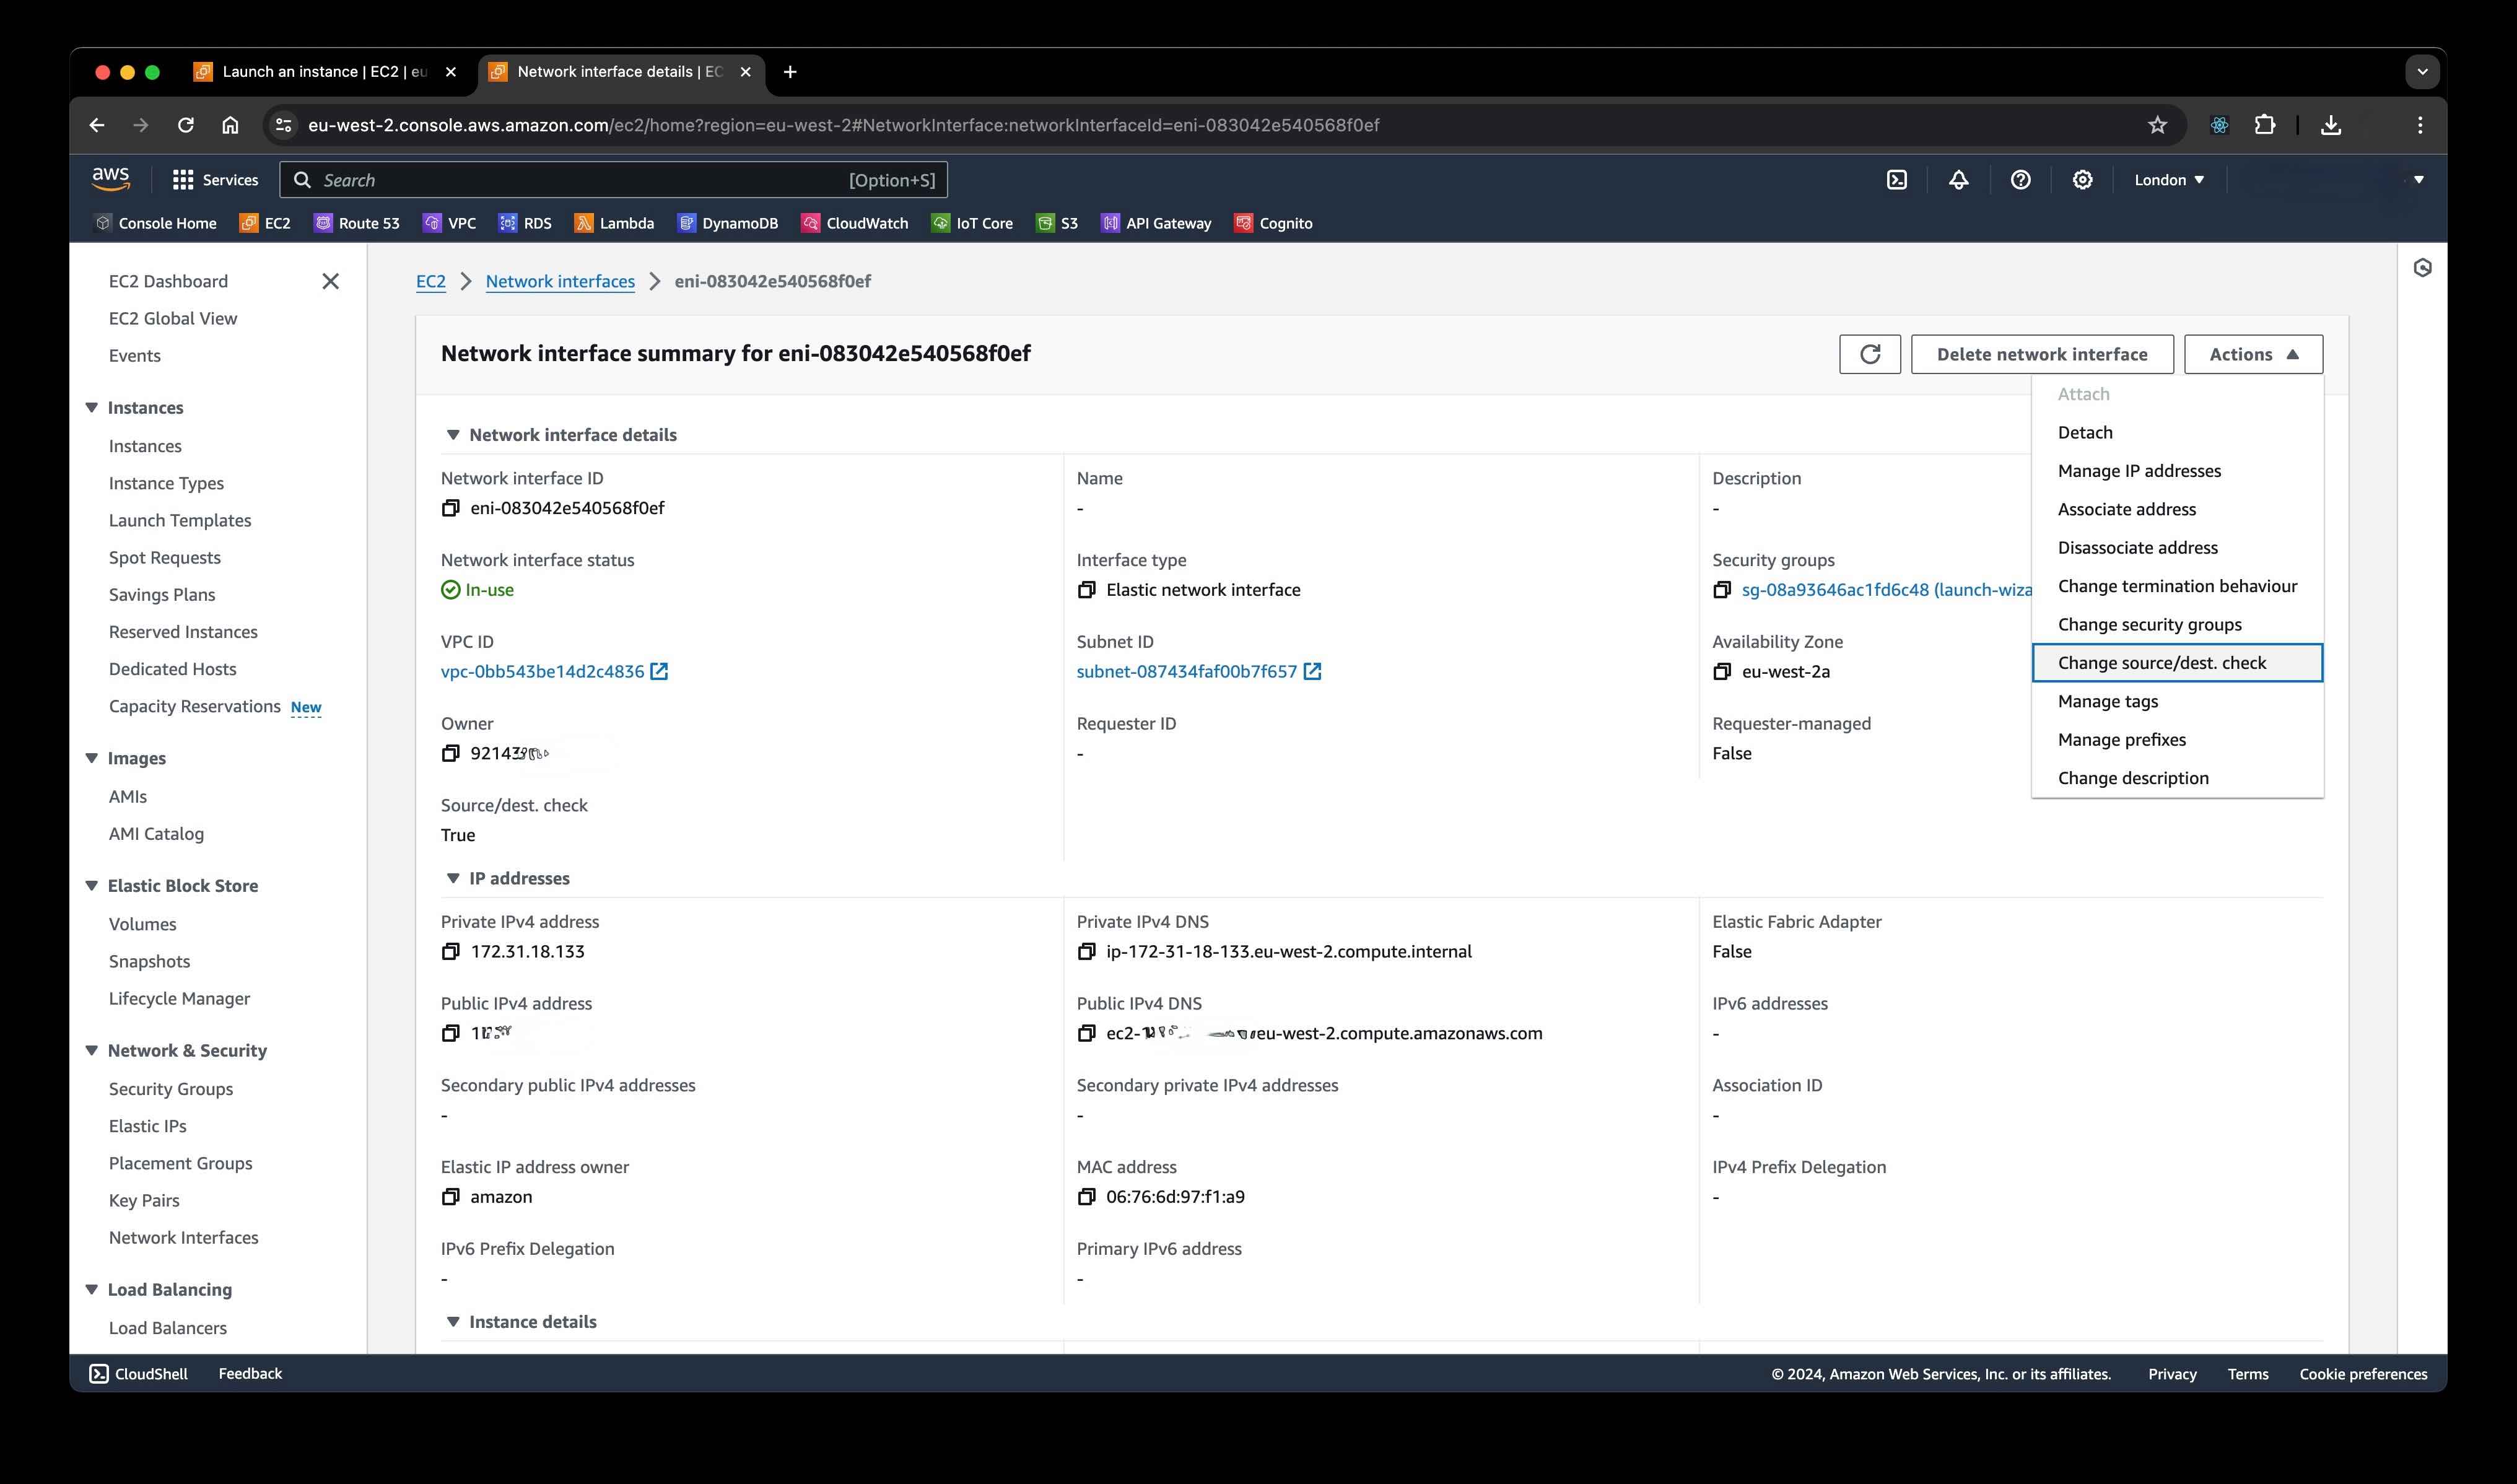
Since this server will act as a firewall router, we need to disable the source/destination check.
-
Click Actions > Change source/dest. check from the instance menu.
Step 7: Uncheck the Source/Destination Box
-
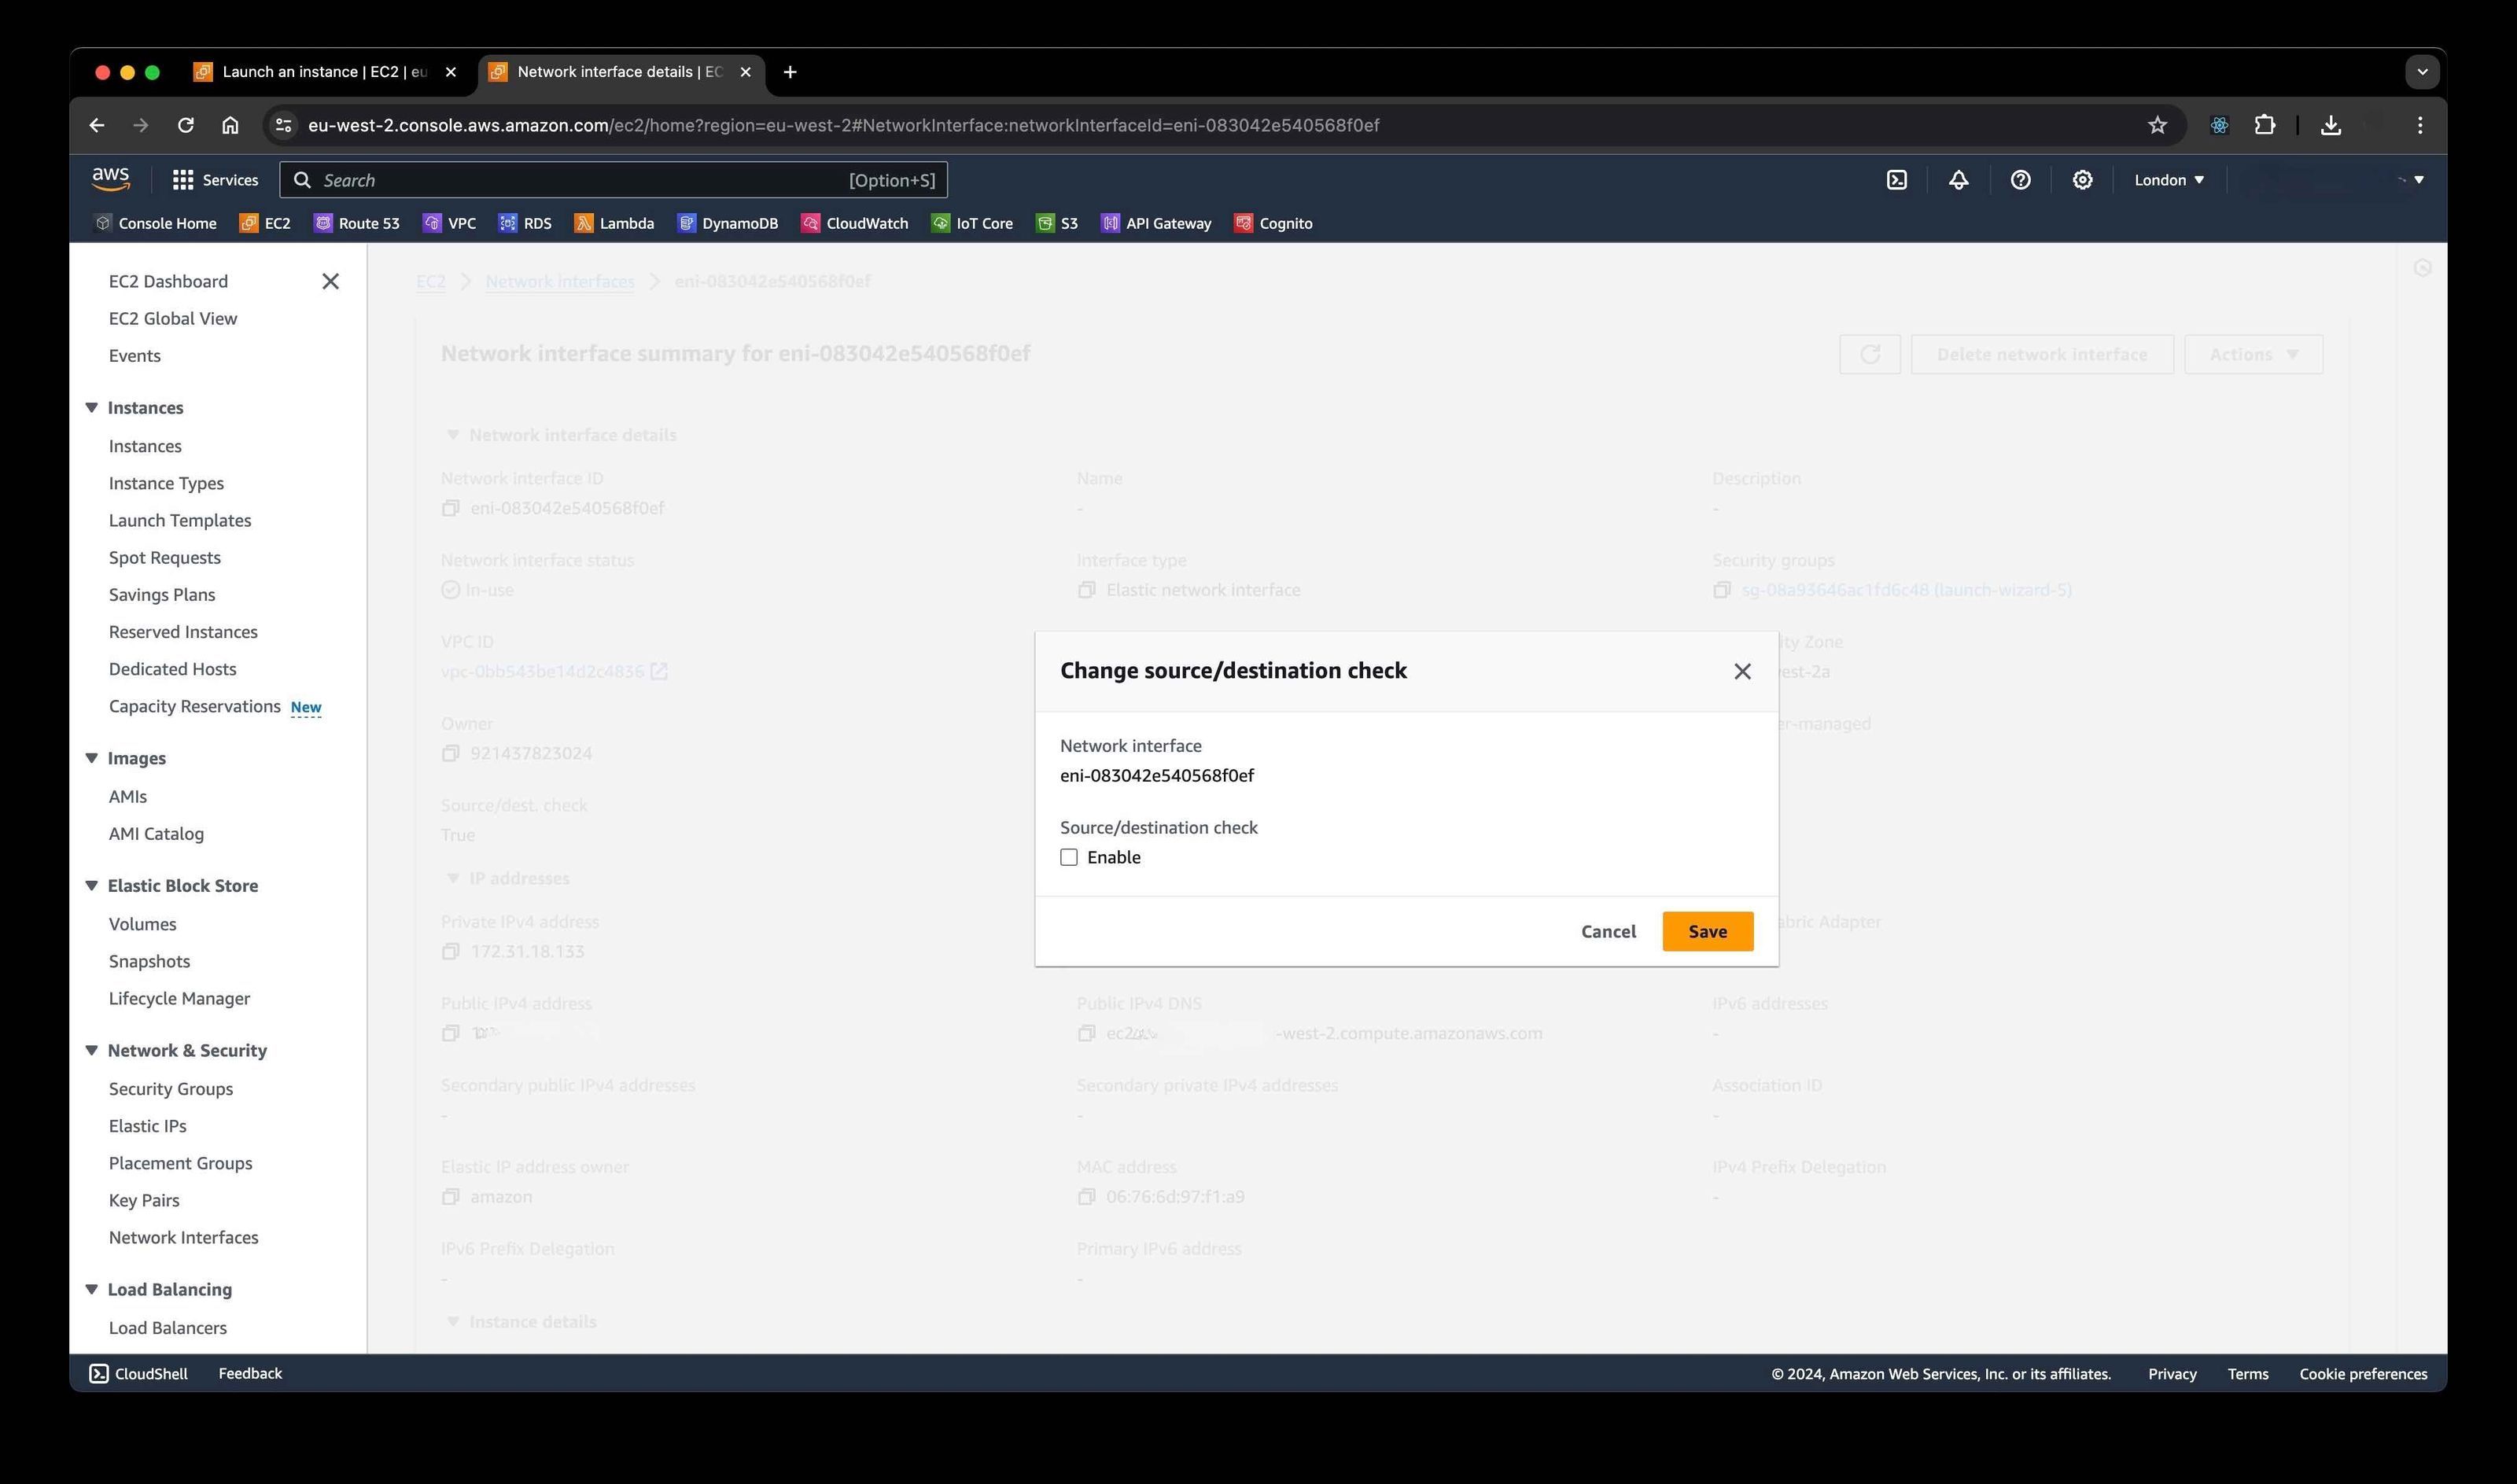
Uncheck the box labeled Enable for source/destination check.
-
Click Save to disable the check.
Step 8: Configure the Security Group
-
Scroll down on the instance details page and click on the Security Group.
-
Since this server is a firewall, you need to allow all traffic on the network interface, and the enforza agent will handle the traffic filtering.
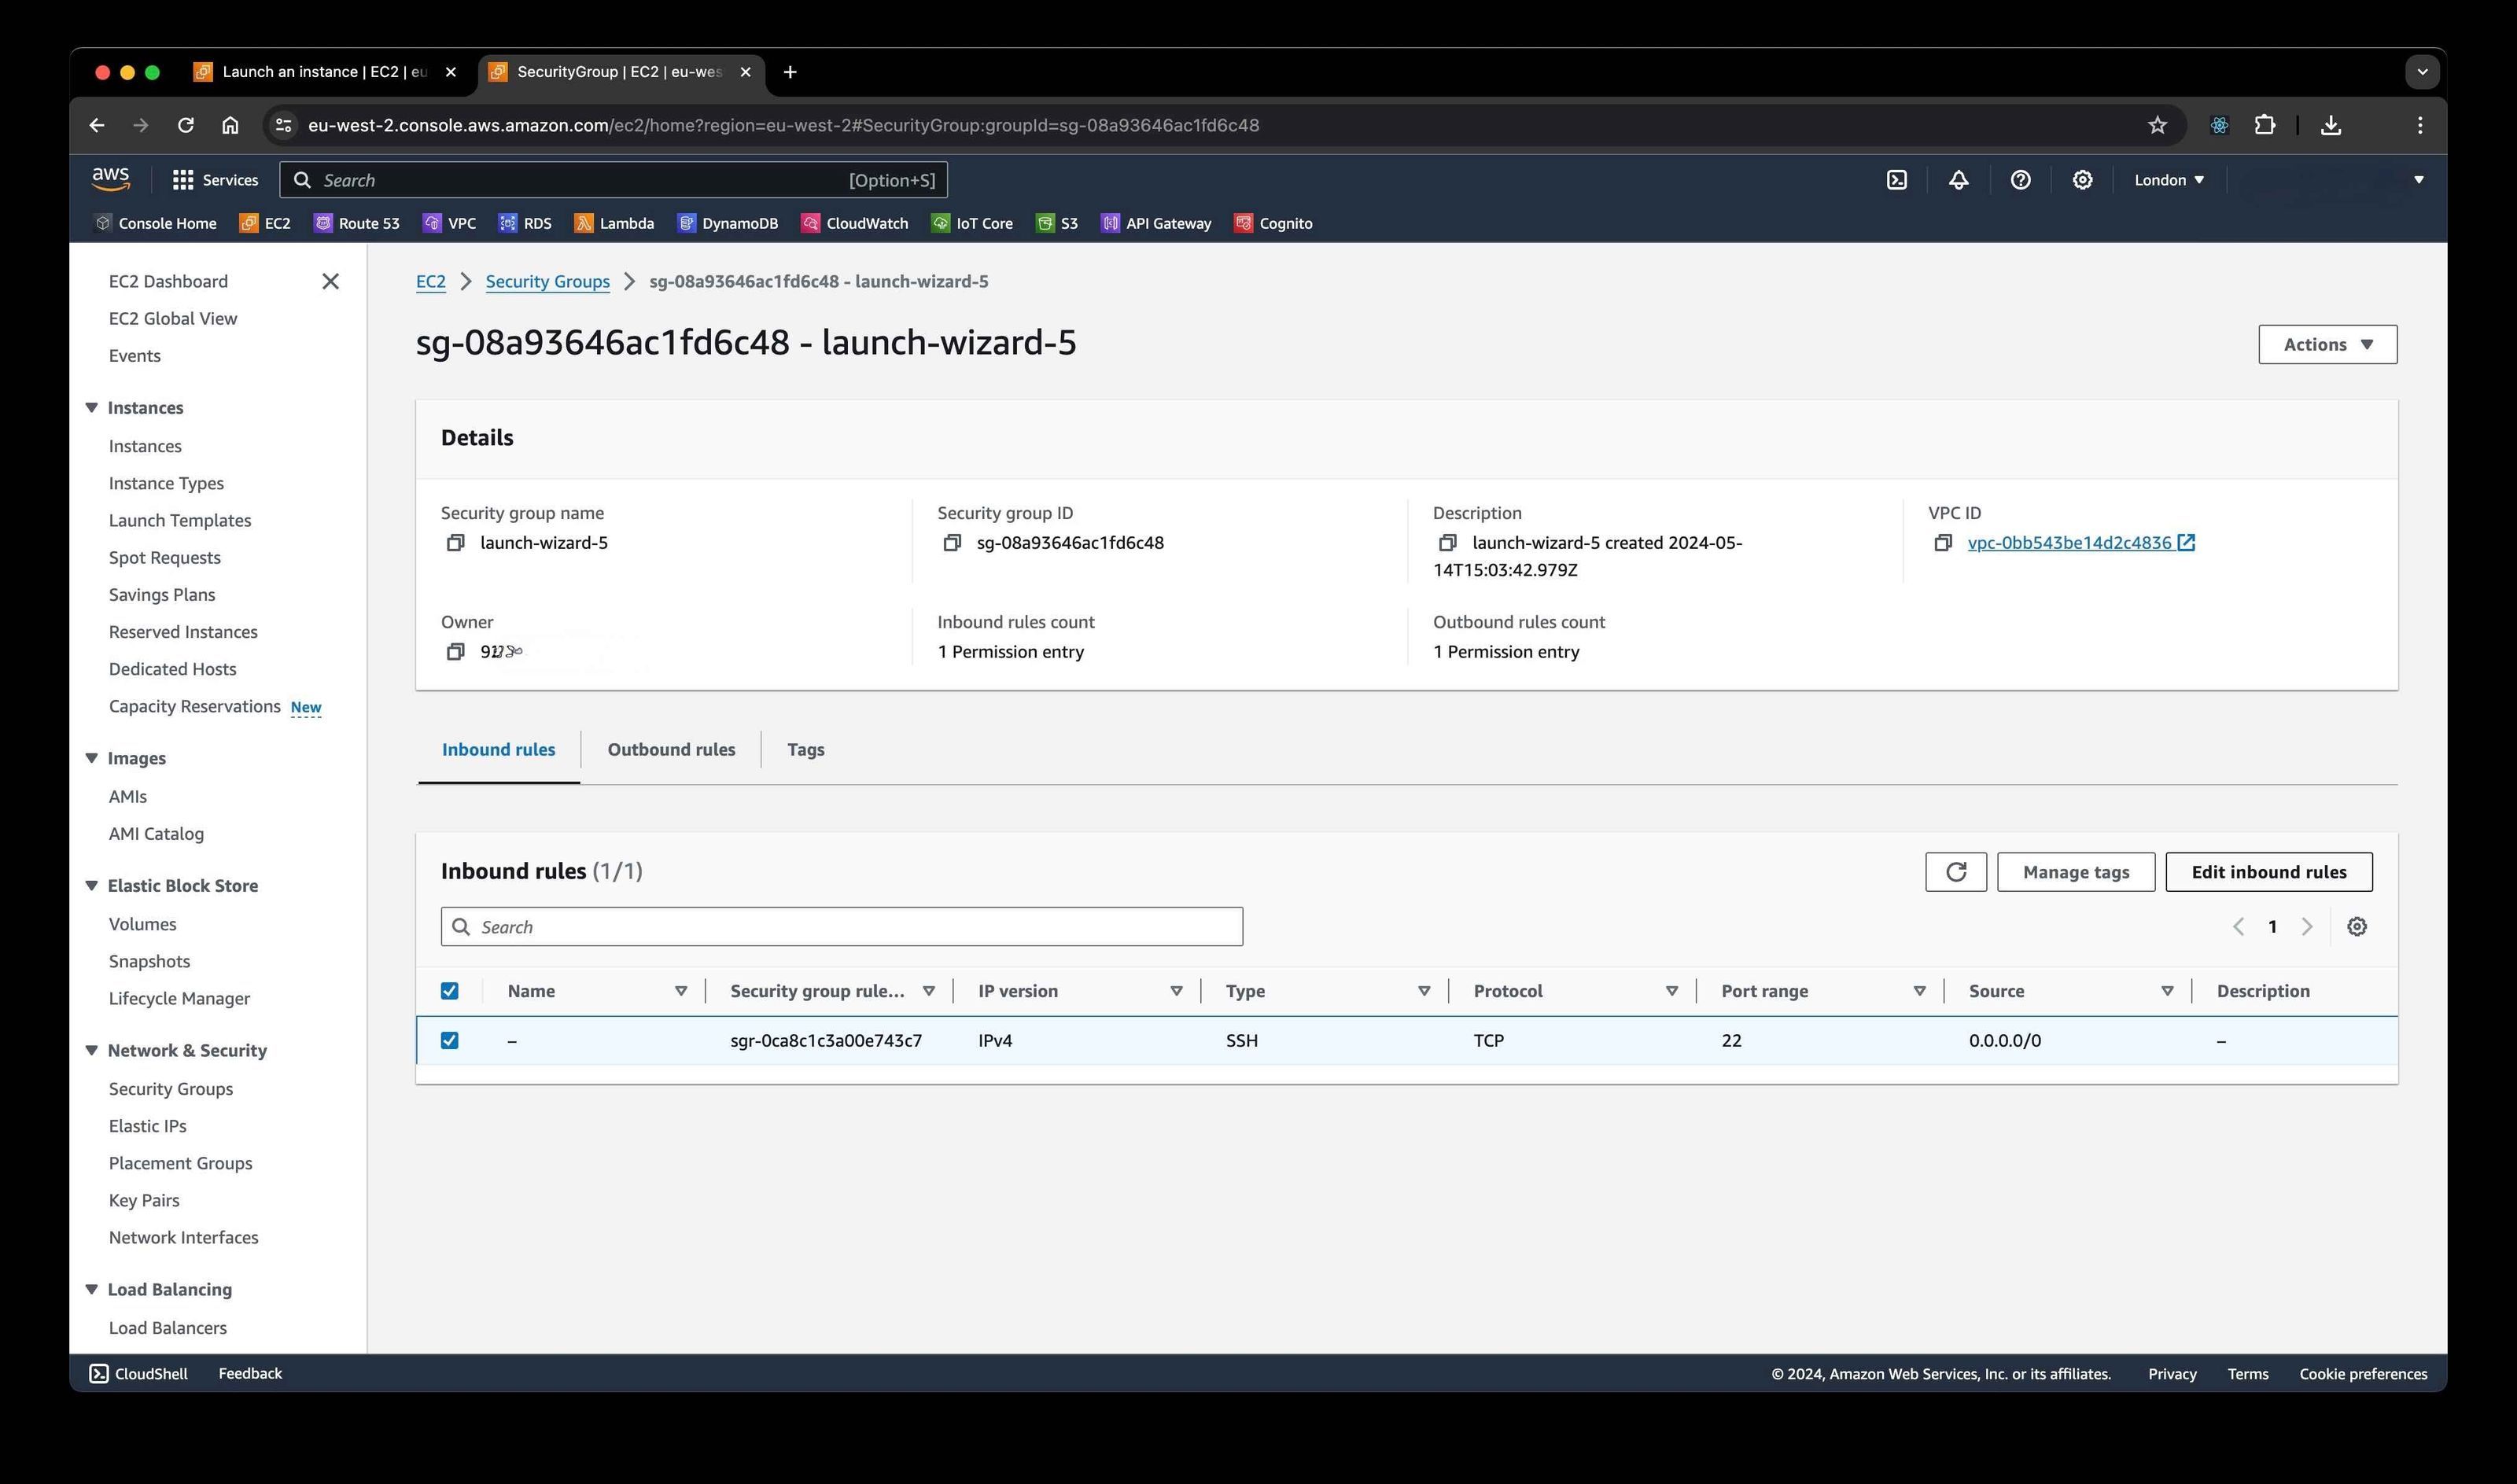
Important: Do not allow all traffic on any instance that is not a security appliance!
Step 9: Set the Security Group Rules
-
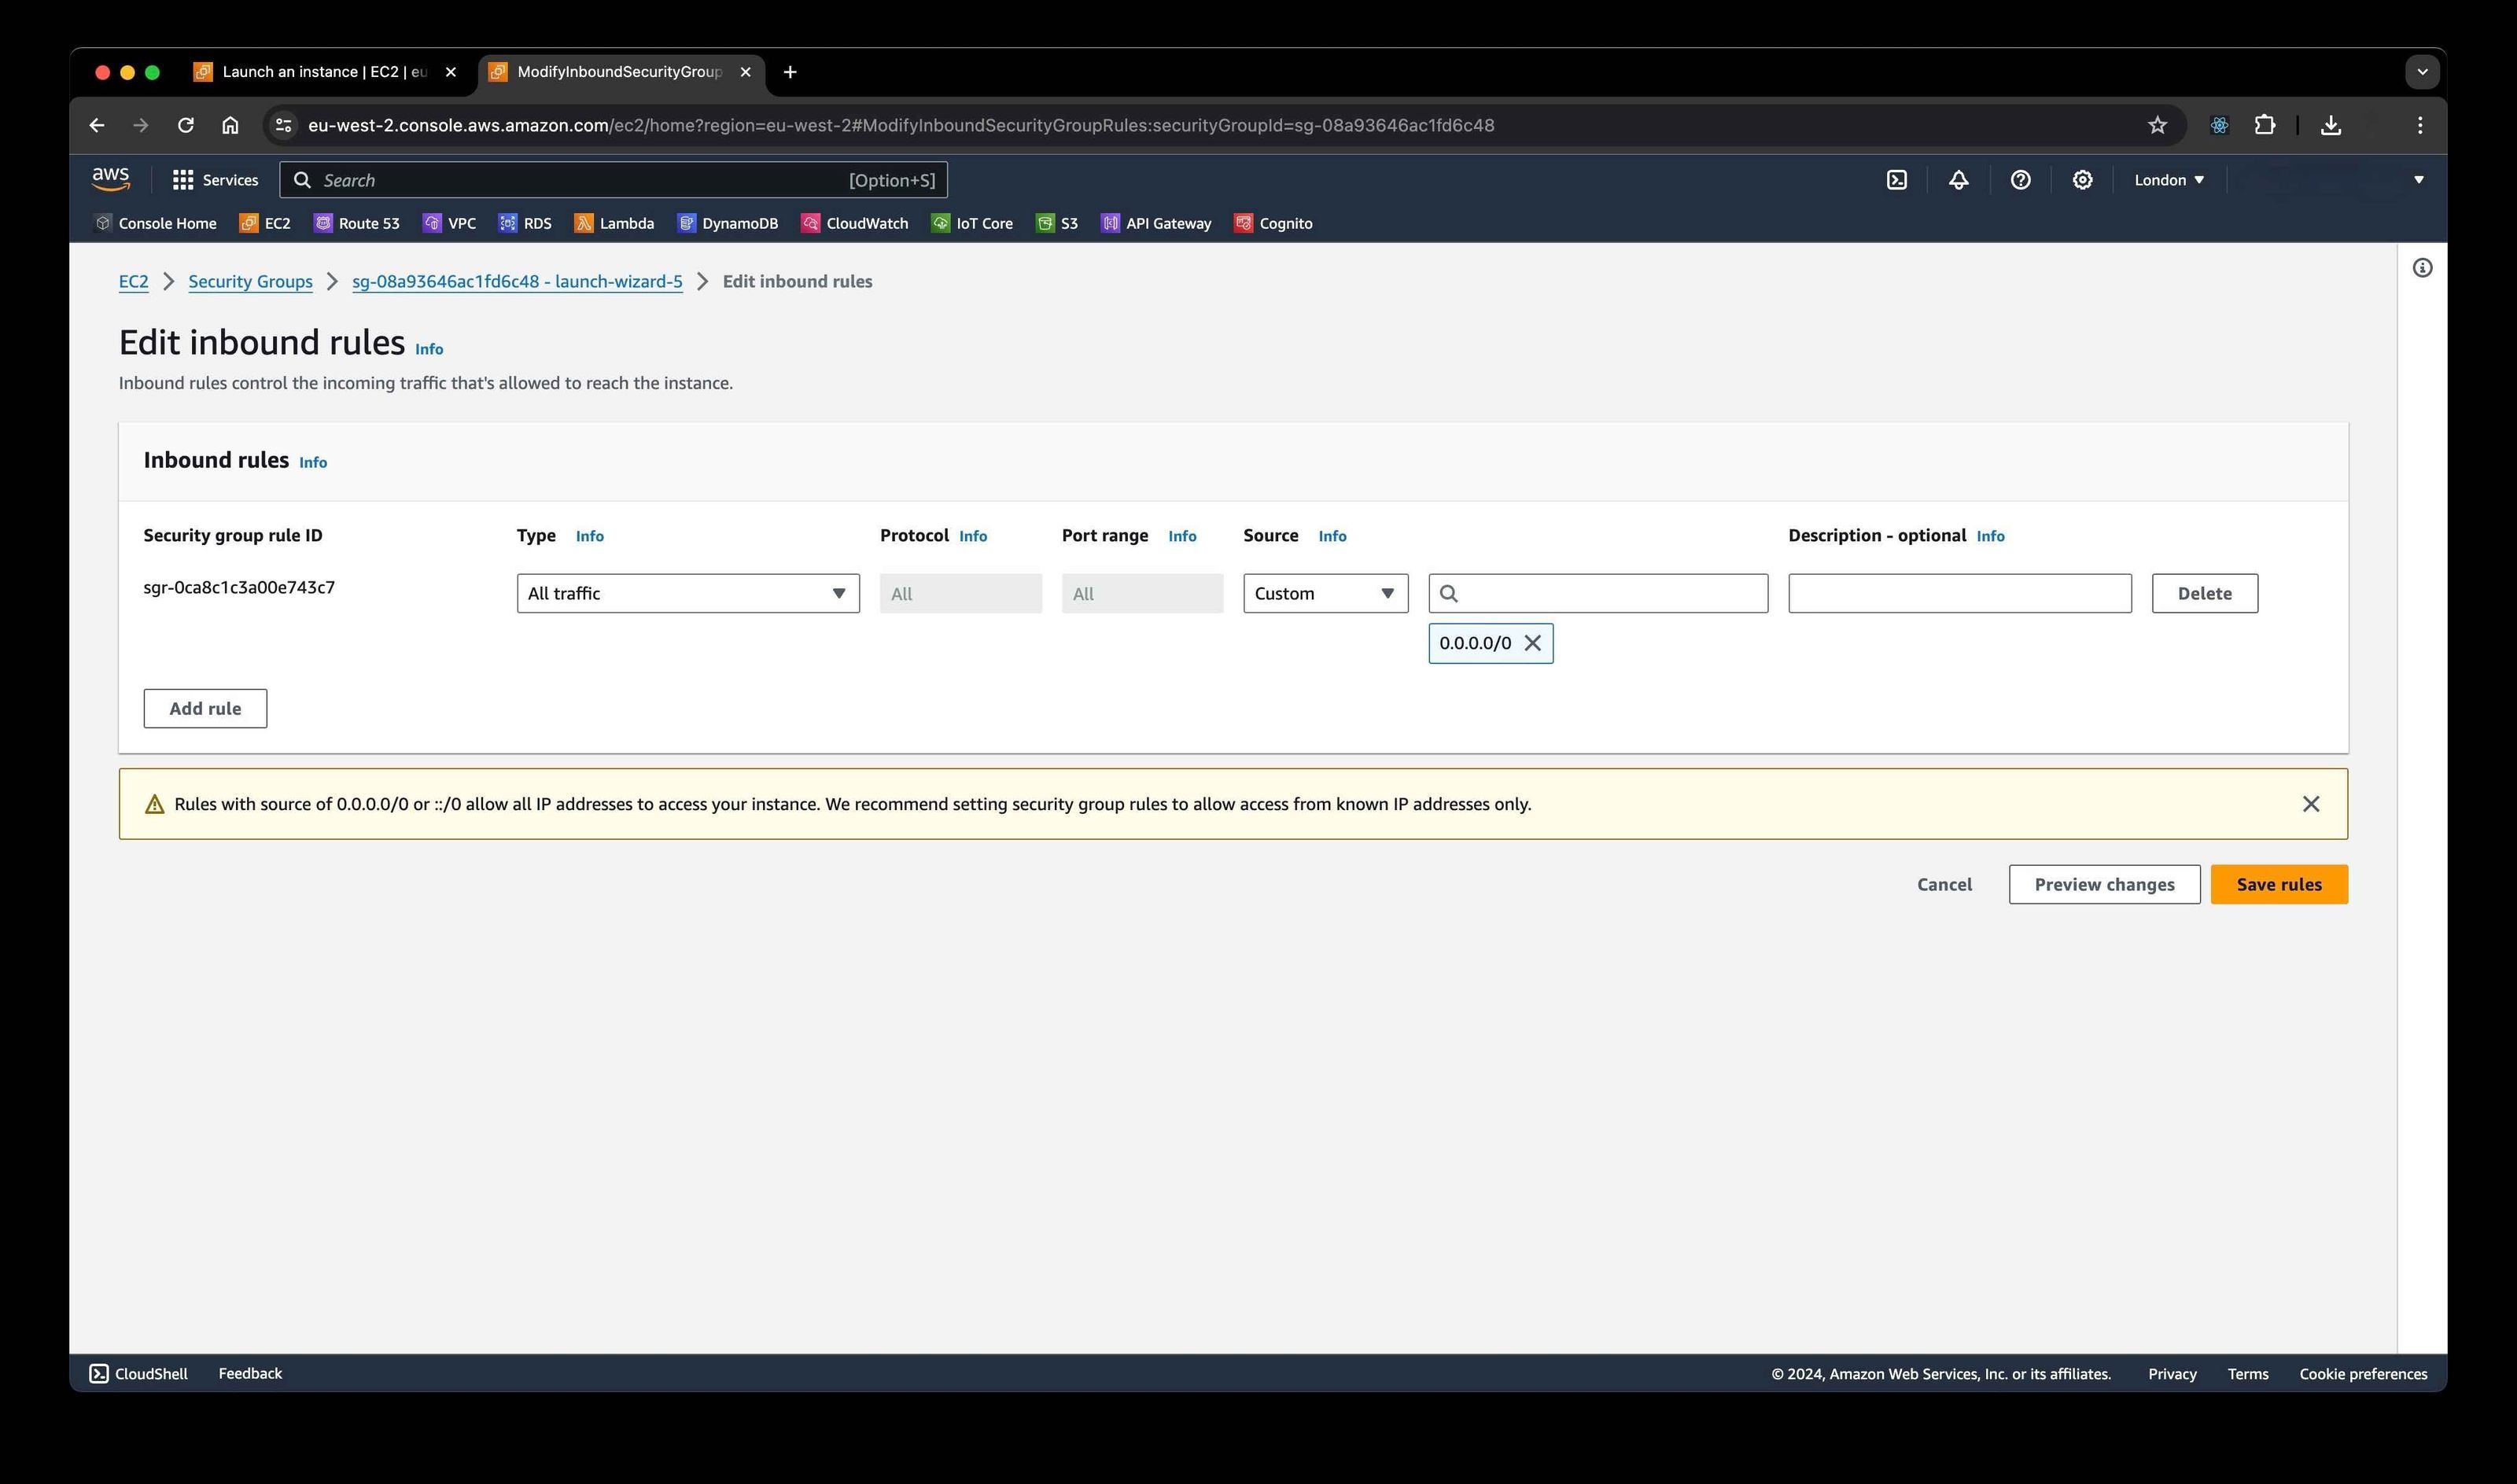
In the Security Group, change the inbound rule to:
- Type: All Traffic
- Source: Custom,
0.0.0.0/0
-
Click Save rules.
Step 10: Check the System Log
-
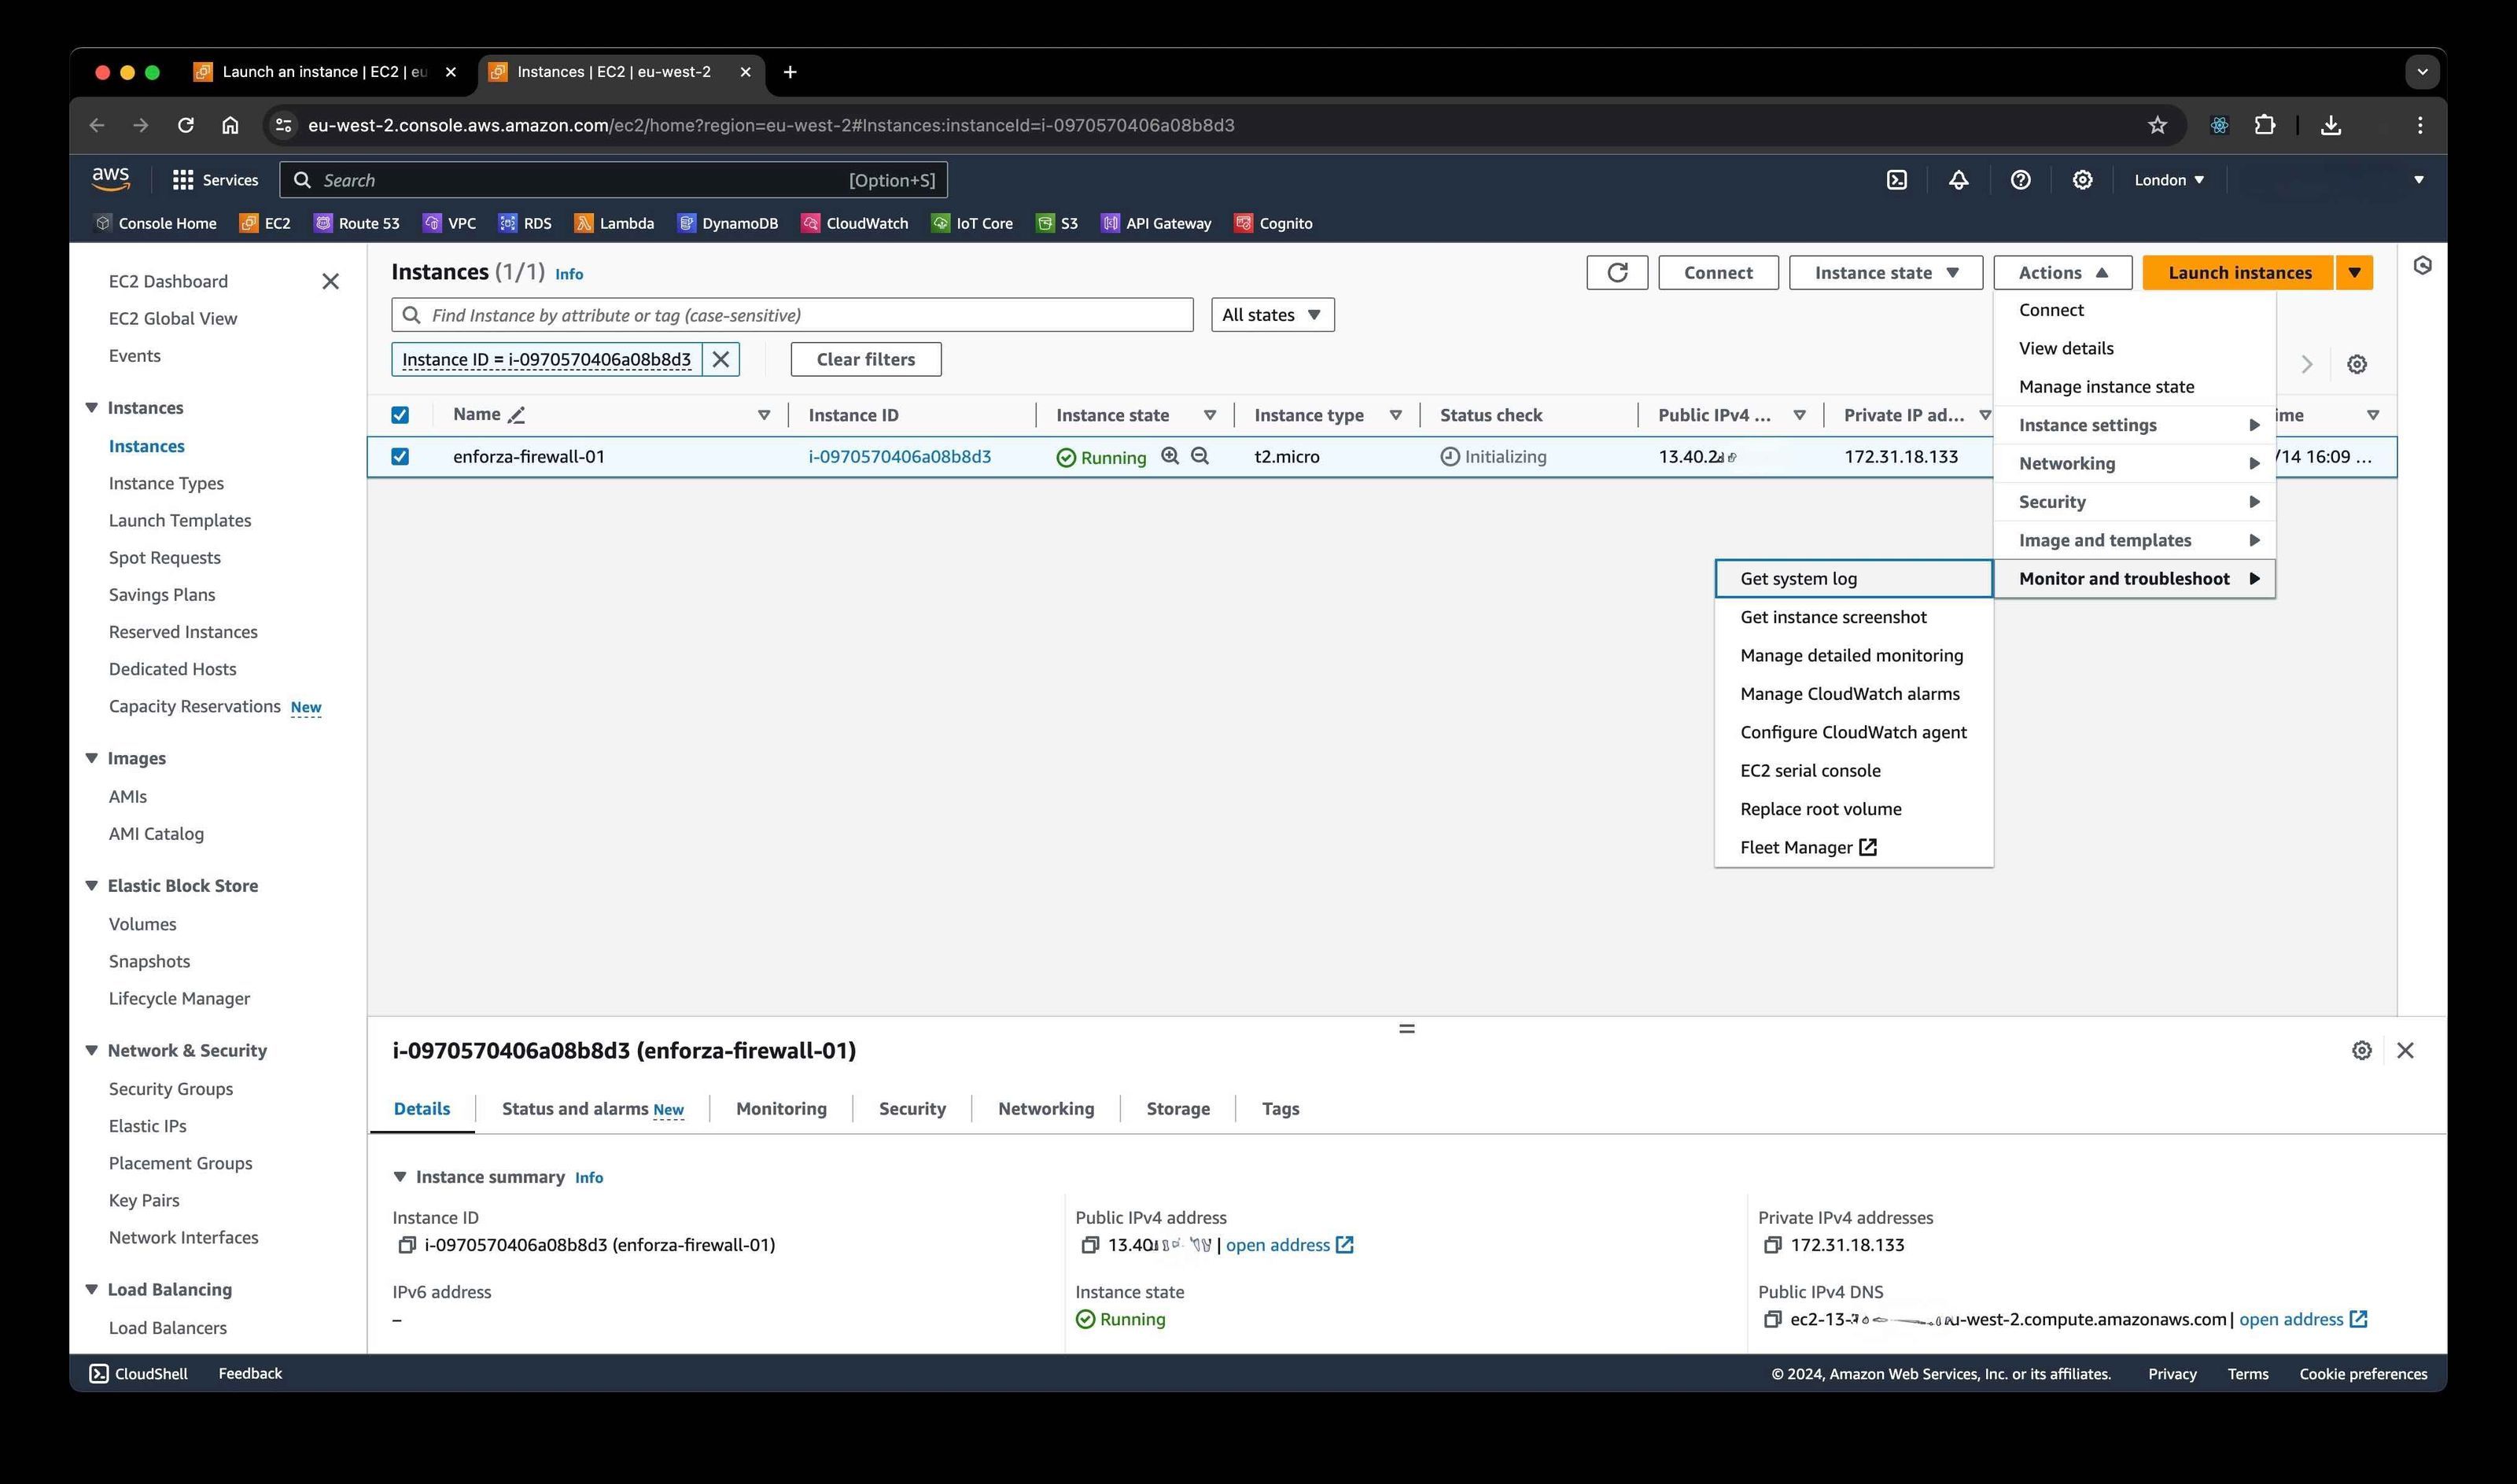
After a few minutes, go back to the Instances view.
-
Select your newly provisioned firewall, then click Actions > Monitoring and troubleshooting > Get system log.
Step 11: Find the enforza Claim Key
-
In the system log, you’ll find the enforza claim key. Look for the line next to
efzClaimKey0.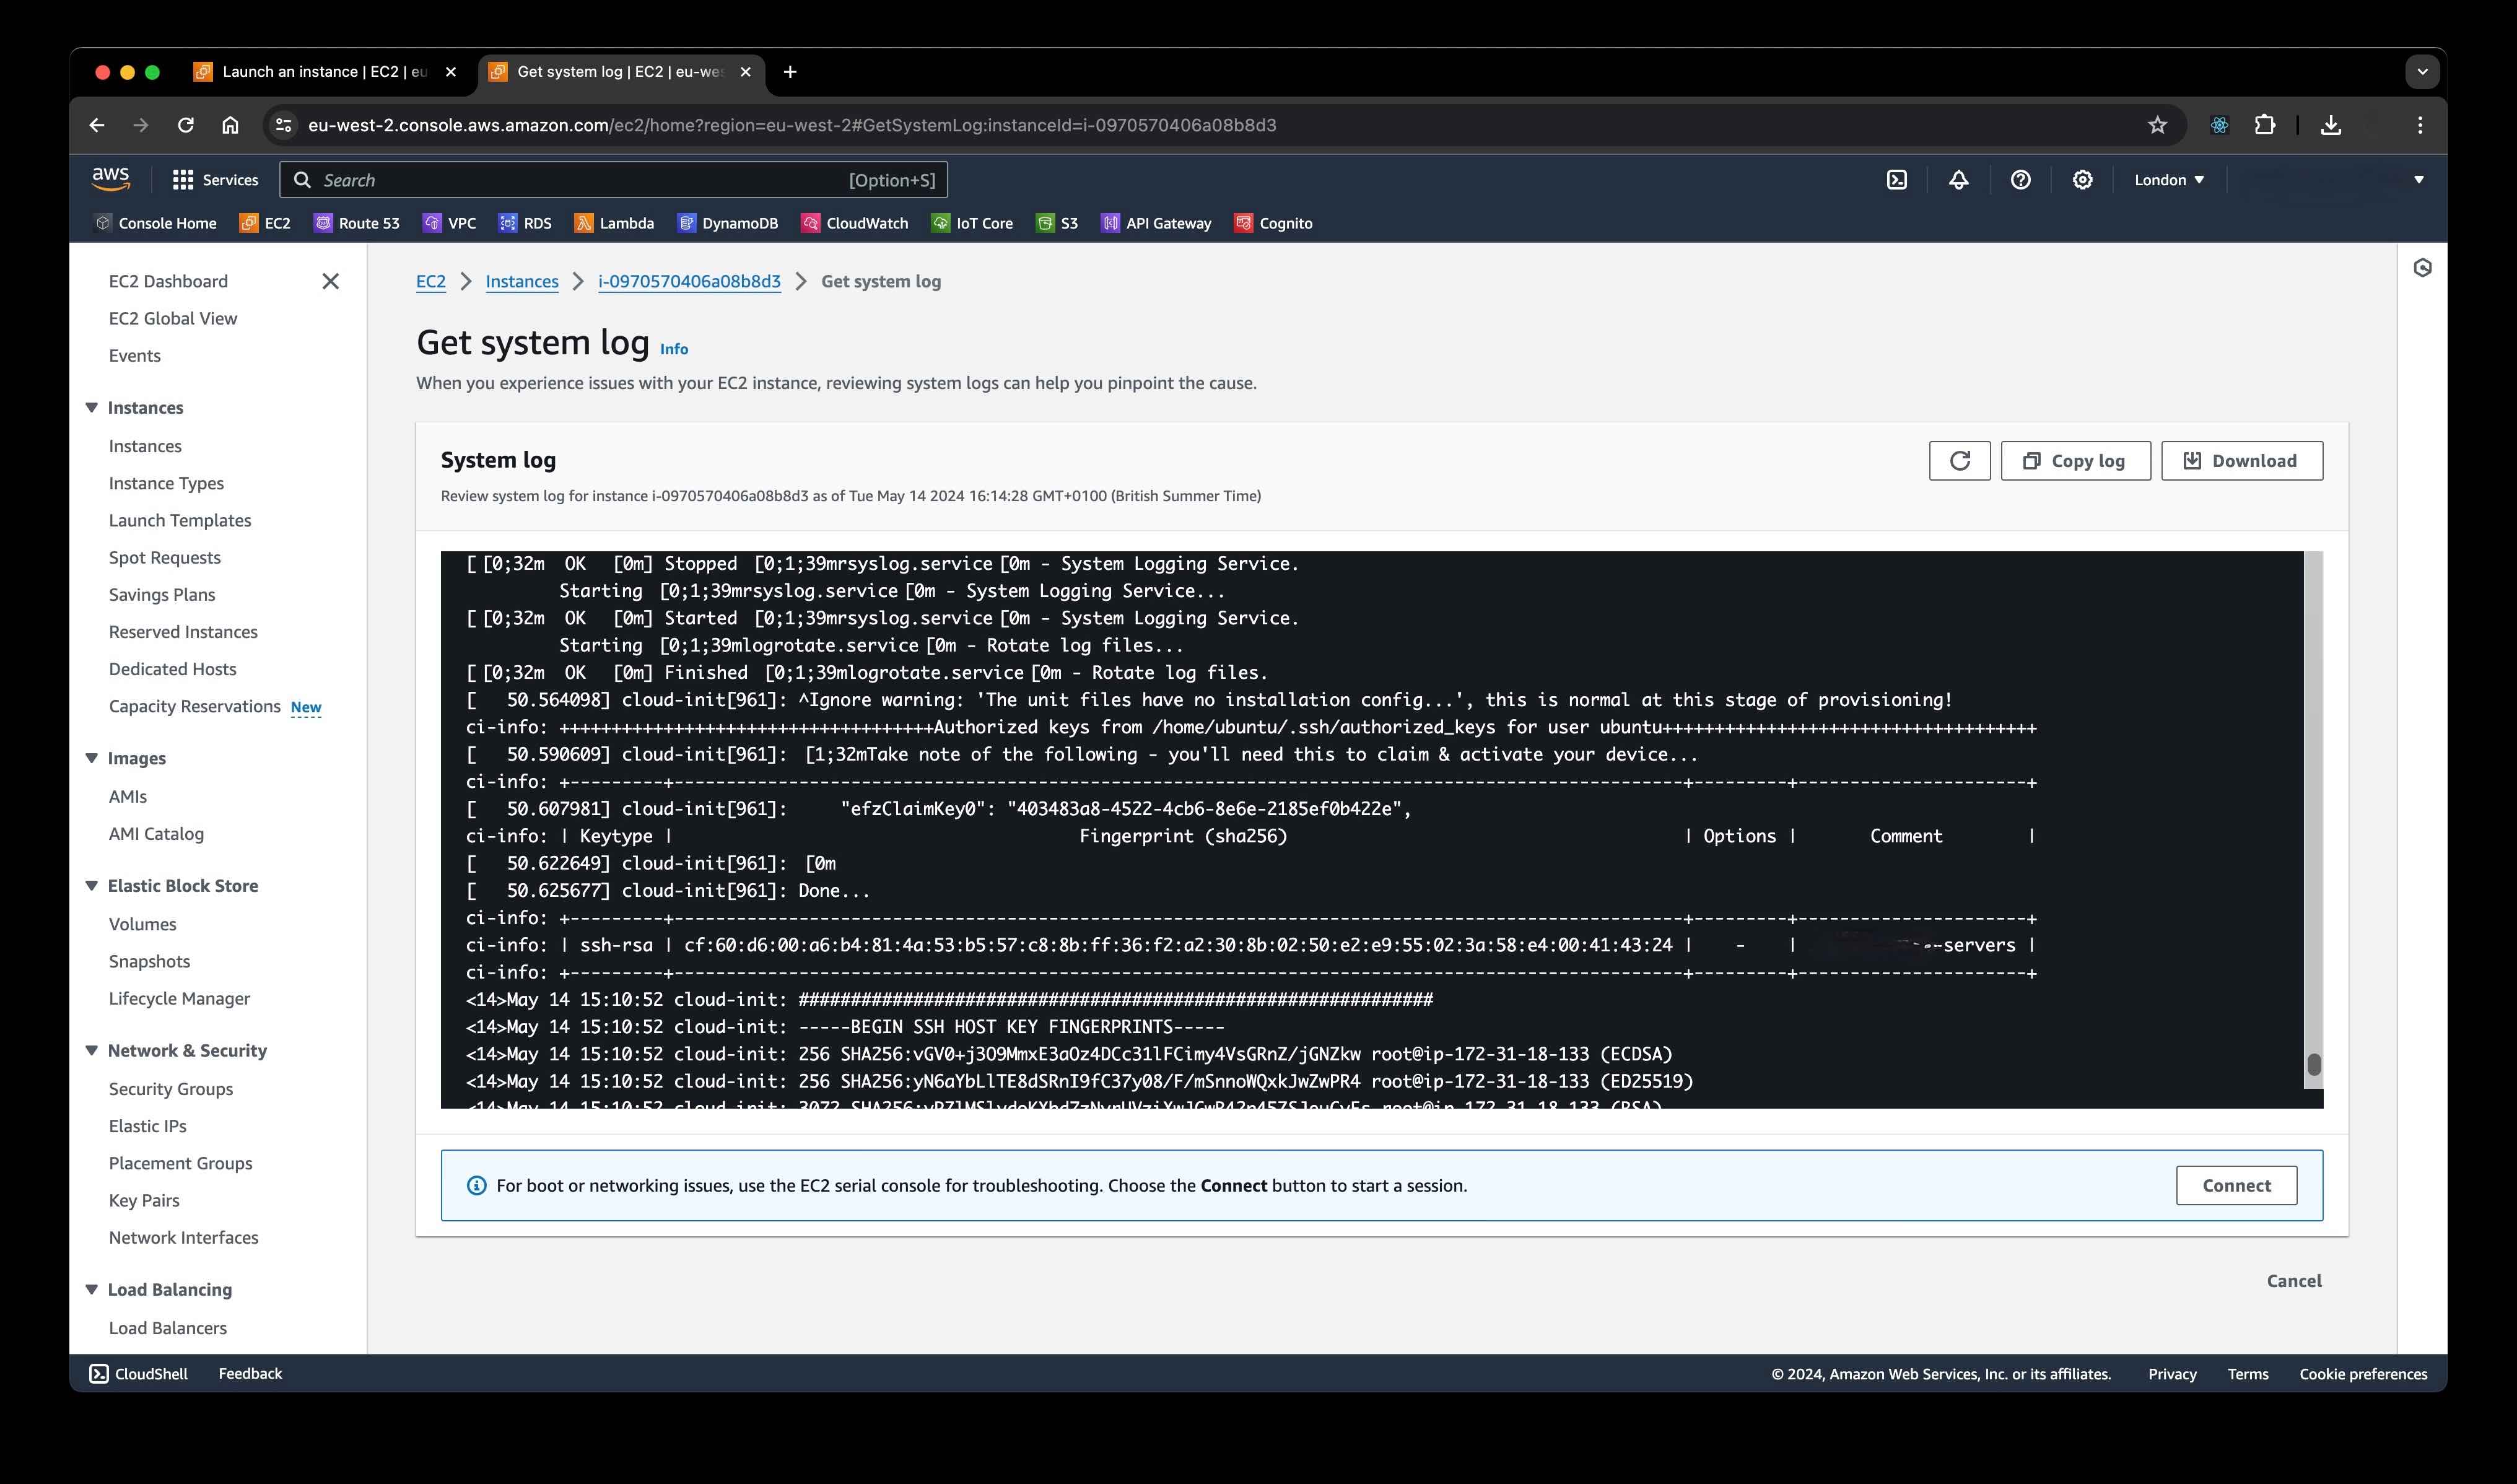
-
Select and copy the claim key to your clipboard.
🎉 Success!
You’ve successfully provisioned a firewall in AWS with the enforza agent installed! 🚀
Next steps:
- Head over to the enforza management portal.
- Claim your device using the claim key you copied.
- Push some firewall policies to start protecting your network.