AWS CloudFormation Deployment
Follow these steps to quickly set up a landing zone using the enforza boilerplates using AWS CloudFormation templates.
Step 1: Start the CloudFormation Stack
-
Open the AWS Console and go to CloudFormation.
-
Click Create a new stack.
-
For the template, enter this Amazon S3 URL:
Single Gateway: https://prod-enforza-public.s3.eu-west-2.amazonaws.com/cloudformation/aws-single-az-boilerplate-cfn.yaml
- View reference architecture here to see the design & resources deployed.
Multi-AZ Gateway: https://prod-enforza-public.s3.eu-west-2.amazonaws.com/cloudformation/aws-multi-az-boilerplate-cfn.yaml
- View reference architecture here to see the design & resources deployed.
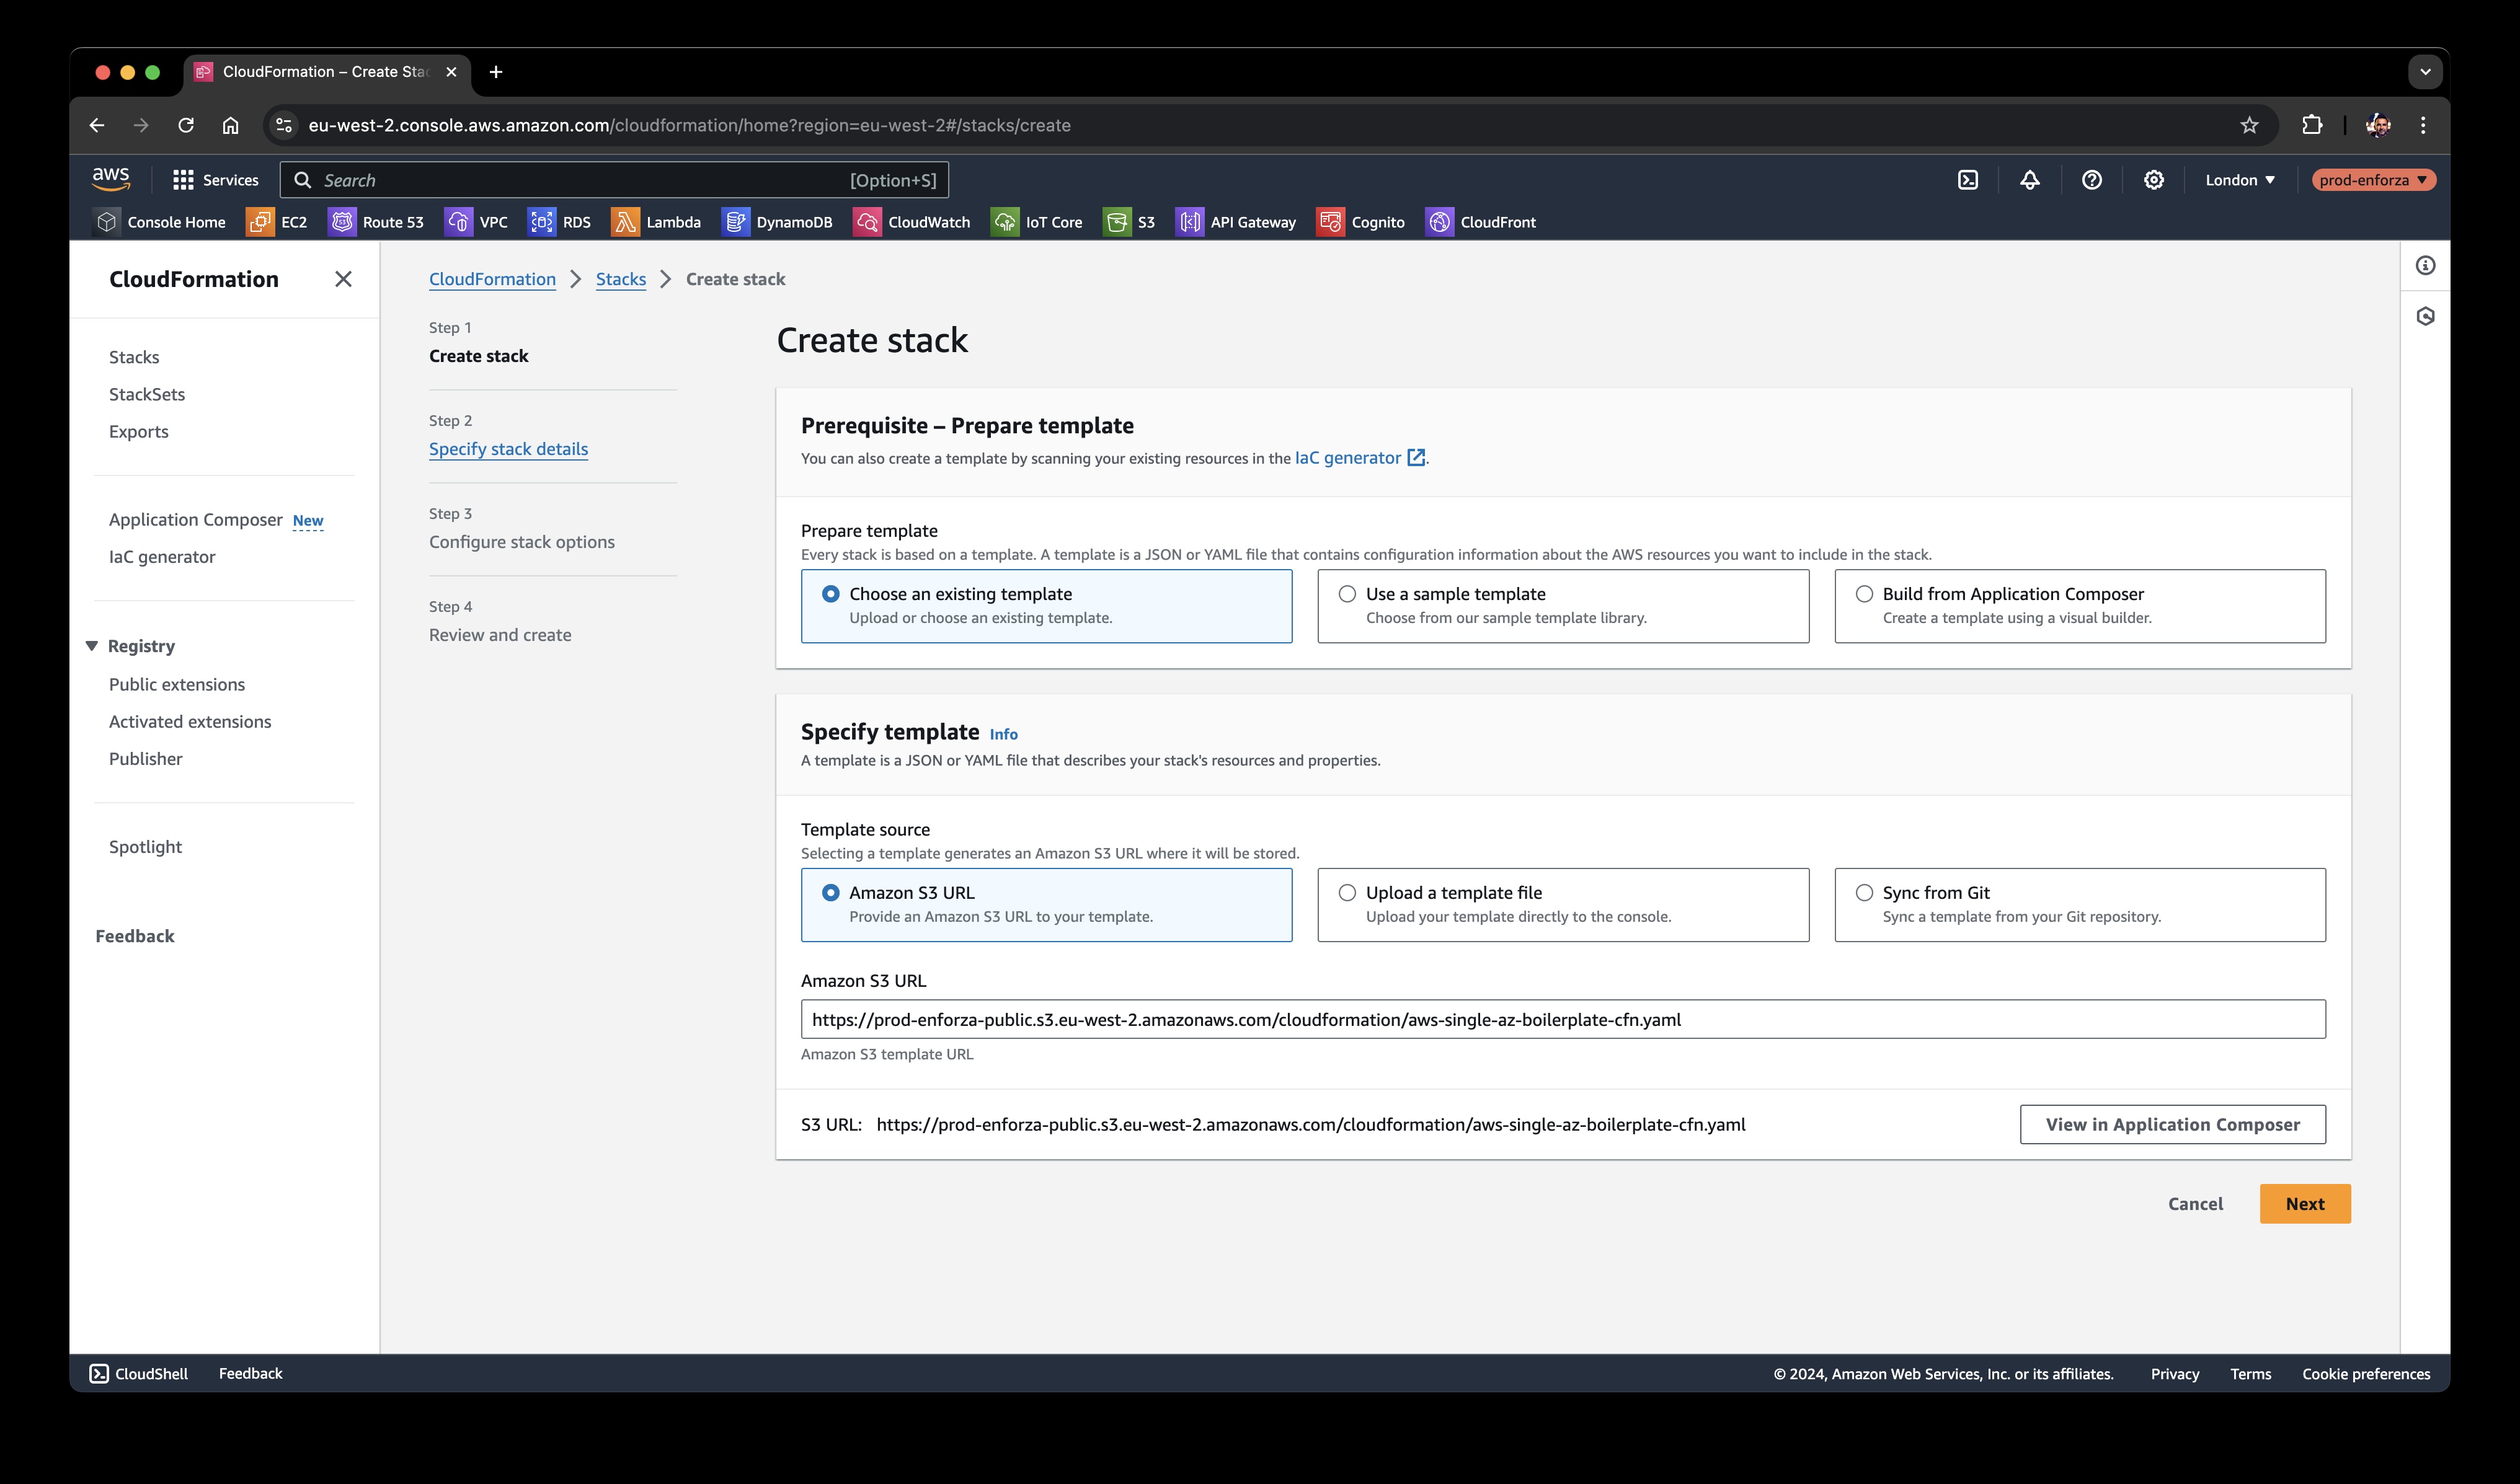
-
Click Next to continue.
Step 2: Name Your Stack and Configure Network Settings
-
Give your stack a name (this is just for you to recognize it later).
-
Enter the IP addresses of your trusted network or devices (like your HQ VPN public IP or a bastion server).
-
Configure your VPC CIDR (you can leave it as the default if you're not sure).
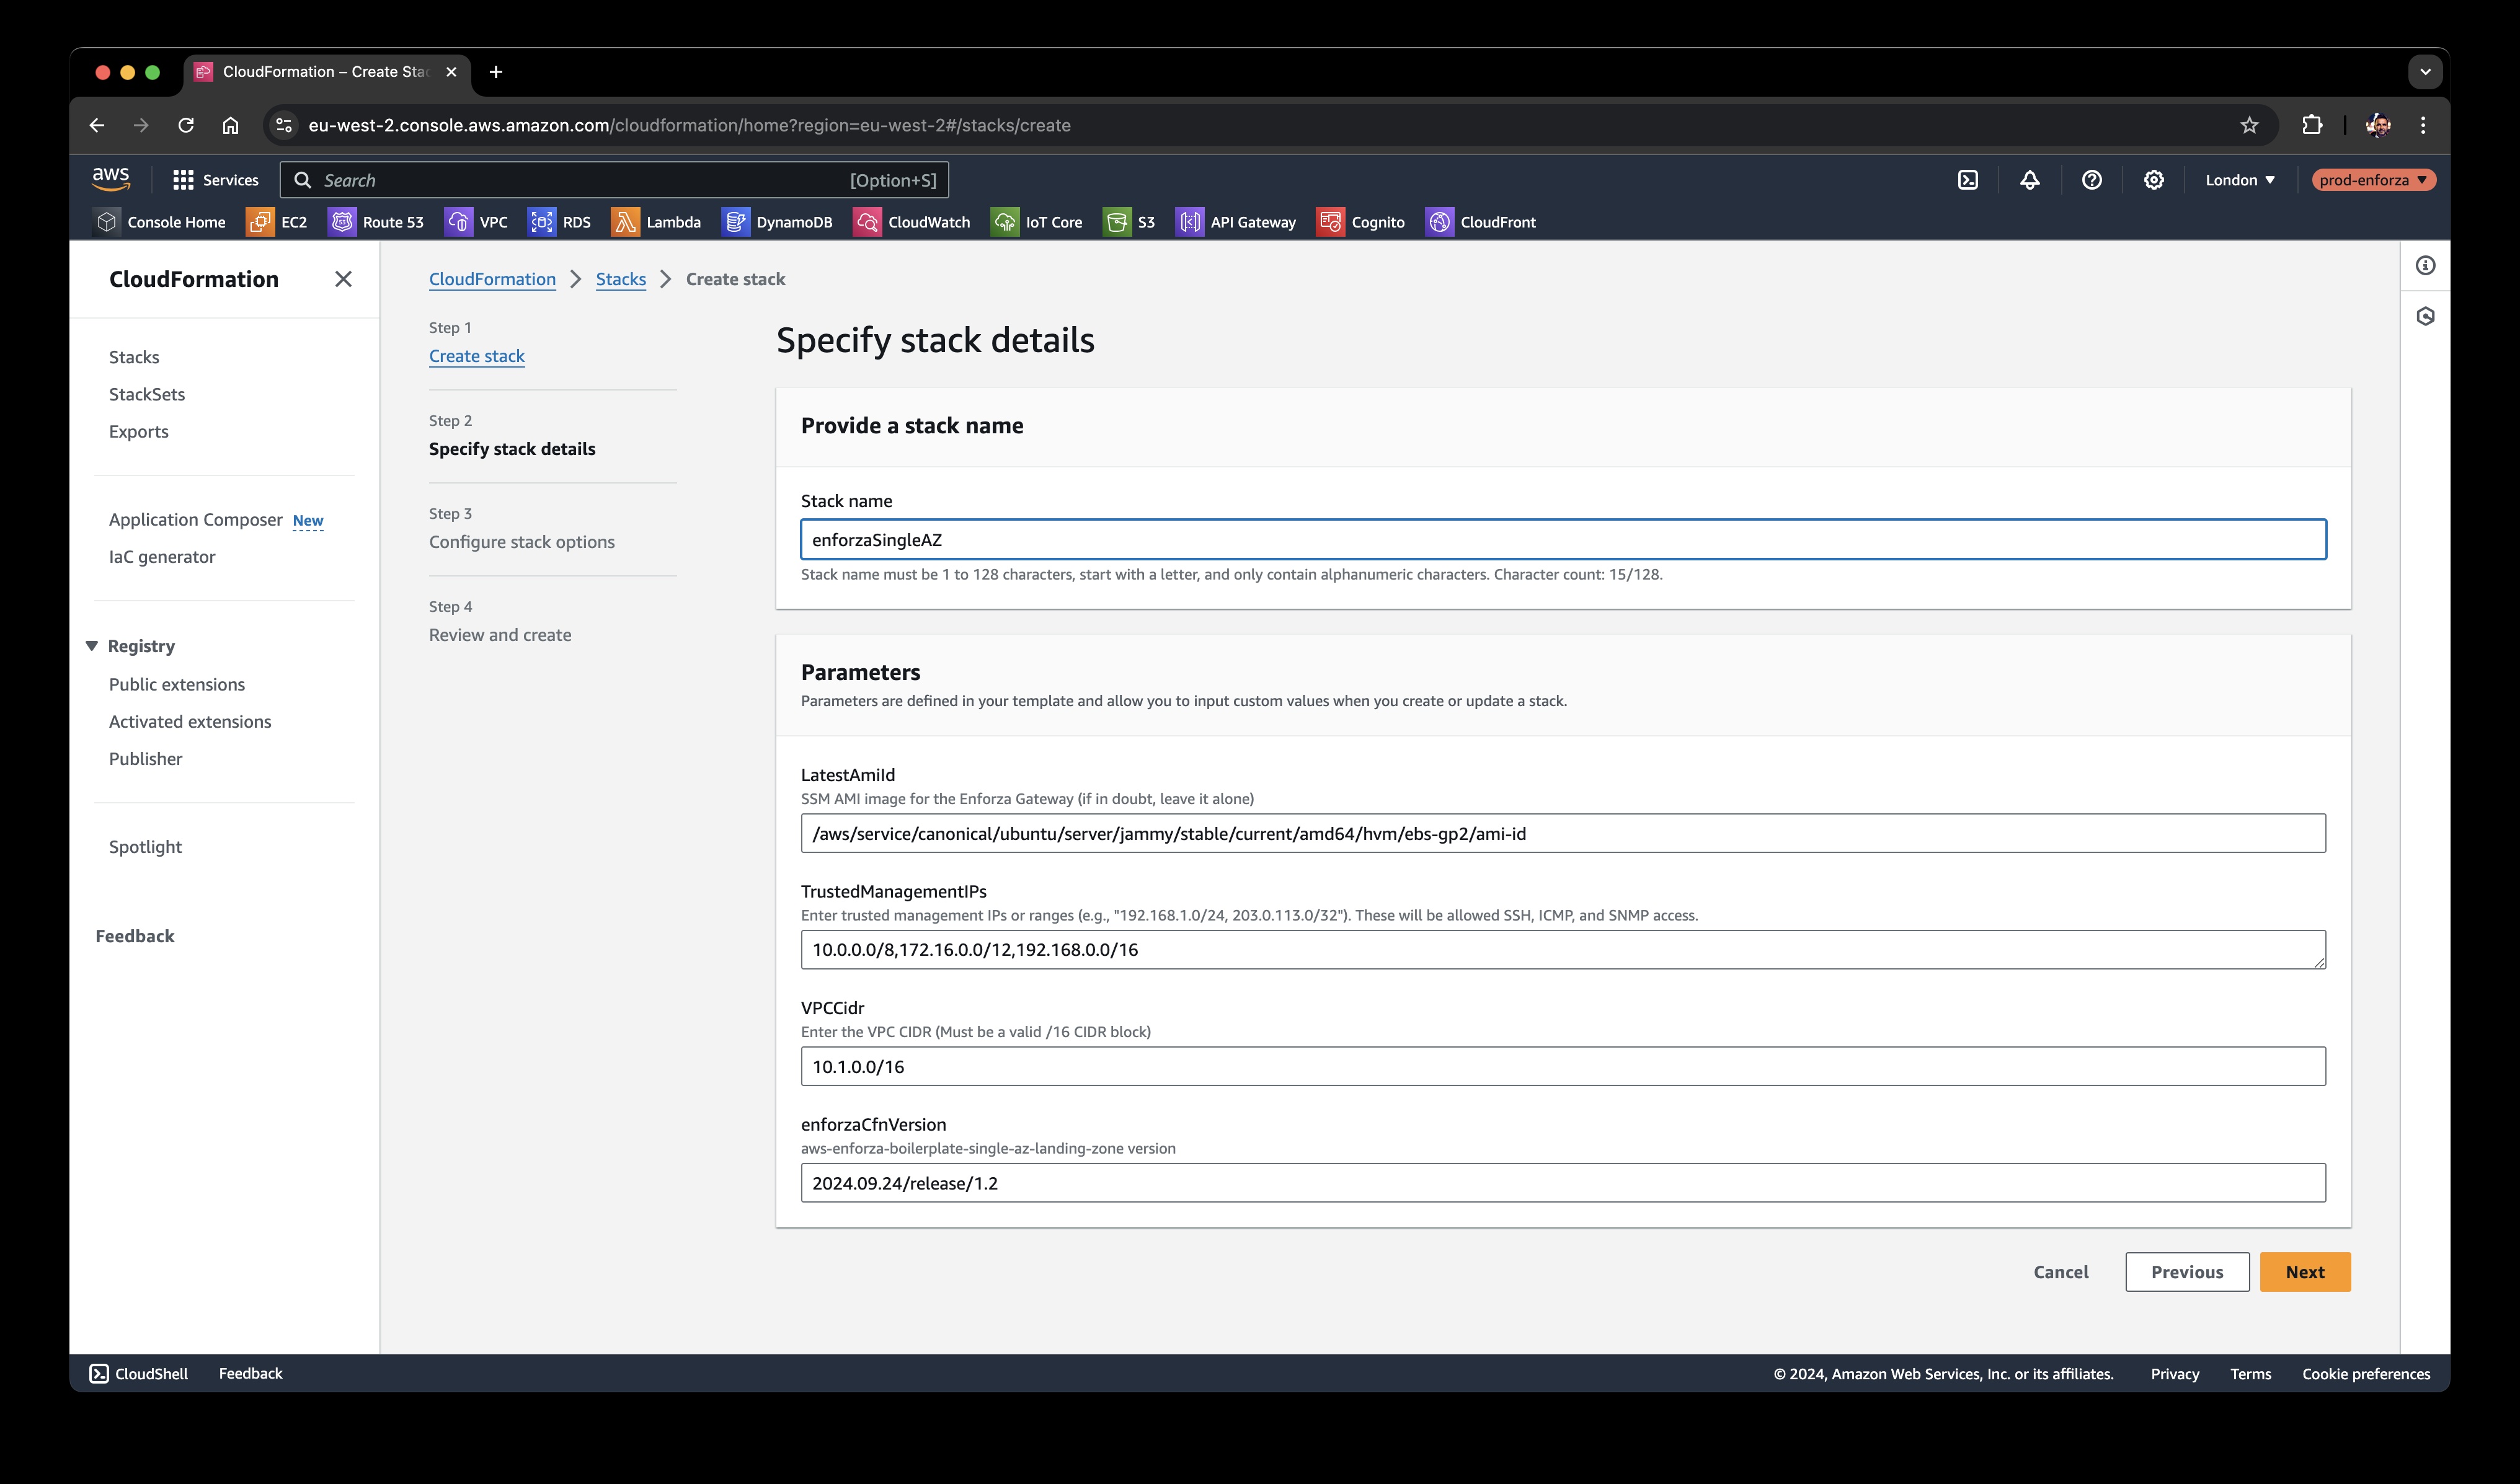
-
Click Next to move forward.
Step 3: Leave Everything Default
-
On the next page, there’s nothing you need to change — leaving everything as default is fine.
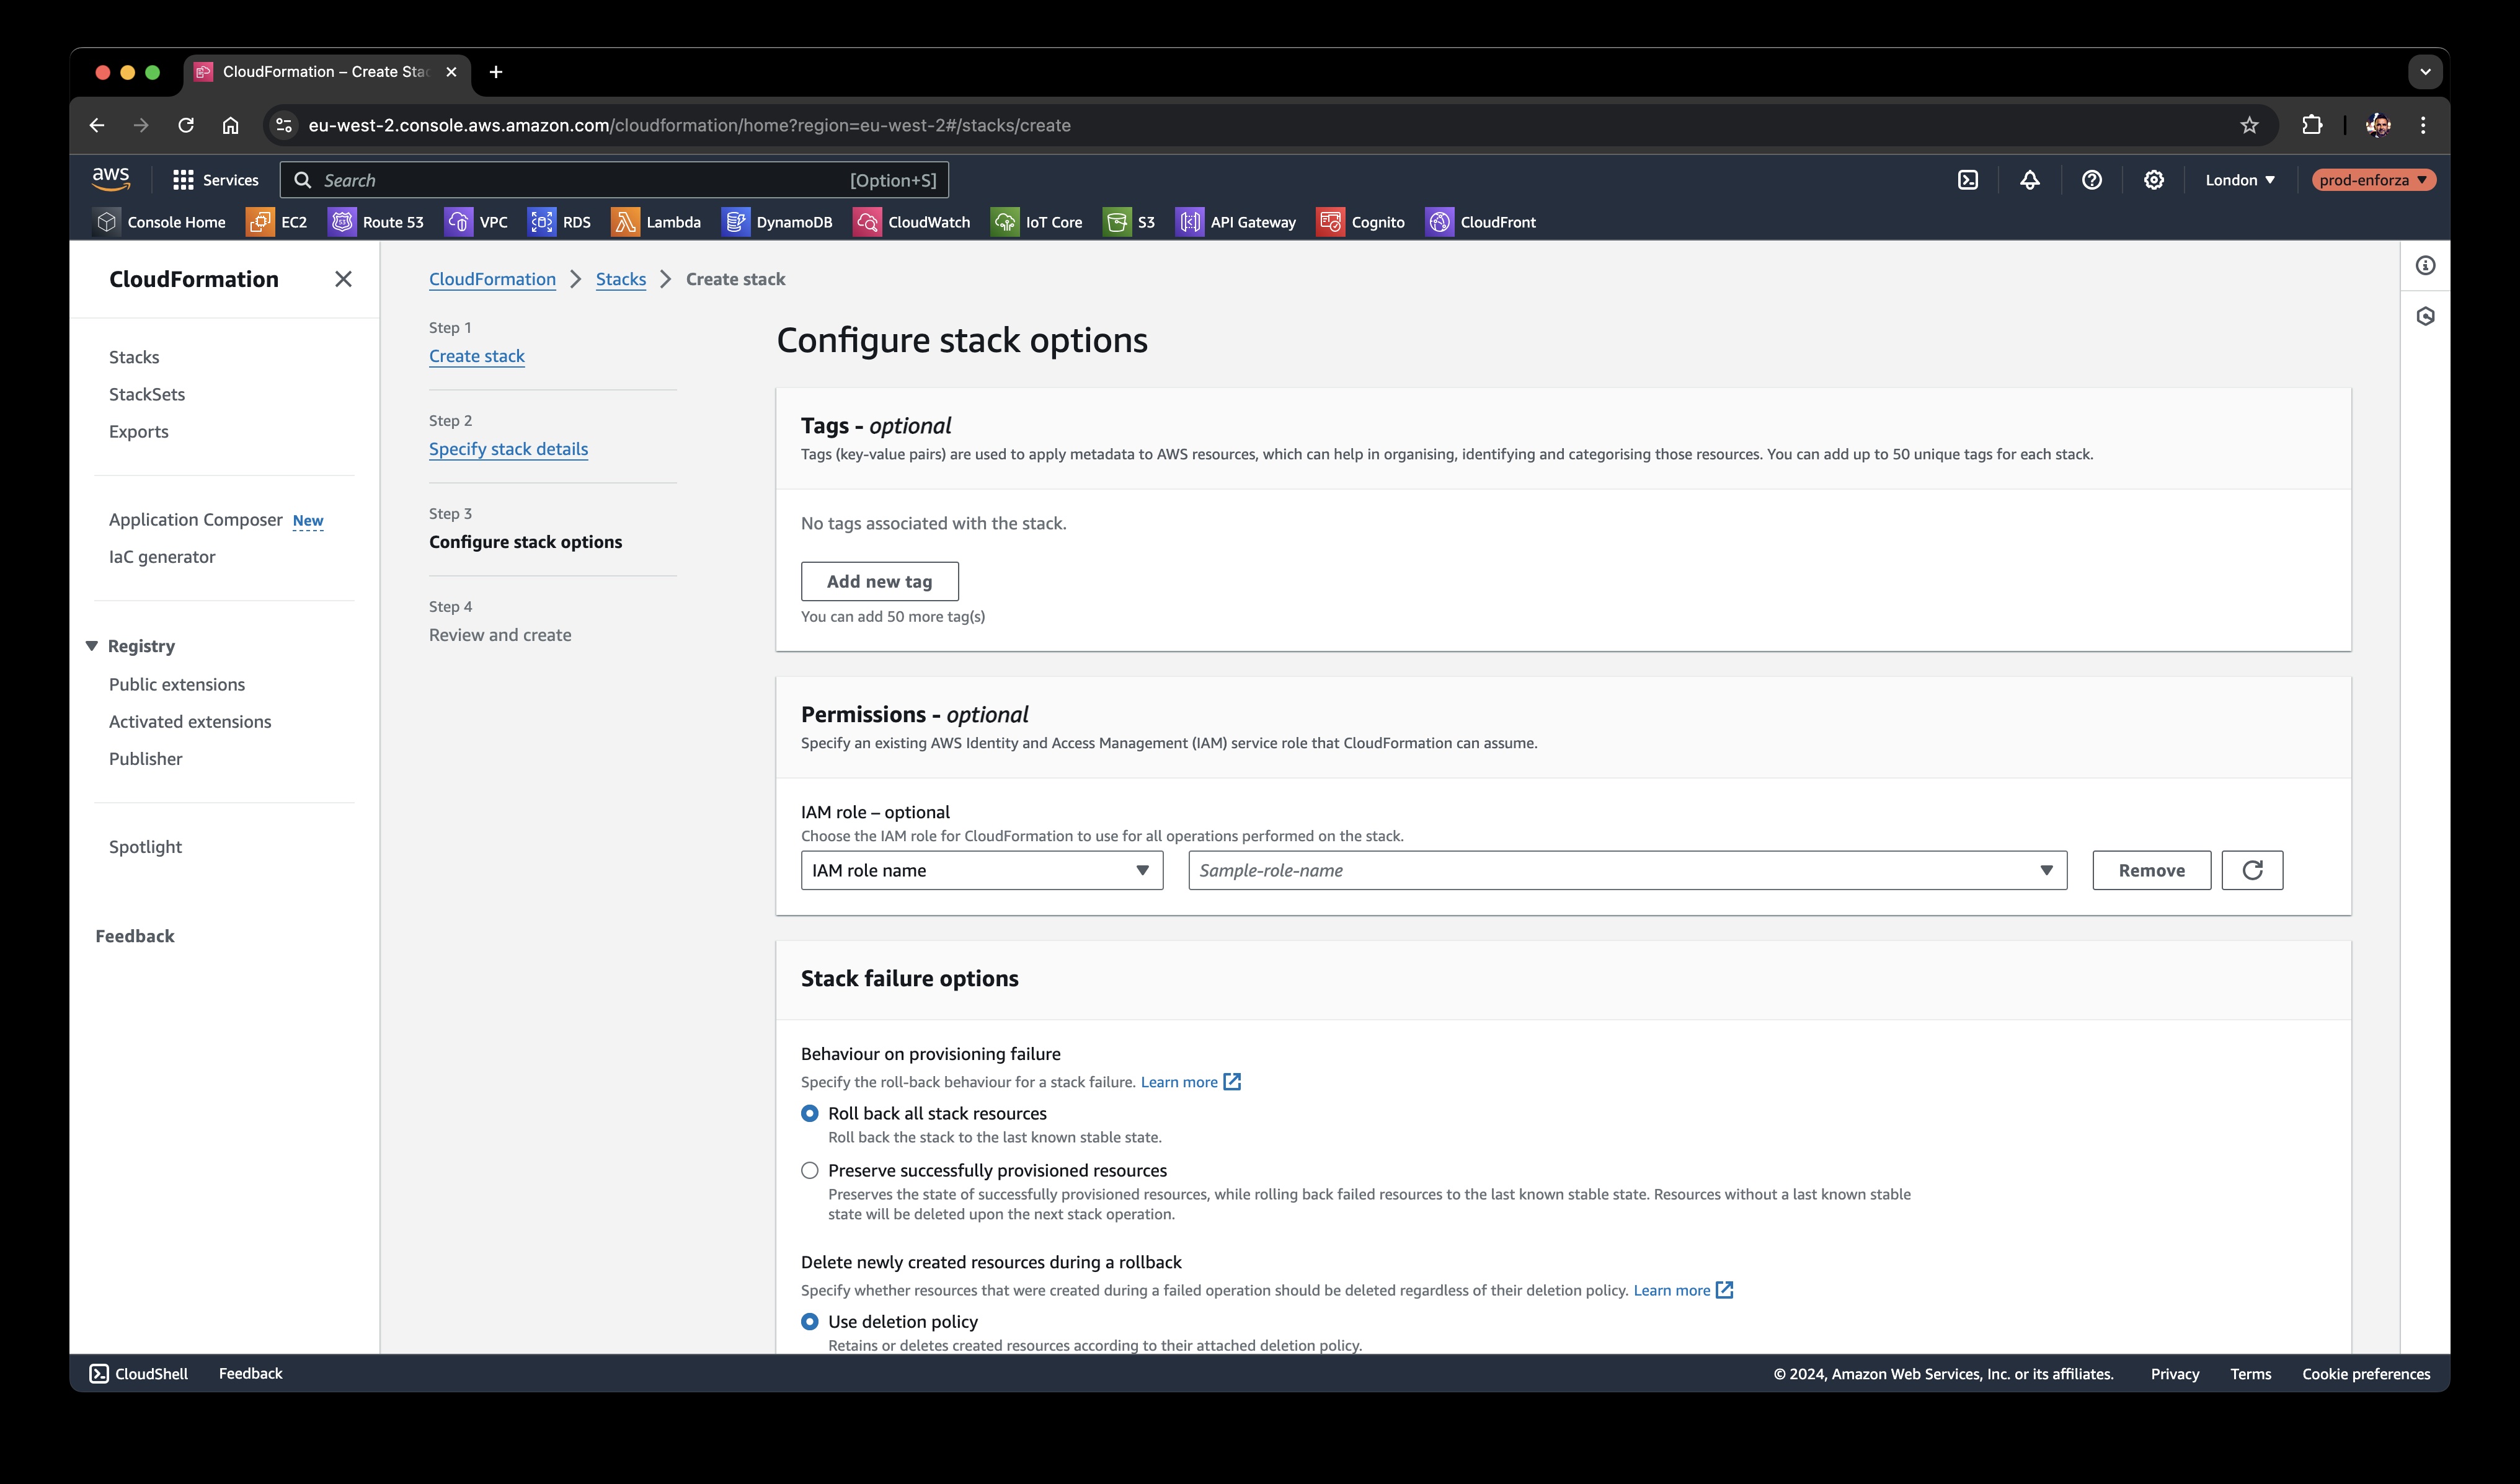
-
Click Next again.
Step 4: IAM Permissions
-
On the final page before deployment, check the box to accept that the stack will create IAM permissions.
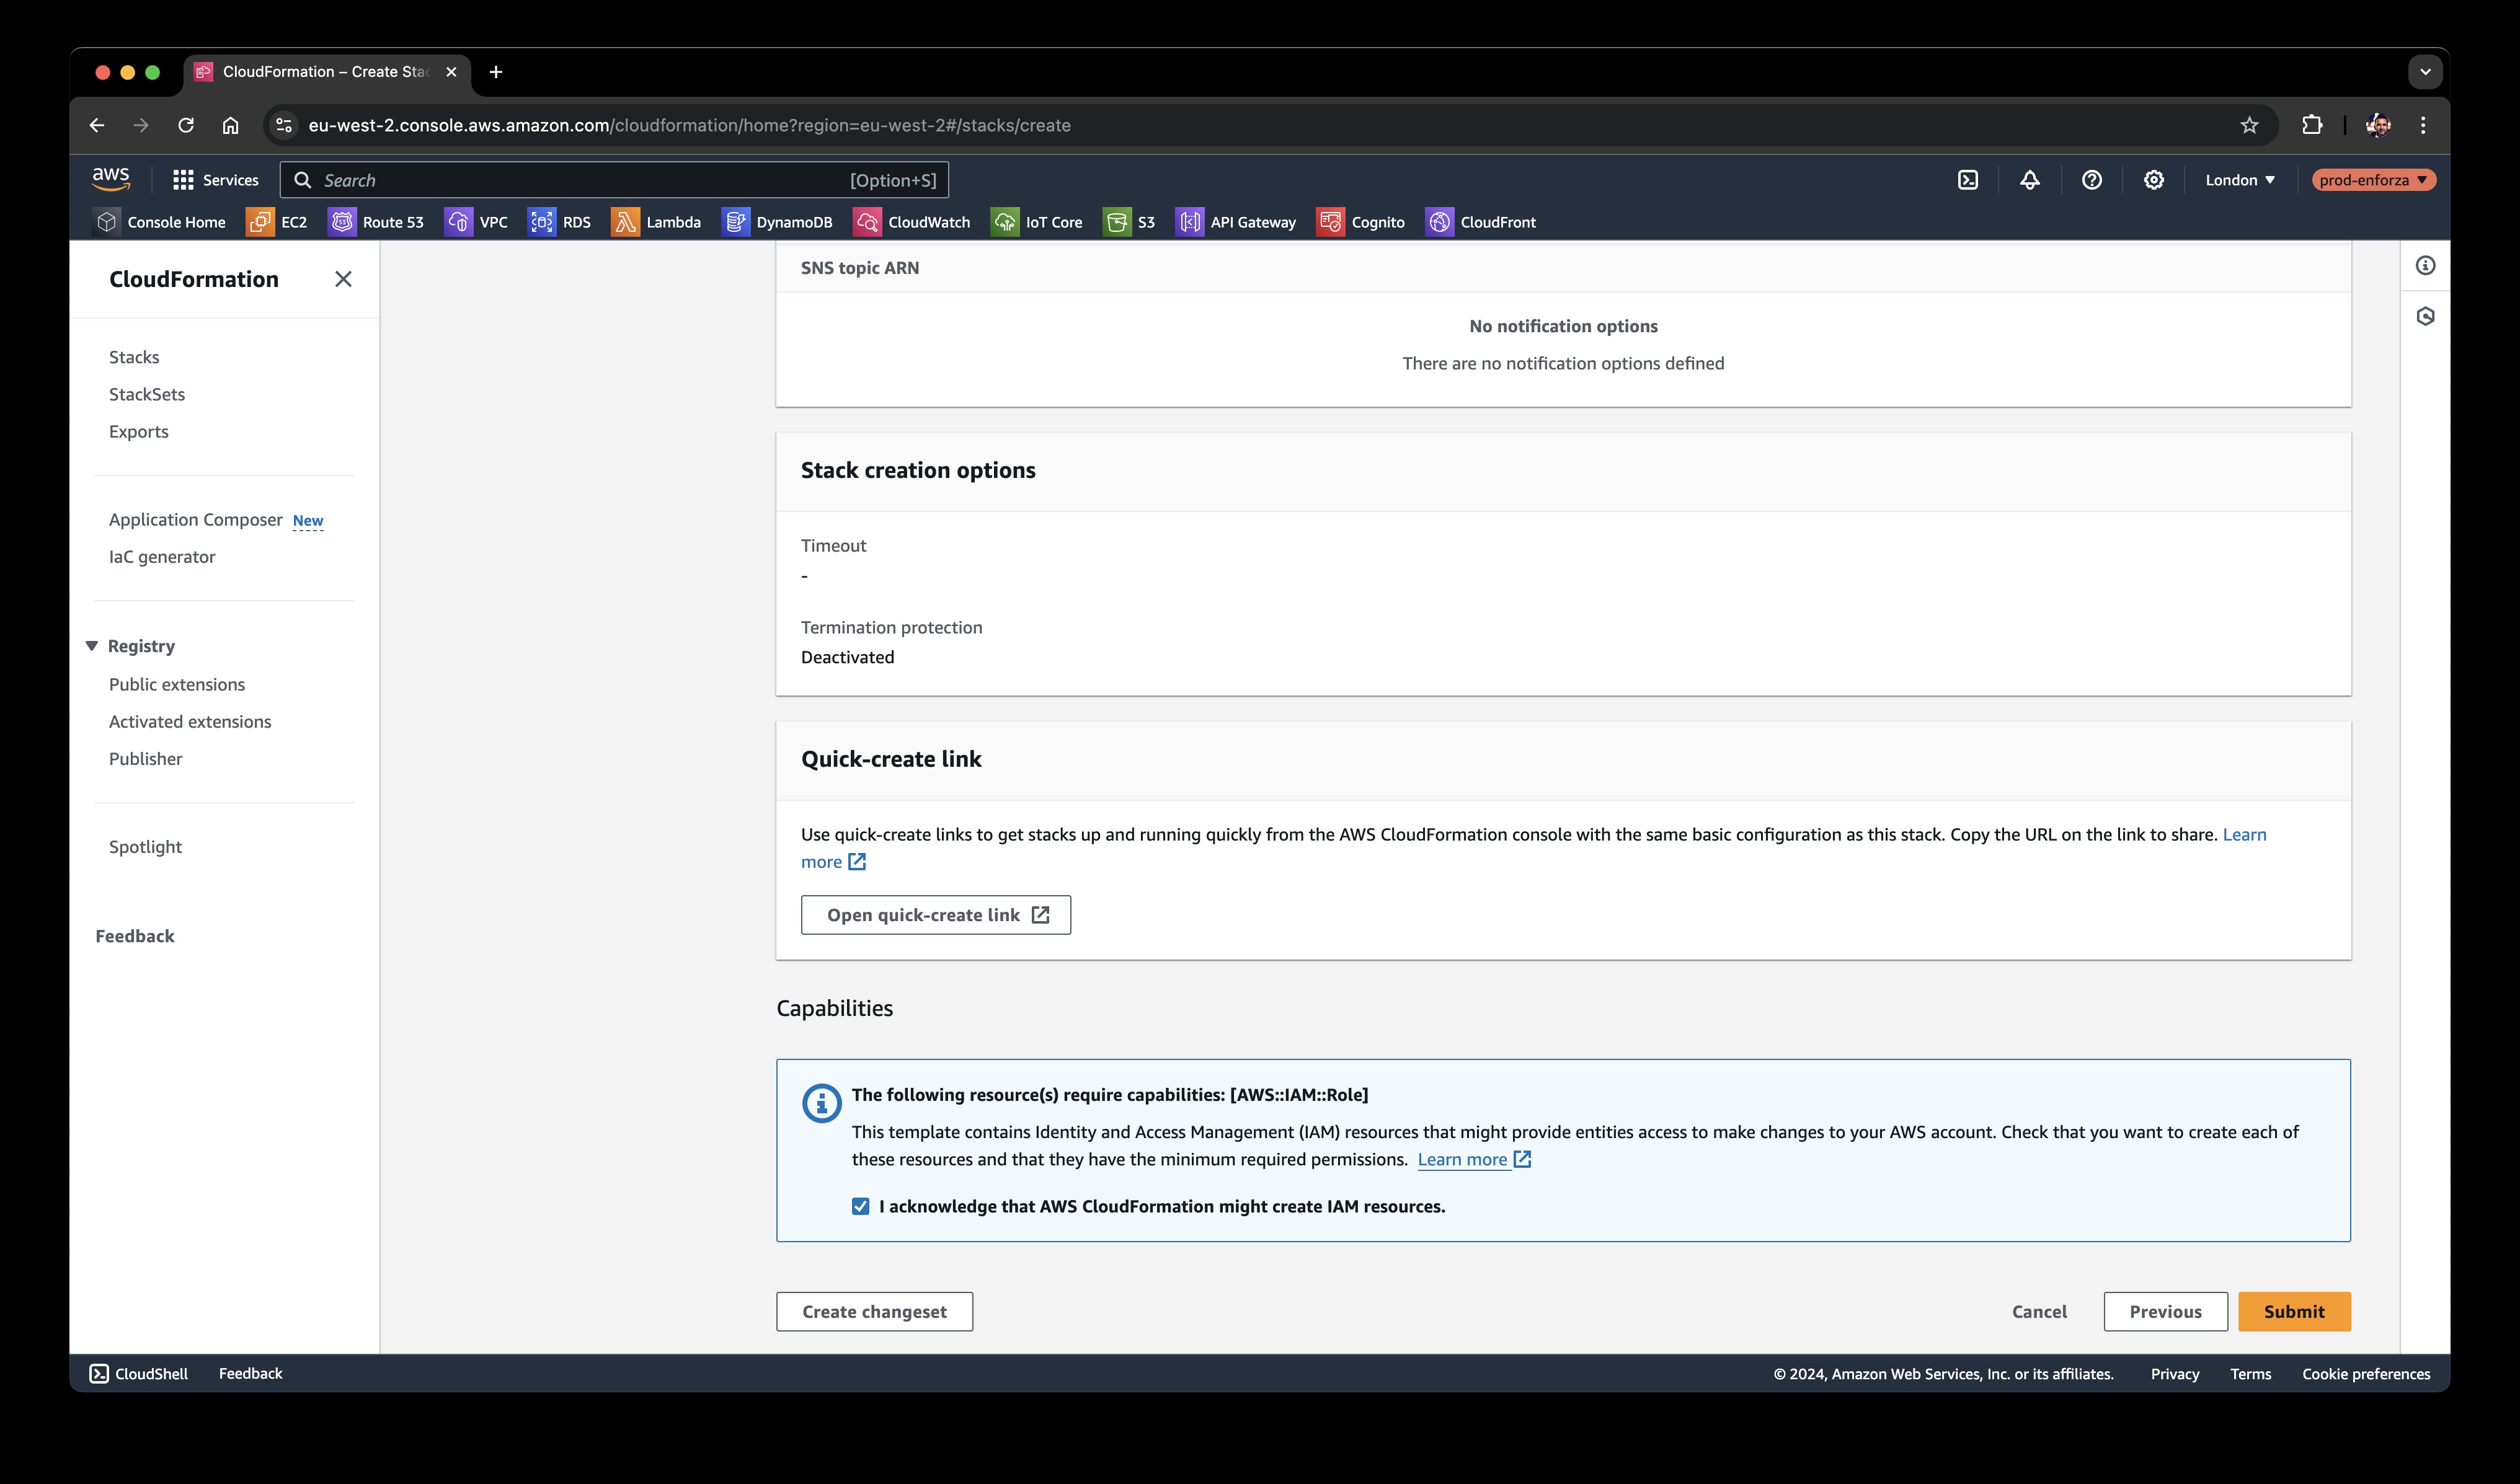
-
Click Next.
Now sit back and relax for 3-5 minutes while your stack is being deployed. Grab a coffee!
Step 5: Check Your EC2 Instance
-
Head over to the EC2 section in AWS.
-
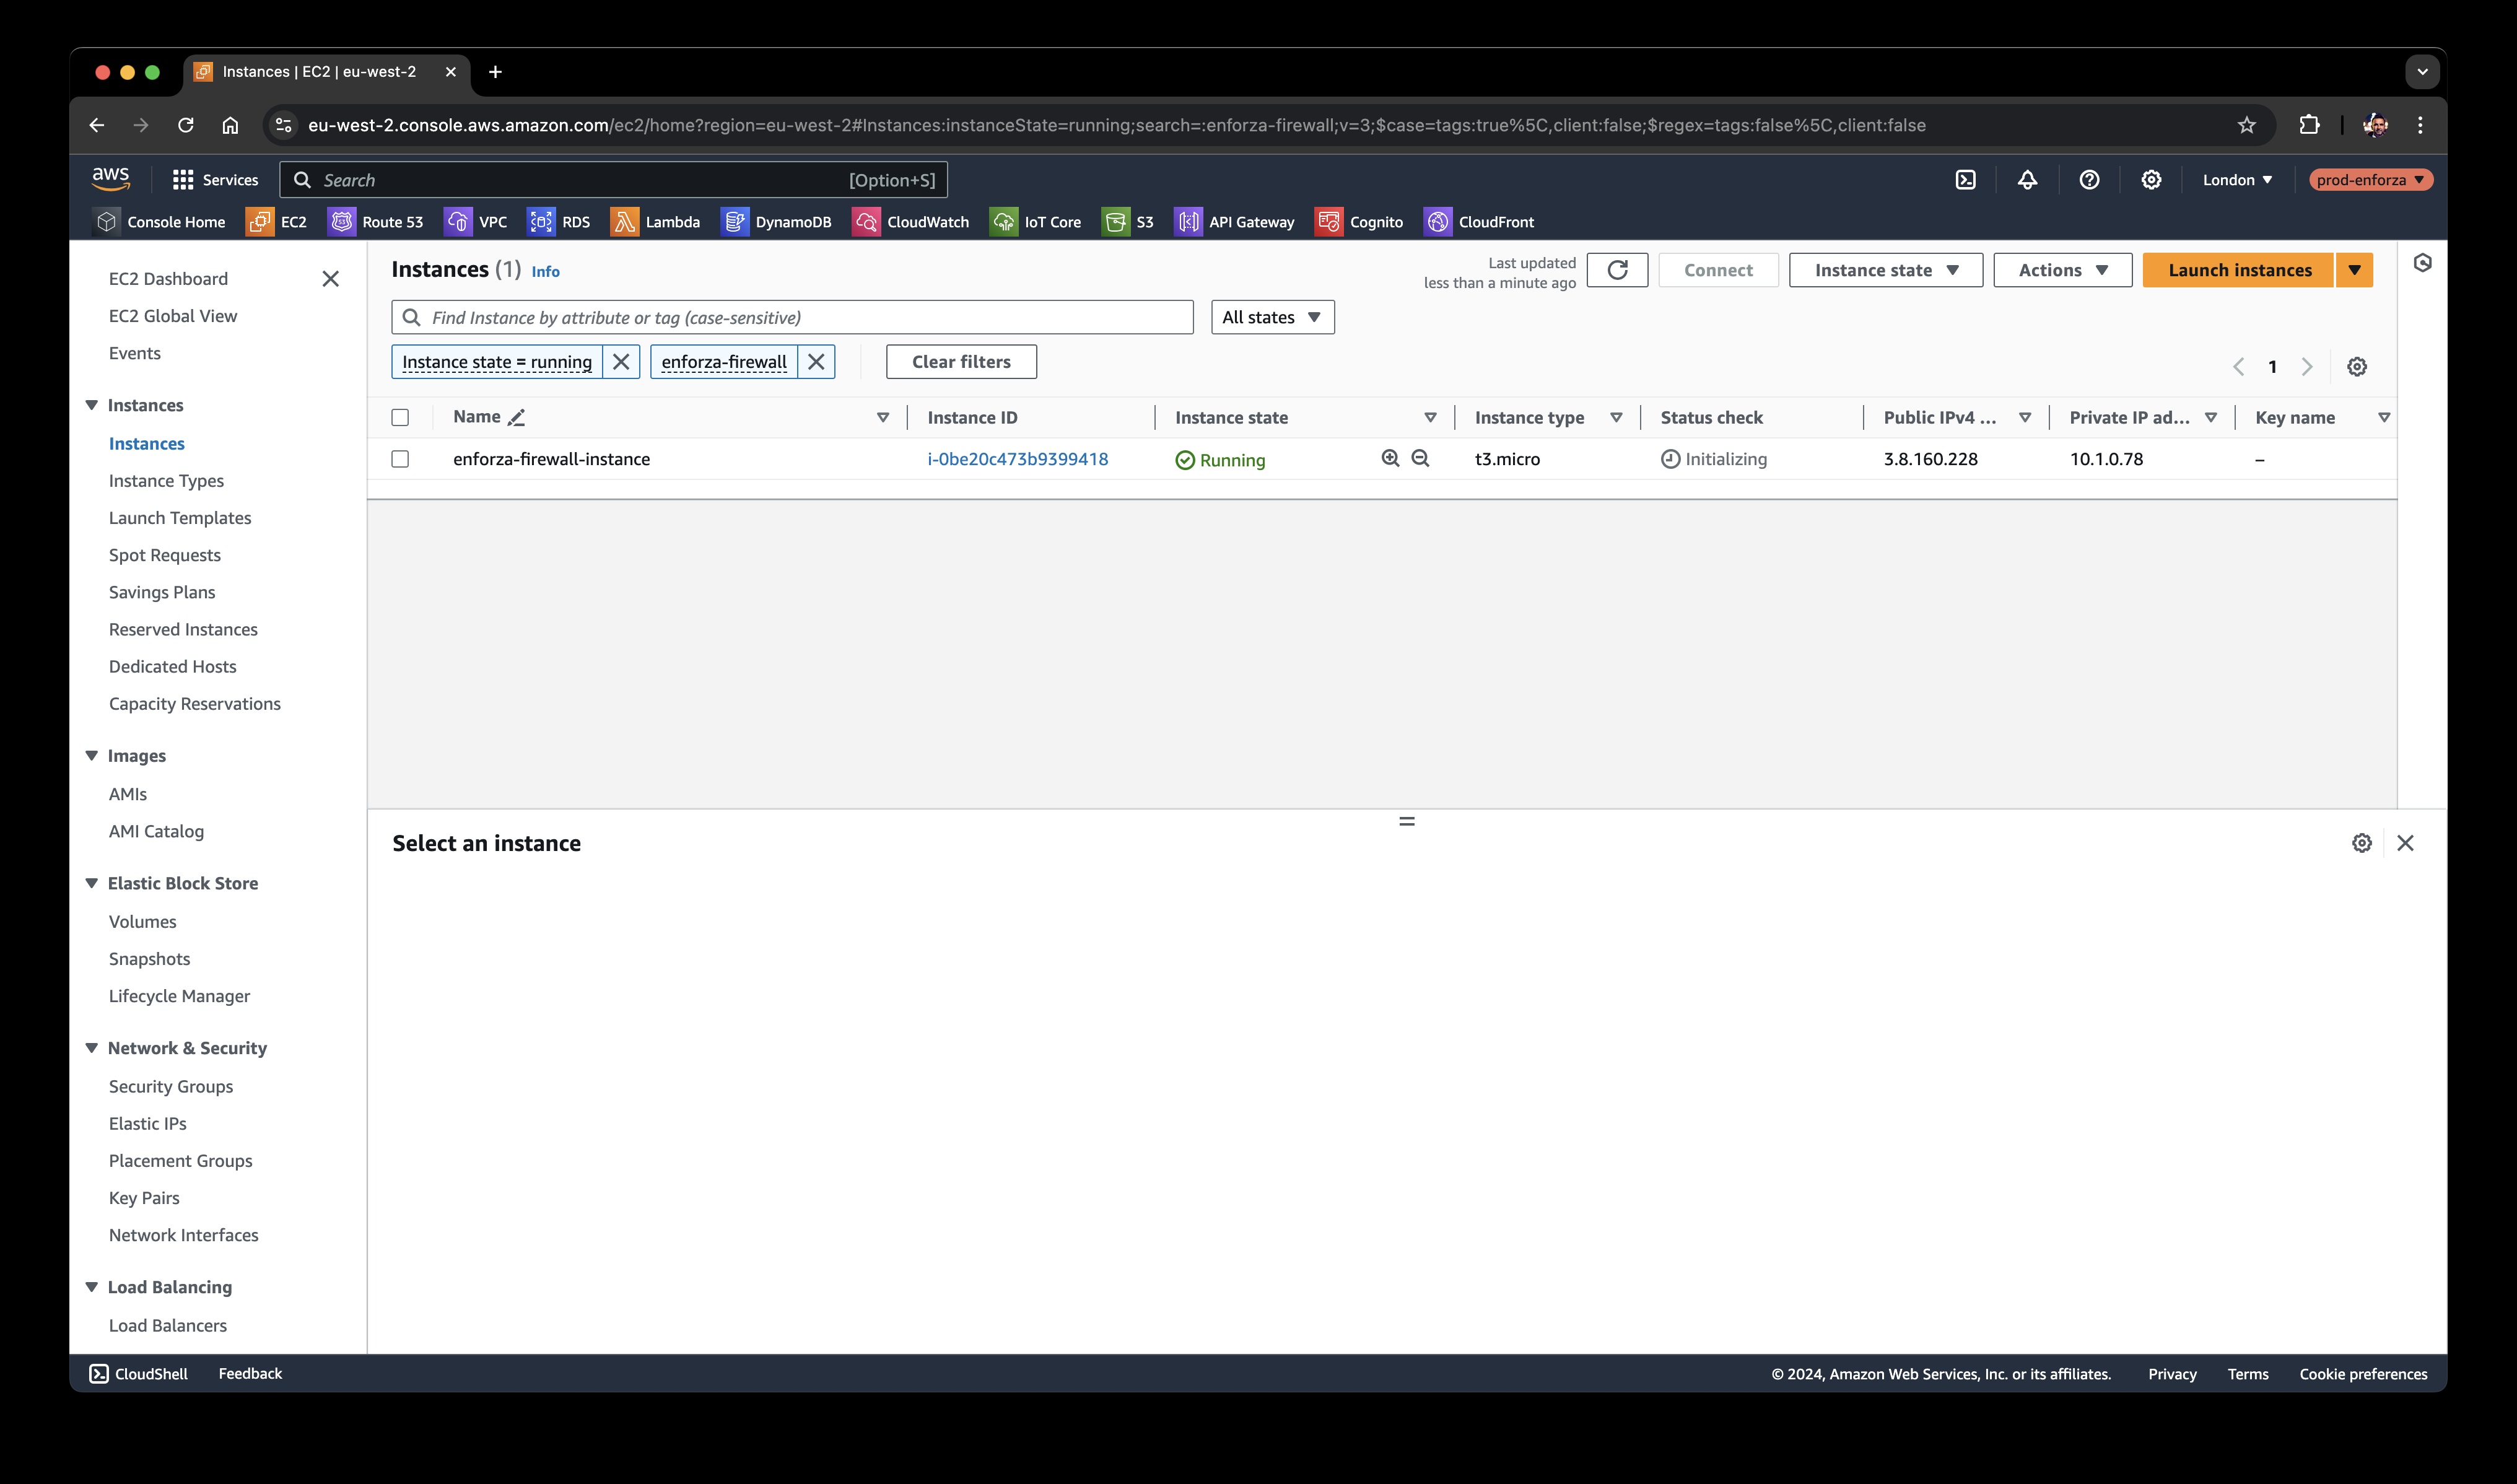
You’ll see new EC2 instance(s) — this is your enforza firewall, or 2 if you deployed the Multi-AZ version.
-
Select the EC2 instance by clicking the checkbox next to its name.
Step 6: Get Your enforza Claim Key
-
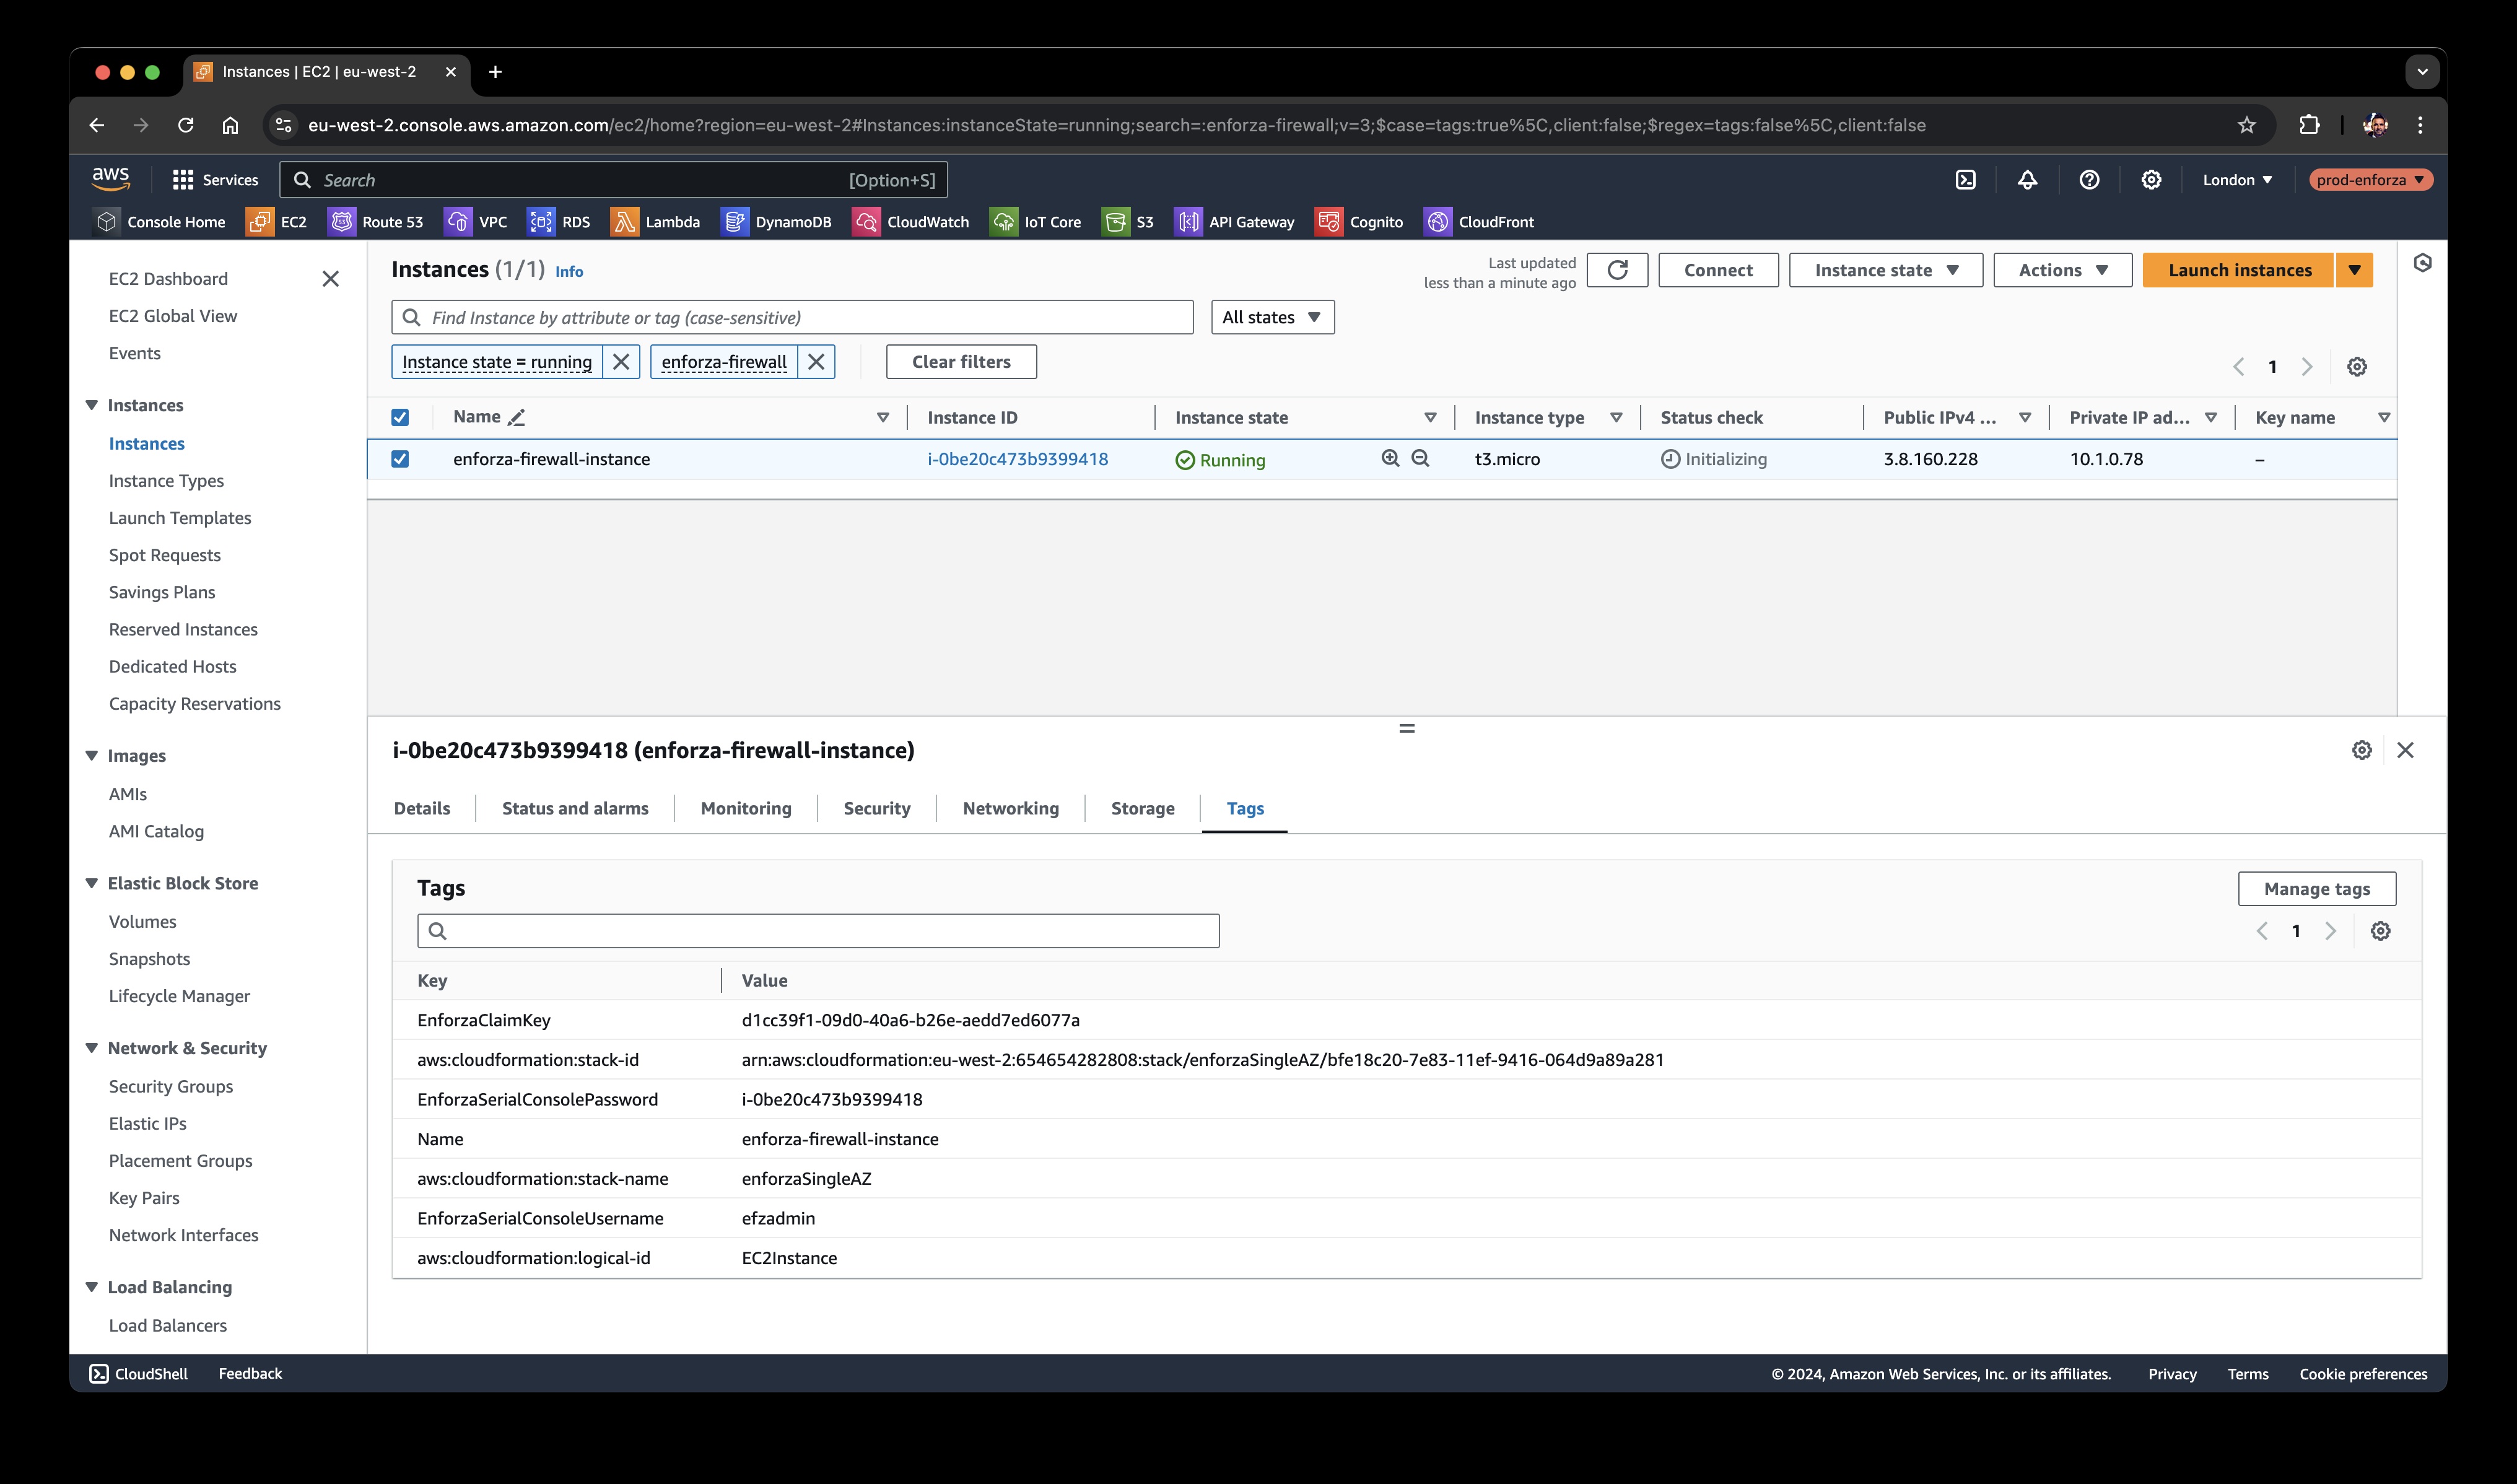
Click on the Tags tab for your EC2 instance.
-
Look for the EnforzaClaimKey — you’ll need this key to claim your device in the enforza portal.
Step 7: Success! 🎉
You’ve successfully deployed your AWS environment with an enforza Firewall/NAT Gateway securing it.
Take a look in VPC and you’ll see the subnets that have been created. You can start placing your resources in the private subnets. All traffic between them (east/west traffic) will be routed through the firewall, as well as traffic headed to the internet.
In the Multi-AZ deployment, traffic is forwarded through the gateway in AZ01, if that fails (more specifically, if the private subnets lose access to the internet), traffic is automatically forwarded via the gateway in AZ02.
That’s it! You’re all set - next step is to claim the gateway(s) in your account.