Quickstart Guide
Follow these instructions to manually install the enforza Agent on an existing or new linux instance in your environment. This will install all of the pre-requesites and dependencies, then register the gateway with the enforza Controller and turn the linux instance into a firewall/gateway.
This method is for users that have SSH access to their linux instance and may have services already running on it, or want more control about timing and level of automation of deploying the enforza Gateways.
Currently (Q4/2025), supported linux distributions are:
- Ubuntu Server 22.04LTS and above
- Debian 11 and above
This quickstart guide assumes that you:
- have your VPC/VNET, subnets and route-tables in place
- want to deploy an enforza Gateway in your public subnet
- are comfortable with configuring your route-tables in order to forward traffic to the enforza gateway
- know what you are doing
Before you start - here are some gotcha's to avoid
- Your VM/EC2 has "Source/Destination Check" (AWS) or "Enable Forwarding" (Azure) is DISABLED on the ENI/vNIC
- The Security Group/NSG that is attached to the vNIC/ENI of the enforza Gateway is set to PERMIT ANY ANY and allow the firewall to do it's job
- You have the default route set in the route-table/UDR to the enforza Gateway IP address (Azure) or ENI (AWS) in your private/protected subnets
- You only need ONE network interface on your VM/EC2, and that it resides in the public subnet that has access to the internet.
- Ensure your ENI/vNIC of the enforza Gateway has a public IP (your protected VMs/EC2s in the private do not need a public IP)
Step 1: Login to your instance
Login to your Linux instance via SSH.
- Using SSH certificate (AWS default)
ssh -i ./my-key.pem ubuntu@myserver.example.com
- Using SSH username & password (Azure)
ssh ubuntu@myserver.example.com
Step 2: Run the bootstrap script
Log in to the enforza Cloud Controller portal, click on Provision New Device, and copy your unique installer code (example):
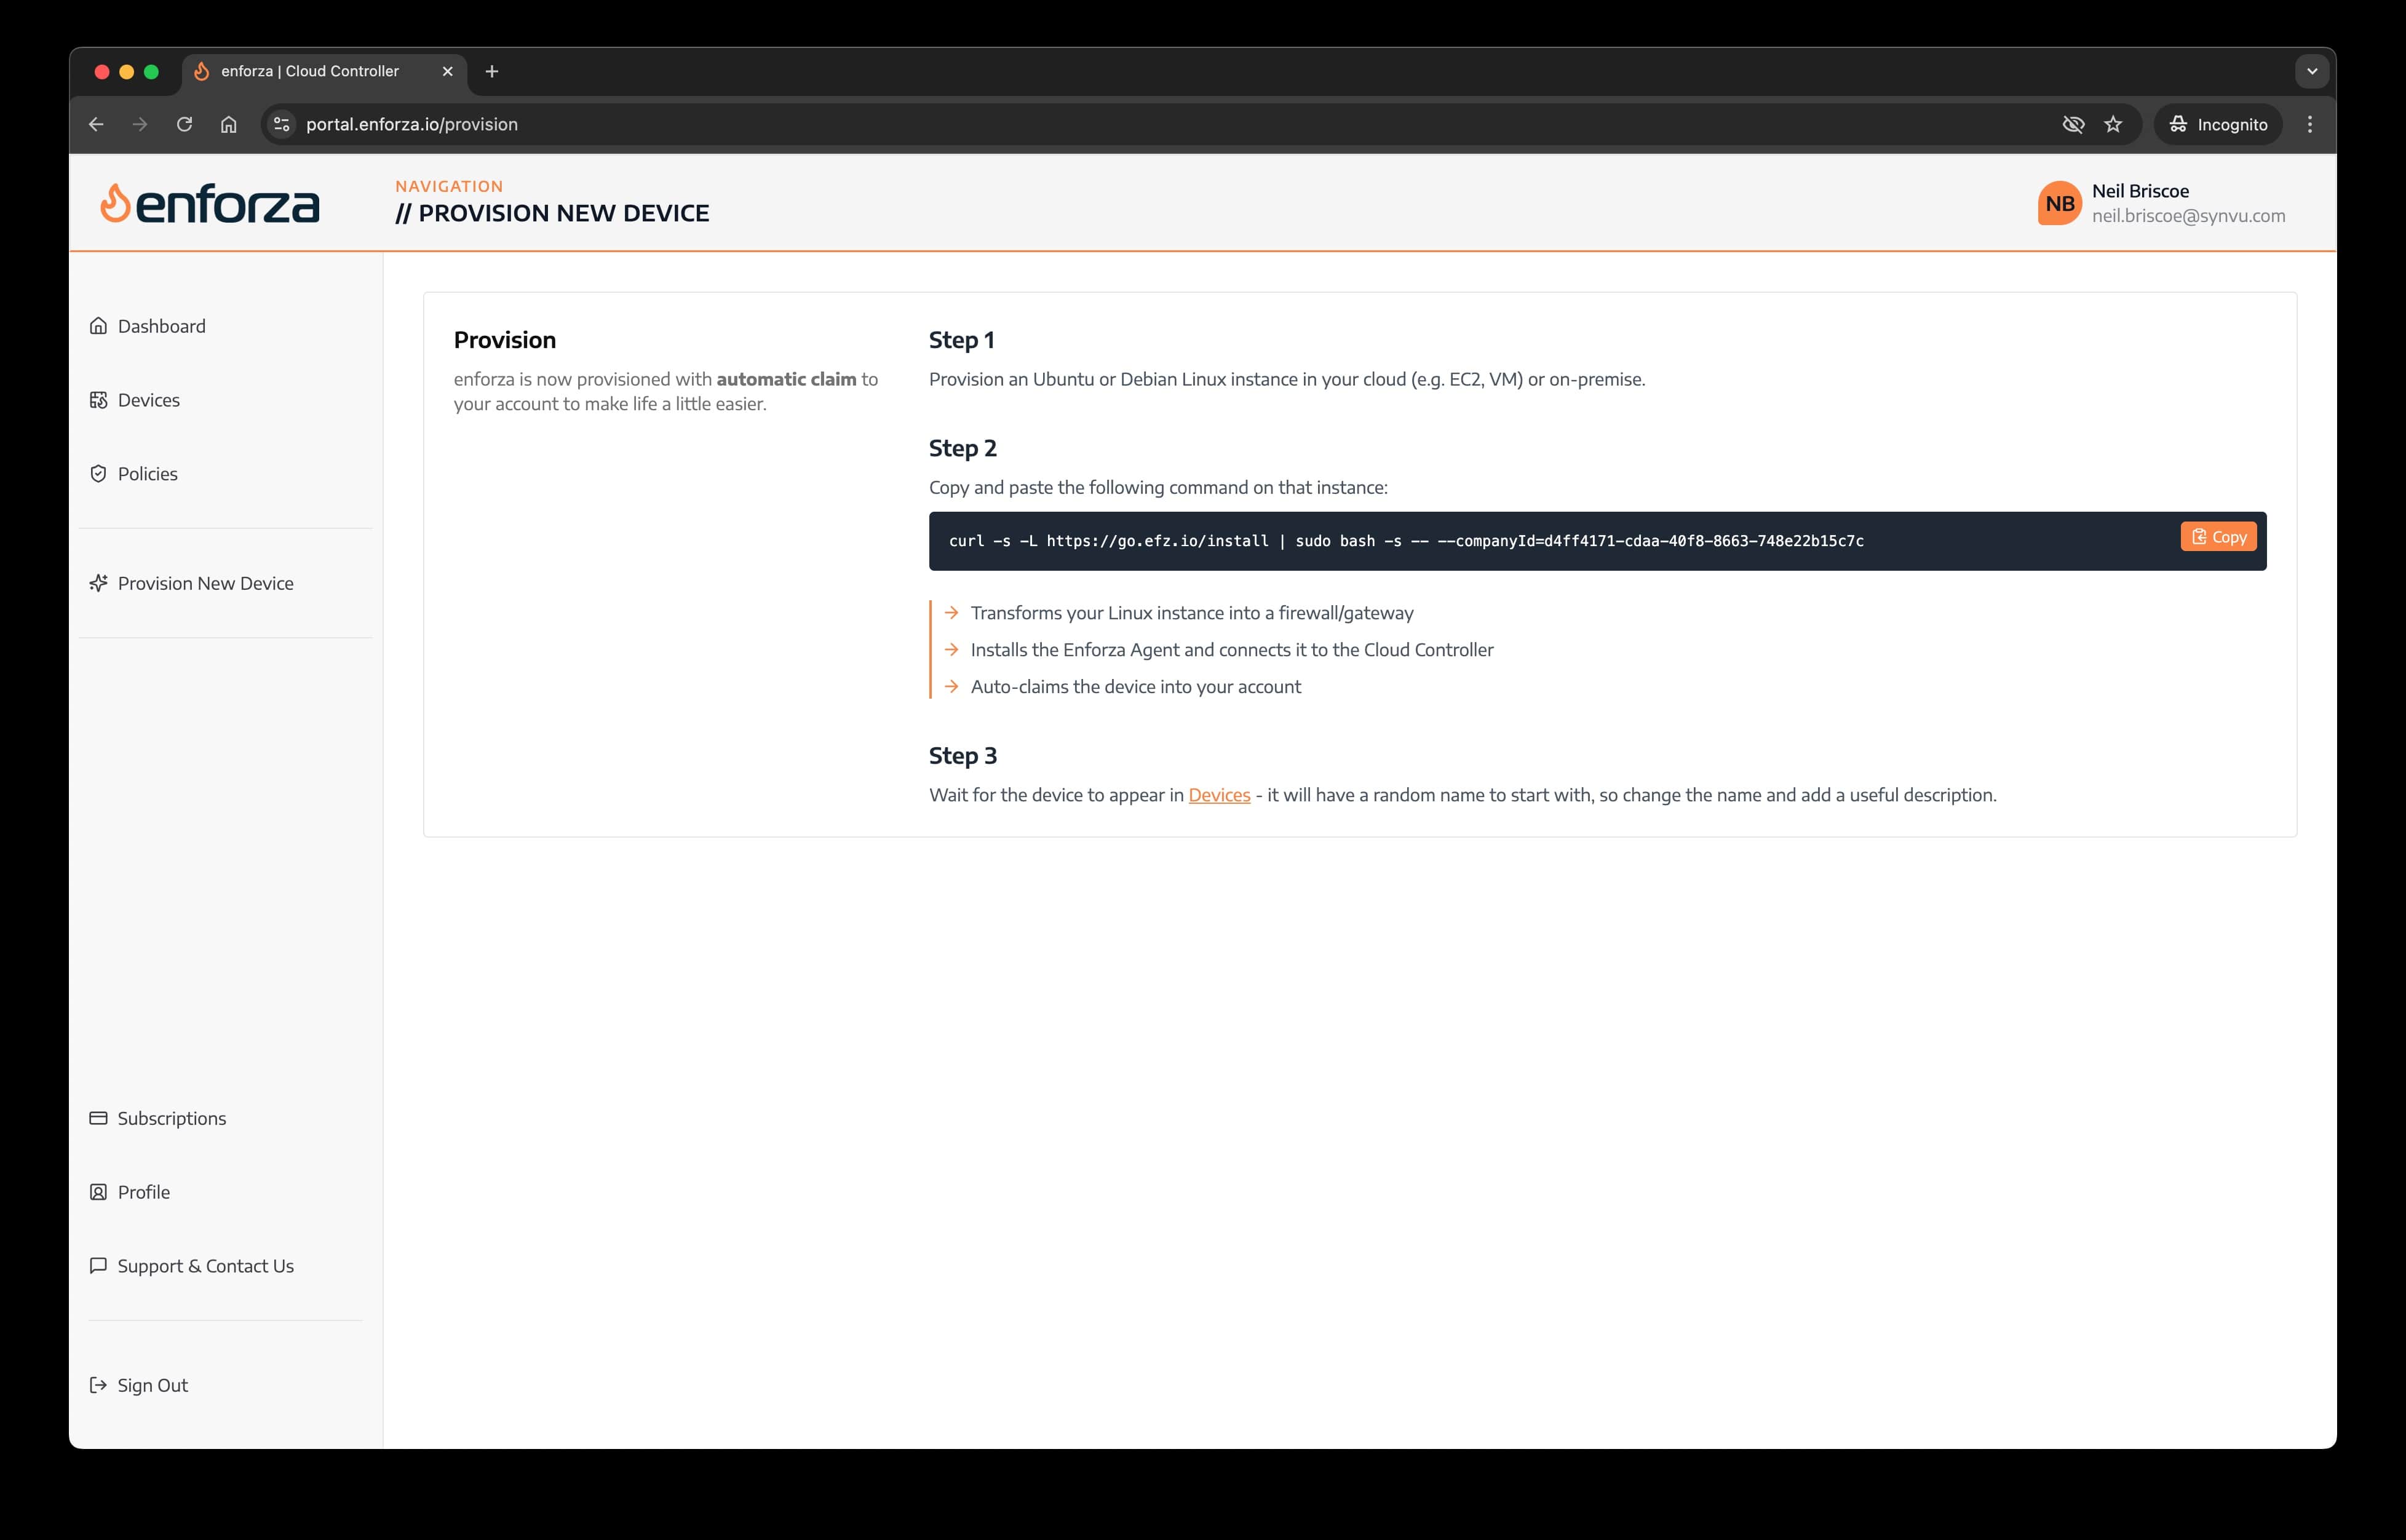
curl -s -L https://go.efz.io/install | sudo bash -s -- --companyId=d4ff4171-xxxx-xxxx-xxxx-748e22b15c7c
The output should be (something) like this:
curl -s -L https://go.efz.io/install | sudo bash -s -- --companyId=d4ff4171-xxxx-xxxx-xxxx-748e22b15c7c

Detected architecture: amd64

Downloading enforza-installer_amd64 from https://dev-efz-public.s3.eu-west-2.amazonaws.com/amd64/enforza-installer_amd64...

Executing ./enforza-installer_amd64...

2025/06/16 11:36:18 Starting enforza installation...

2025/06/16 11:36:18 Bootstrap Version: 2.0, Date: 2025.06.13/1

2025/06/16 11:36:18 Running as root user.

2025/06/16 11:36:18 Detected OS: ubuntu, Version: 24.04

2025/06/16 11:36:18 Detected 2 vCPUs.

2025/06/16 11:36:18 Stopping daemon: enforza-core

//

2025/06/16 11:37:30 Registering device on the platform...

2025/06/16 11:37:32 ✅ Device registered successfully:

2025/06/16 11:37:32 [enforza-device] Claim key: W03-0ALV3

2025/06/16 11:37:32 [enforza-device] Claim this device at: https://portal.enforza.io

//

2025/06/16 11:37:36 Setting ownership of /opt/enforza to efzadmin:efzadmin...

2025/06/16 11:37:36 Ownership of /opt/enforza set to efzadmin:efzadmin.

2025/06/16 11:37:36 Enforza installation completed successfully.

Enforza installation completed successfully.
Step 4: All done.
The device will now be registered to your account. Refresh the Dashboard or Devices to show the new device - initially it will be called a random name, so next, we need to change the name and description to something more useful to you.
Next Steps
- Give your gateway a meaningful name - click here
- Create & push your first policy - click here